How to draw furniture with a pencil step by step?
I suggest learning how to draw furniture using the example of a room furnished with furniture. Let's take this drawing as a basis, for example.
You can learn to draw windows, there is a wardrobe in the corner, sofas from different angles, a table, a pouf, an armchair on the side. Carpet.
This drawing is quite simple. Look at the basis there are simple lines. You can arm yourself with a ruler. But it is better to make sketches with a light movement of the hand without pressing on the pencil.
First of all, you need to draw the horizon and auxiliary lines.
Actually, now we are arranging the furniture around the room.
As you can see, furniture is not at all difficult to draw. The main thing was that there was a pencil, a piece of paper and the desire to do something with your own hands. Good luck!
In order to draw furniture, you need to decide on a general style, otherwise the drawing will look ridiculous, where the chair is completely different from the table, etc. although it may be creative, who knows, it all depends on the artist himself and his tastes.
Article on the topic: How much does a furniture designer earn?
And so, to draw furniture , you can (and should) use drawing diagrams, in which everything is shown step by step:
- draw a bed:
- draw a table:
- draw a chair:
- draw a sofa:
- draw a kitchen stove:
- draw a table lamp:
I think that there is no point in explaining each stage of drawing when everything is clearly shown, the main thing is that you can combine it all together, as well as choose a color for painting completely to your taste.
Initially, draw a rectangle and divide it into three parts. The first line divides the figure into two halves and will separate the back of the sofa, and the second - the boundaries of the pillows.
Already on the very back of the sofa we draw a sketch of the pillows and draw several segments that will become the armrests. In the middle of the sketch we draw lines that will become pillows (those on which they sit). We draw three lines from below: a long horizontal one and two small vertical ones.
Now it’s the turn of the pillows - we draw them along the edges of the sofa. We draw a line for the seat on the pillows, complete the pillows, and add legs to the furniture.
Draw a wavy line on the seat cushions.
Now we just erase the auxiliary lines and the drawing is almost ready.
Coloring the drawing is not difficult.
You can draw furniture three-dimensionally, taking into account the laws of perspective.
If the object is located directly in front of you, then we will draw a perspective with one vanishing point.
Let's try to create a voluminous sofa together.
Start your drawing by drawing a horizontal rectangle.
This will be the back of the sofa.
At the bottom we will draw a rectangle of smaller volume - this will be the seat.
Divide both rectangles with a vertical line in the middle - this will be the division of the sofa cushions.
On the lower rectangle we indicate the thickness of the pillows with a horizontal line.
Next, draw the body of the sofa and its depth.
We will also draw thickness on top of the pillows. Let's round the corners of all the pillows and the body of the sofa and draw decorative pillows.
Article on the topic: Where to buy office furniture and home money?
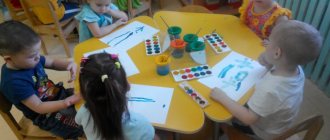
Summary of GCD for drawing in the senior group of preschool educational institutions
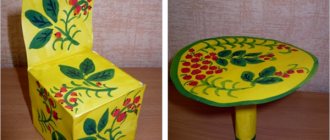
Abstract of the GCD in the senior group on the topic “Decorating furniture for dolls.”
Goal : To introduce children to a new element of Fedoseev painting - velor. Objectives: 1. Continue to acquaint children with the nature of Fedoseevskaya painting - its color, its constituent elements. 2. Teach children to draw a new element - velor. 3. Strengthen the ability to work with a brush and felt-tip pen. 4. Develop aesthetic perception, a sense of beauty. Tools: Parcel Doll Furniture templates Gouache paints Brushes Felt pens Simple pencils Sippy cups Methods: Game situation - the arrival of the postman Guessing riddles Artistic word Questions Demonstration of drawing velours Examination of samples Physical education Finger gymnastics Reflection Progress of
GCD
There is a knock on the door.
The postman enters. P. - Hello guys. It was me, postman Pechkin, who brought you a parcel (leaves). V. - Guys, on the parcel it is written: “You can open the parcel if you guess the riddles.” The first riddle: “She wears a dress and a bow, She doesn’t ask for food at all, If you put her to bed, she will sleep, For a day or two, and even five.” D. - This is a doll. (the teacher takes a doll out of the box) V. - Oh, what a beauty the doll is! Do you guys like it? What do we call the doll? Think, guys. Dasha, Masha, Katya, Ira, and maybe Nata? D. - Masha. Q.- Our doll has a name, But there’s nowhere for it to sit! She needs to make a chair, a sofa, a table so that she has somewhere to eat. - But first, guess one more riddle. Second riddle: “Under the roof there are four legs, And on the roof there is soup and spoons.” D. - This is a table. (the teacher opens the second box and takes out stencils of a bed, chair, sofa, table) V. - And here is the furniture, only it is white, ugly, I’m afraid that the doll Masha and her friends will not like it. What should we do, guys? D. - Furniture for dolls should be decorated with a pattern. Q.- What pattern will we decorate the furniture with? D. - We will decorate the furniture with the Fedoseevsky pattern. Q.- What elements does the Fedoseev painting consist of? D. - Fedoseevskaya painting consists of flowers, buds and leaves. V. — What colors do Fedoseev’s artists use in their painting? D. - Artists use yellow, red and green colors. V. - Guys, today I will introduce you to one more element - velor. The velor or curl is drawn in black, with wavy movements like this (demonstration). — Try to draw velor on leaves. (children try to draw velor) V. - To make the pattern look more expressive, the artists supplemented it with velor. (showing and examining samples) V. - Now it’s time for us to rest. I suggest you dance with the doll Masha and her friends. Physical school “Wider the circle, wider the circle - clap in front of you
Music calls All friends, all girlfriends -
turn to the right, right hand
In a friendly round dance.
to the right, also to the left side
Hands on the belt
hands on the belt
Let's put them first, Left and right
tilts to the left - to the right
We'll swing our shoulders Foot to heel
in turn right and left feet Let's put
forward,
heel forward
Let's turn together
around ourselves
We'll turn.
Well, now it's deep. deep breath
Let's all take a breath, Let's sit down together and
exhale
And sing a song.
Wider the circle, wider the circle, clap in front of you
Music calls All friends, all girlfriends -
turn to the right, right hand in
a friendly round dance.
to the side, also to the left. Practical work V. - We’ve had a rest, now we can work. Go to the table and choose the furniture that you will paint. (children come to the table and take the pieces of furniture they like) V.- Before we start working, I suggest warming up our palms and fingers. Finger gymnastics “One, two, three, four, five The fingers went out for a walk. One two three four five. They hid in the house again.” V. - Tanya, how will you decorate your table? Ilya, where will you draw a flower? Nikita, what element will you add to your pattern? What will you use to paint the velor? Vika, do you like the table that you decorated with Fedoseev’s paintings? Reflection V. - What beautiful furniture. I think the dolls will like it. -Artyom, what did you do especially well today? -Nastya, what didn’t work out for you today? -Vika, do you think your velours turned out well? -Gera, would you have gotten such an expressive pattern without the velor? V. — Guys, you are real masters. The dolls are very happy, because now they have very beautiful furniture that you decorated with love.
We recommend watching:
Summary of educational activities in the senior group “Journey to a Fairy Tale” Summary of a mathematics lesson for children of the senior orthopedic group Summary of educational and gaming activities in the senior group in the section of the “Childhood” program Synopsis of educational activities for the perception of music in the senior group of kindergarten
Similar articles:
Lesson in the senior group of kindergarten on the topic of February 23
Lesson notes for children of senior preschool age. Topic: Invisible air
Summary of organized educational activities for children of the senior group
Notes for mathematics classes in the senior group
Lesson summary on the topic “Reserve” in the senior group
Terms you need to know
There are three components of perspective that every aspiring artist or architect should know about in order to understand how to draw a room easily and without unnecessary edits.
Let's look at them in detail:
- The horizon (more precisely, a perpendicular line) is marked with a thin strip at the eye level of the viewer or artist. You can place it anywhere on a canvas or regular sheet of paper.
- The vanishing point is the beginning on the horizon line where all parallels meet.
- Orthogonal lines are diagonals that artists took from geometry. In fact, they are often imaginary; in rare cases, they are transferred with a thin pencil so that they are almost invisible. They help achieve aesthetics in a bitmap.
Even if these components seem unimportant now, they will play a major role in the drawing process.
How to draw your room
Before work, be sure to look around, find out what shape the room has.
Next, you can start drawing the space step by step with a pencil:
- First, draw the horizon line - it is better to do this closer to the middle of the page.
- Then you need to draw the back wall of the room using only the same lines.
- What exactly it will be (square, triangular or rectangular), the artist decides for himself.
- The main thing is not to make the figures too large, as you need to leave room for additional furniture and objects.
- You also need to remember about the distance for the ceiling and floor.
- Next, you need to determine the vanishing point - you need to add a vanishing point anywhere in the room along the horizon line.
- Be sure to look at the drawing from the viewer's side.
- After this, you can proceed to the walls - a new rectangle is drawn at any point of one of the orthogonals.
- In this case, the artist uses verticals and horizontals that will intersect at one point.
Article on the topic: How to file a claim for defective furniture goods
The draft of the room is ready, then the space is “furnished” with furniture and other details, following the rules of perspective. This step-by-step instruction for children will help them quickly master the skill of perspective.
"Furniture" GCD in the second junior group
Performed:
Ivanova Elena Yurievna,
teacher
MADOOU Borovsky kindergarten "Zhuravushka"
GCD summary: “Development of mathematical abilities by means of non-traditional drawing in the second junior group on the topic “Furniture”
Goal: To develop children's powers of observation, elementary mathematical concepts, and holistic visual perception of the world around them.
Tasks:
1. Develop the ability to navigate in spatial directions (draw lines from top to bottom, left to right, use the words “on”, “in”, “behind”);
2. Develop the ability to see the general characteristics of objects (shape, color, size, material of manufacture), use the general concept of “furniture”;
3. Continue learning to draw straight lines.
GCD move:
During free play activities, children find a broken doll chair and table.
Children: - Elena Yuryevna!
Educator: - What happened, guys?
Children: - The furniture for the dolls is broken!
Educator: - What a pity... But we can help the dolls! And I know how! Where do you think furniture is made?
— Children's answers (at the factory)
Educator: - Correct!
Educator: - Guys, let's help our toys. I propose to open a furniture factory here. Close your eyes, turn around yourself - one, two, three! We became carpenters!
What pieces of furniture do you know? (children's answers). Bed, chair, table, wardrobe.
What do they sleep on? (on the bed).
Where do clothes go? (into the cupboard).
What are they sitting on? (on the chair)
What do they have lunch for? (At the table)
What is furniture made of? (from boards).
On the table for each child are prepared sheets of dots, as well as gouache and cotton swabs.
In front of the children there is a children's table and chair
Educator: What is there at the table?
Children: Legs and table top. They show.
Educator: What does the chair have?
Children: Seat, back and legs?
Educator: What do a table and a chair have in common?
Children: There are 4 legs, the seat and table top are square, and the table and chair are made of wood.
Educator: To make furniture, you need special drawings, which are called “schemes”. Can you draw? (yes) Then let's try to draw diagrams of a table and a chair...
Before us lie really smooth boards and drawings - mysterious drawings.
Educator: If you look at them carefully, you will see what it looks like: a table or a chair. what should be done?
The dots will help you read the drawing, open the drawing. Try to connect these points with a line (I show you how to do this on the sheet). The guys begin to draw and connect the lines of their drawings.
At the end of the GCD we consider what tables and chairs we got.
Cheerful music plays, the teacher and the children conduct the dance game “We are sitting on chairs.”
Educator: - What wonderful masters you are! Now we can send these drawings of chairs and tables to a furniture factory. And they will make us new furniture for the dolls! And then they will deliver it for our dolls! (put the drawings in a large envelope to send them)
Used Books
- From birth to school. Basic educational program of preschool education / ed. NOT. Veraksy, T.S. Komarova, M.A. Vasilyeva. – 4th ed., revised. – M.: MOSAIKA-SYNTHESIS, 2021. – 352 p.;
- Approximate comprehensive thematic planning for the program “From birth to school.” Second junior group / Ed. T.S. Komarova. - .: MOSAIC-SYNTHESIS, 2021. – 168 pp.;
- Complex classes according to the program “From birth to school” edited by M.A. Vasilyeva, V.V. Gerbova, T.S. Komarova. Second junior group / author-comp. T.V. Kovrigina, M.V. Kosyanenko, O.V. Pavlova. – Volgograd: Teacher, 2013. – 262 p.;
- https://www.maam.ru/detskijsad/konspekt-zanjatija-po-poznavatelnomu-razvitiyu-vo-vtoroi-mladshei-grupe-na-temu-mebel.html
“Certificate of publication in the media” Series A No. 0007630
We invite teachers of preschool education in the Tyumen region, Yamal-Nenets Autonomous Okrug and Khanty-Mansi Autonomous Okrug-Yugra to publish their teaching materials: - Pedagogical experience, original programs, teaching aids, presentations for classes, electronic games; — Personally developed notes and scenarios of educational activities, projects, master classes (including videos), forms of work with families and teachers.
Why is it profitable to publish with us?
1. “Kindergartens of the Tyumen Region” is an officially registered specialized media outlet at the federal level. 2. The activities of the editorial office are supported by the Department of Education and Science of the Tyumen Region 3. We issue a “Certificate of Publication” in the media. 4. The document has a unique number, is entered in the register, has the original seal of the editorial office of the online publication and signature. 5. “Certificate of publication” in the media is sent to the author in both paper and electronic versions.
Details >>>
Sample “Certificate of publication of author’s methodological material in the media.”pdf
Share
Professional room drawing
If the master is going to draw on paper, be sure to draw light lines that can be easily erased. For these purposes, choose a thin HB pencil (hard-soft version).
Now you can consider the main steps of the master class for beginners, which will help you draw a small project for your living space.
Drawing the base of the room
The basis or sketch begins with drawing the horizon line (it is advisable to do this with a ruler). Be sure to remember eye level.
It's worth remembering that this is a line from the viewer's point of view in relation to the scene (also known as the horizon line). We determine the vanishing point directly on this horizon, focusing it exactly in the middle.
How to beautifully draw the remaining details:
- Then you should draw out the back wall (in this case it is a simple rectangle).
- From the vanishing point, draw straight lines passing through each corner of this figure to the edges of the drawing area.
- After the artist has finished applying the guidelines, he erases the perspective lines inside the figure, leaving only the horizon line.
Important! At all stages you need to use a professional pencil of medium softness. In this case, erroneous lines can be easily removed.
abstract of GCD drawing furniture outline of drawing classes (preparatory group)
Tasks:
— Develop the ability to identify and name some parts of furniture.
— Teach children to choose their own materials and method of drawing furniture, teach them to convey shape and relative size in a drawing, and navigate on a sheet of paper.
— Develop imagination, creativity, visual efforts and skills, general and fine motor skills.
— Cultivate a caring attitude towards household items.
Adding items
To place all objects correctly, you need to fully draw out the shape of each object, even if it is partially obscured by other furniture or a figurine in the room.
A good place to start is by drawing the objects/furniture at the back of the room.
- To do this in specific examples, you simply need to draw the front side of the object first, and then project perspective lines onto each corner separately.
- After this, you need to form the back part along the perspective lines.
- Next, we continue to draw the general shapes of other furniture in the room until all objects are arranged in perspective. You shouldn't draw the details right away.
- First you need to place all the main shapes correctly to avoid the need to erase/remove.
Article on the topic: How to care for matting furniture
Even though the pencil can be easily removed, the work still runs the risk of being aesthetically untidy.
Preview:
Summary of GCD in the preparatory group. Artistic and aesthetic development (drawing) “Our apartment.”
Goal: Clarification and expansion of children's ideas about furniture, its functions and properties, the quality of the materials from which it is made, its diversity (in shape, size, color and purpose).
Developmental: Develop the ability to identify and name some parts of furniture.
Teach children to choose their own materials and method of drawing furniture. Develop imagination, creativity, visual efforts and skills.
Learn to convey shape and relative size in a drawing.
Continue to learn how to navigate on a piece of paper.
Develop gross and fine motor skills.
Educational: To cultivate a caring attitude towards household items.
Educator: Children, do you hear someone knocking on our door? I'll take a look now.
One body and two backs, On one of the backs there is a Feather for Irinka. (Bed)
I'm comfortable, very soft,
It's not difficult for you to guess.
Grandmothers and grandchildren love to sit and lie down. (Sofa)
There is a back, but it never lies. Has four legs, but doesn't walk. He himself always stands, but tells others to sit. (Chair)
People sit on it, but not a chair. With armrests, but not a sofa. With pillows, but no bed. (Armchair)
He has a big back, and on it he allows you to write, and draw, and sculpt, and cut. (Table)
- Guys, how can you call all these objects in one word?
That's right, furniture. Why do we need furniture?
Children's answers. Now get your fingers ready, we’ll play and remember why we need furniture.
Finger game: "Furniture"
One, two, three, four, five (we clench our fingers into a fist)
We begin to count (we unclench)
There is a lot of furniture in the apartment (we clench and unclench our fists)
We'll hang the shirt in the closet (we clench our fingers into a fist one by one)
And we’ll put a cup in the cupboard. To rest our legs, let’s sit on a chair for a while,
And when we were fast asleep, we lay on the bed. And then the cat and I sat at the table.
They drank tea and jam together (claps). There is a lot of furniture in the apartment.
(Wood, fabric, foam rubber, iron fastenings, plastics, glass).
If the furniture is made of wood, what kind is it? (Children's answers) Made of plastic? Made of iron? From glass?
They make a lot of different furniture, from a variety of materials. You won’t immediately understand which one to choose: Each will be good in its own way! Now we will rest and warm up.
Physical school
Here is Kiryushkina’s crib, (spread your arms to the sides)
So that Kiryushka sleeps sweetly, (sit down, palms under the cheek)
So that in a dream he grows up, (rise slowly)
So that he becomes big as soon as possible (stand on your toes, stretch your arms up)
Guys, where can I buy furniture? Children's answers.
In stores, furniture is most often sold disassembled. I suggest collecting it.
Game “Cut Pictures” (children collect cut pictures and name what they got).
Educator: Guys, you have your own room. There is furniture there. What else would you like to have in terms of furniture? Now let’s think about it, draw it, and show it to your dads and moms in the evening. And they will know what to buy for your room.
Independent work of children.
Educator: You did great. You are all great fellows!
Drawing the details of the room
In this step, you need to use perspective guidelines to place the pieces on the furniture.
Simple drawing technique:
- To draw doors on a cabinet (or to properly place a dividing line between them), you need to draw an "x" shape on them, going from one corner to the other opposite. Where they intersect will be the dividing line between the doorway;
- To place the doors on the cabinet, you can first draw a small rectangle on them in perspective.
At the corners of the rectangle, draw parts where the handles are attached.
On the topic: methodological developments, presentations and notes
Long-term plan for the “Childhood” program for the preparatory group.
To introduce children to living nature, systematize existing knowledge, develop curiosity, cultivate interest and desire to study living nature.
Summary of an open event in the senior preparatory group (artistic and aesthetic development - drawing) “I love the Russian birch...”.
Expand children's understanding of folk crafts, one of which is Dymkovo painting.
Abstract of an open GCD integrated (artistic, aesthetic, cognitive development (drawing) using non-traditional drawing techniques in the senior group “Usatiy-striped.
Lesson summary in the preparatory group Artistic and aesthetic development (drawing) Topic: “Golden Khokhloma”.
Source
Adding a bed and a window
Based on the shape of the rectangular prism filler (3d rectangle), we draw a bed. We round the corners and draw out folds. Finally you can start working on the windows and curtains.
Since the window and curtains don't actually require drawing perspective, in this case you can simply draw them as you see them as an artist. This was the basic information on how to easily draw your room or small space.
As long practice has shown, the process of studying perspective drawing takes a lot of time.
First, the artist uses a ruler and eraser, then tries to draw the lines himself.
Without understanding perspective, you won’t be able to draw more complex pictures or scenes. Even if the master plans to draw ordinary manga or anime, without experience, the drawings will turn out less realistic.
The highlighted tips will help a beginner draw a room step by step, giving it volume and realism.