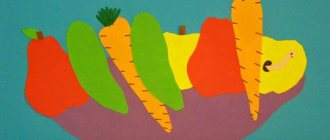
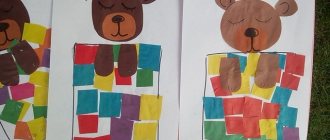
Ready-made samples of blanks
Creating a paper set is not a very popular process today compared to flowers, butterflies, and landscapes. It is still very rare to find professional blanks for creating furniture appliqué on sale, but if you have a vivid imagination, you can create beautiful pictures.
As we noticed, there are quite a few blanks, but they still exist. They are quite easy to use. We cut the blank and glue it in the desired order. If desired, we complete the missing elements (wallpaper, carpets, etc.). It is important not to confuse them with regular colored stickers.
Creating an applique from ready-made material is quite simple (cut and paste), but if you want to make it yourself, you will have to get confused.
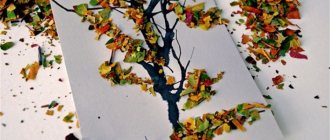
Application from figures “Aquarium”
A very interesting and educational application of geometric shapes in the form of an aquarium. Well stimulates fine motor skills and imagination of the baby. Also, with the help of applications, you can introduce your child to the names of colors and surrounding objects.
loading…
Self-execution
Let's try to create a chair together. To do this we need colored paper (blue, yellow and red), a button without a needle, glue and scissors. We start from the back of the chair. Draw a shape resembling a crown on a blue sheet. We do the same on yellow, but smaller in size. Draw two orange slices on a red piece of paper. Let's move on to the legs and seat. Cut out 4 red pieces measuring 2 x 4 cm (3 pieces) and 2 x 5 cm (1 piece). We twist them into tubes and secure them with glue. We assemble a chair from the resulting material. We decorate the back with a button.
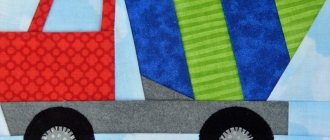
As you can see, such products look much brighter and neater. Let's look at a few sketches, having learned to draw which, you will be able to create creations with smooth, clear contours.
Let's create a TV and a sofa. We redraw them or translate them using carbon paper.
After you have drawn a sketch, color and cut out. We paste it onto the sheet in the required shape and complete the interior elements.
If you want to create a large room, then you need to draw a lot of furniture. We take a large sheet of paper or several small ones, draw a lot of different home furnishings, paint them with the necessary colors (for example, orange, blue and green). Carefully cut out with curly scissors and paste in the order we need.
Applications from geometric shapes “Animals”
How to make a small cockerel or elephant from colored paper? Show your child that even the most ordinary geometric figure, such as a circle or oval, can turn into a funny monkey or a cheerful circus elephant! Animals made from colored paper are also very easy to make and are intended for children 2-3 years old.
Cockerel
Example picture, background and templates for work:
Monkey
Applique is the basis on which such a fascinating process as scrapbooking is built, as well as making holiday cards with your own hands. Over time, the child will learn to come up with stories and design his own work, but for now the parents’ task is to introduce him to the magical world of appliqué.
Templates for the application “Circus Elephant”
Templates for applique from “Dinosaur” figures
A dinosaur made of colored paper is another option for captivating a child with an appliqué of geometric shapes.
Templates for work “Parrot”
This bright and beautiful parrot can be made from simple geometric shapes. The application will help your child get acquainted with the names of animals. You can save the templates from the page (see below), or download the entire archive.
Templates for work “Butterfly”
All presented applications are best performed together with the child. Such a creative process develops not only fantasy, imagination and introduces the baby to the world around him. Such simple actions as cutting out small parts and gluing them exactly to the intended place develops the baby’s fine motor skills.
Paper 3-D
Using curly scissors you can also cut out elements for 3D applique. Cut out a cross with sides 3 x 3 cm. Glue a cube from it (the base of the chair). Glue the back to the shape we need. Wait for it to dry completely and paint. Let's make the table: cut out a strip measuring 2 x 5 cm, roll it into a tube and secure it with glue. Cut out a circle and attach a tube to one side (this will be a table). We paint the table.
We attach these elements to a sheet of paper, finish drawing the background - the craft is ready.
Thus, we considered several creation options. Of course, the blank material at work looks much brighter, but if you know how to draw beautifully and select colors, then homemade elements will look no worse. Select shapes, tones, complement with invented elements, diversify your applications. With their help, children will be able to learn new words, develop imagination and imagination. Good luck!
Features of the Russian nesting doll
There are several options regarding how to make a matryoshka doll from paper. At the same time, the products can represent not only standard Russian nesting dolls, but also more original ideas that represent animals and other characters in the form of prefabricated structures. Children of different age groups in kindergartens and primary schools can work on this type of craft.
- What kind of crafts exist in the form of nesting dolls?
- Examples of ready-made crafts
- Creating crafts based on the child’s age
- Required materials and tools
- Junior group (2-4 years)
- Average (4-5 years)
- Senior (5-6 years old)
- Preparatory (6-7 years old, preschoolers)
- Varieties of crafts with assembly instructions
- Step-by-step assembly of a matryoshka cat
- Origami with diagram
- Applications for children
- Cutting templates
- Volumetric craft using modular origami technique
- Eyes and lips to print and cut out
- Video master class
- Design ideas
What kind of crafts exist in the form of nesting dolls?
There are several methods and types of nesting dolls, which may be presented in the standard sense or may be far from the norm. Here are several options for paper dolls:
- Russian nesting doll (flat or three-dimensional);
- nesting dolls in the form of animals;
- folding version of the set with the faces of family members;
- nesting dolls in the form of plants or objects.
If the Russian nesting doll is recognizable in any form, then when making this type of crafts in the form of animals, plants, people, it is worth observing the most important feature - the ability to assemble from the smallest element to the largest.
Examples of ready-made crafts
There are many ways to make matryoshka dolls from paper. At the same time, they can look very peculiar. Examples of the most interesting works:
- Forming a paper figurine on a disposable glass to recreate the volume.
- Funny three-dimensional matryoshka dolls consisting of several parts.
- A flat, prefabricated structure consisting of several elements, preserving the basic principle of the toy.
You can give a lot more examples and finished works, each of which is the result of the manifestation of boundless imagination and the properties of paper as a base material.