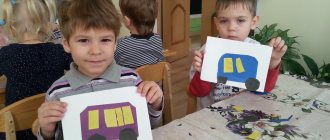
Each child is unique, you just need to find your own approach to him. Creating applications with your child can be an interesting and entertaining activity. Such creativity not only makes you fantasize, but also promotes the development of fine motor skills, which is important for the mental development of the baby.
Also, during the lesson on appliqué, perseverance and accuracy are developed. By creating “Vegetables” applications from paper with your baby, you open up a huge world of fantasy and creative thinking for him.
If you choose the right materials and take into account the child’s age, you can create original crafts for each age group of the kindergarten. When making crafts, it is important to consider the age of the child and the materials from which you will create your work of art.
Materials and tools needed for work
- Colored paper single-sided and double-sided
- Glue stick
- Scissors must have blunt ends
- White paper
- White and colored cardboard for the base
- Ruler
- Simple pencil
- Markers or felt-tip pens
Options for decorating rooms with an autumn theme
Not a single kindergarten is complete without the Autumn holiday, every school celebrates Teacher's Day, many celebrate Halloween. For this purpose, the premises where the event will be held are decorated. Various decorative objects, ribbons, and balls are used. But with a limited budget, it’s easier to cut out pictures and decorations from paper and make large crafts with your own hands. Examples of other designs can inspire you to create the right atmosphere.
Vegetable applications for kindergarten
The applique involves cutting out and gluing vegetable shapes from paper onto a base. Carrying out activities with children can be done in different ways:
- simple sticking of shapes
- gluing the figure to the middle of the part
- production of volumetric applique
- using different techniques.
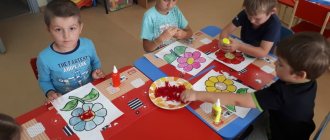
Application "Vegetables" for kids
Before starting classes, interest your child in work in a playful way. You can use poems, riddles, songs, fairy tales. The child should be interested, then he will be happy with the result.
Sharp objects should not be used with small children, so scissors will not be useful for them. When creating an applique, you can use two technologies for making crafts:
- use ready-made templates that parents or teachers cut out for children themselves
- Use the technique of tearing paper or crumpled paper to create a three-dimensional craft.
The main thing when creating crafts with young children is to teach them how to correctly place objects on a sheet, to introduce the children to the colors and shapes of vegetables.
The guys should know that vegetables grow on the ground. Tell them about their color and size: round red tomato, oval green cucumber, yellow round onion, orange triangular carrot, etc.
Tomatoes and cucumbers grow in the garden bed, onions, beets, carrots grow in the middle of the bed, potatoes in the ground. At the end of the lesson, be sure to praise the guys for their work.
You can make a stand of crafts for children in the younger group so that children and parents can see their creativity.
Application “Vegetables in a jar” for the middle group
For children of the fourth year of life, scissors are introduced to work. Before starting, it is imperative to have a conversation on safety precautions when working with sharp objects. Show children how to hold scissors correctly and how to use them.
The outcome of correct, safe and accurate work depends on this. This exercise will help you avoid injuries. Organize a comfortable workplace for them: cover the table with oilcloth, remove unnecessary items from the table, prepare a sufficient amount of paper.
It will be interesting to make the “Vegetables in a Jar” applique with children. For this you can use various materials:
- jar or any other transparent container,
- a can shape cut out of cardboard.
As you work, you need to decide what you want to do with your child. Children at home often see canned vegetables: tomatoes, cucumbers, peppers, carrots, cabbage, etc. They master the shape of an object, color and size.
To make their work easier, children are given preparations of future vegetables in the form of a square, rectangle, or triangle. You can make a voluminous application of vegetables. So, for example, on a cut out orange triangle - the base of a carrot - stick orange strips, crumpled by hand and slightly smoothed.
Stripes will give the voluminous vegetable appliqué an interesting look. The top of the work is decorated with a fringe of green paper. To do this, cut out a trapezoid from paper and make cuts from top to bottom, slightly short of cutting the part to the end. It turns out carrot tops.
By combining both parts of the carrot, a voluminous vegetable applique is obtained. Add a tomato to the composition, attaching a green sprig to the red circle; cucumber, drawing thorns on it.
Cabbage can be made by gluing several green circles at the bottom edge onto the stalk base and drawing veins on the leaves with a pencil. Other vegetables for work can be prepared using similar methods.
To complete the work, children place their applications in a glass jar or glue them onto a cardboard imitation jar. You can make a craft “Vegetables in a pan”, while complicating the task for children. For example, advise making and placing vegetables in a pan for borscht, vinaigrette or salad.
This task will contribute to the all-round development of the baby. With children in the middle group, you can make a vegetable bed by placing the vegetables correctly. This can be either individual or group lessons for children.
Application “Vegetables” in the senior group
By cutting out vegetable blanks for their crafts in the older group, the child masters the technology of cutting out paper folded in half. Objects cut out in this way turn out to be symmetrical and neat in appliqué.
For work in the older group, you can use mosaic or cutting techniques for working with paper. The child draws with a pencil the vegetable he wants to make and pastes squares of torn colored paper onto his drawing. You can cut out pieces for a mosaic.
Such work will be more accurate. An interesting and original craft will inspire children to make further applications. You can make a large collective applique “Vegetables on a plate”. Each group member makes his own vegetable, and together the children form a plate of vegetables.
For a plate, take a round or oblong template. You can also place voluminous appliqués of vegetables on it by cutting out three parts of the object for this purpose. All parts must be glued together to form a triangular shape. Then the vegetables are placed on a plate.
You can place crafts in a basket, because the child can see how vegetables and fruits are stored. The box can be made from strips of paper or cardboard of the appropriate color.
What you can do with your children on the theme of autumn from paper
Golden autumn brings inspiration with its bright outfits and seasonal colors. Nature is also not asleep - animals are preparing for a long winter, some are going to hibernate, so everyone is stocking up. This is reflected in many crafts. They can be made using different techniques and using different types of paper. In addition, this material is almost always at hand. The child will be able to make many crafts on their own, without the help of their parents, which will encourage them to express themselves more.
Autumn-themed craft ideas can be useful for kindergarten and school events, or simply for introducing your child to the season more closely. There are simpler options that even little ones can implement, and complex ones for older children.
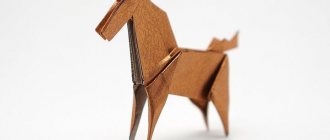
Origami on the theme of autumn
What is the main symbol of autumn? A yellow leaf falling from a tree. Moreover, most often it is a maple leaf, which has a beautiful intricate shape. It’s easy to do, based on the video master class.
- To work you will need 3 squares of paper measuring 7*7 cm and 2 squares measuring 5.5*5.5 cm.
- Take a larger square. Bend it diagonally.
- Bend both sides to it to create an acute angle.
- On the reverse side, bend the corner of the square towards the center.
- Open the folds and tuck the bottom corner inward.
- Fold the bottom corners up.
- Tuck this bend inside the “pocket”.
- Bend the resulting corners upward to form protruding “petals.”
- Do the same with the remaining squares (including small ones).
- Using double-sided tape, connect all the parts into a single composition.
- Form a stem from a rectangle of paper of the same color as the leaf itself.
- Connect it to the sheet using double-sided tape.
The resulting sheet can be decorated at your own discretion or left as is.
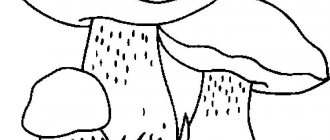
What's autumn without mushrooms? Every lover of quiet hunting dreams of collecting a full basket. But you can do this without going to the forest, by making them with your own hands.
- For work you will need a square sheet of 15*15 cm.
- Fold it diagonally twice.
- Then fold it in half twice.
- Fold 3 corners to the center.
- Fold the resulting “envelope” in half so that the folded corner remains on top.
- Turn the workpiece over and fold the top corners toward the center.
- Return them to their starting position.
- Lay out the resulting back pocket so that the bend coincides with the center line.
- Fold the pocket forward along the line again.
- Bend the sharp corner towards the center.
- On the other side, do the same.
- The top and side corners can be bent, then you get a boletus mushroom or something similar. Or you can leave them spicy by making toadstool or fly agaric.
- Also bend the corner at the bottom of the workpiece.
- Turn the craft over. It turned out to be a fungus.
It can be decorated with additional elements to make it more natural.
Another origami craft is a hedgehog. Before winter, he eats up “fat” in order to sleep through all the cold and wake up safely in the spring. Therefore, in the fall it can often be seen in search of provisions.
- To work you will need a square sheet of paper measuring 21*21 cm.
- Fold it diagonally twice.
- Turn the sheet over and fold it in half twice.
- Turn over again and bend 2 opposite corners to the center.
- Bend the two sides of the workpiece to the center.
- Fold the workpiece in half.
- Fold the origami along the bend lines to form a square.
- Flip through one fold of the square and fold the top corner into the pocket. It turns out to be a beak. Return the square to its original position.
- Bend the opposite side towards the center to indicate a bend. A fold is made along it.
- Turn the workpiece over and repeat the previous step.
- Select this fold on both sides. You will get a protruding sharp corner.
- Lift the lower part towards it on both sides.
- Bend the side where the corner sticks out towards the center.
- Bend the other side to the resulting bend.
- Turn the workpiece over and repeat steps 13, 14.
- Connect the top corner to the bend.
- Bend the larger triangle on the workpiece until an acute angle is obtained.
- Unfold and bend the top corner down.
- Unfold the pocket so that the top corner “goes” into a straight line.
- On the other side, repeat steps 17-19.
- Fold the resulting “line” forward.
- “Put” the bottom part into the pocket with a corner.
- On the other side, do the same.
- Bend the “back” part of the craft a little to get curves.
- Straighten out the corner from there.
- Separate the second one from the upper “corner” and move it back.
- Fold the top corner sticking forward twice.
- On the other side, do the same.
- Place the front corner inward so that the tip remains sticking out.
- Do the same on the other side.
- Fold the hedgehog’s “face” inward.
- Tuck the nose so that it is not sharp.
- The hedgehog figurine is ready.
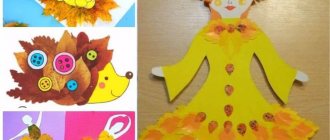
Autumn applications
Appliques are most often the simplest type of craft. I start with it in kindergarten, gradually complicating the composition and method of creating creative work.
There are several options for simple, but at the same time educational applications of autumn trees. Once you show your child how to fold and glue the leaves to the base, he will immediately understand it and be able to do it on his own.
The first option is with ring-shaped leaves, the second – with colored circles bent in half. A child with cutting skills will be able to make the blanks themselves. If he has not yet mastered this, then an adult will help him.
For older children, such work will be too simple, so for them the compositions chosen are more complex, using interesting techniques. The quilling technique is suitable for this type of work. The works turn out to be airy, yet voluminous and original. Twisting the strips into different shapes makes the composition incredibly beautiful, and also develops the motor skills of the child’s hands.
You can learn how to twist modules using video lessons.
Even a beginner can make a picture of a rowan branch from simple modules.
Templates and stencils for applications
If for quilling you need thin long strips of double-sided colored paper, then for simple applications it is better to use special templates and stencils. This way the details of creative work will be more accurate.
Autumn patterns using vytynanka technique
The “vytynanka” technique is similar to conventional templates and stencils. For many, it is familiar from snowflakes that are cut out of paper. Previously, the vytynanka was made in the form of a symmetrical figure: the paper was folded in half several times, and then the elements were cut out in pairs, forming gaps. Now the figures have become more complex and the resulting patterns can be different, even asymmetrical.
To make them smooth and neat, not scissors are often used for cutting, but stationery knives and razor blades. Therefore, it is better to entrust such work to older children or carry out it under the supervision of an older friend.
Volumetric crafts on an autumn theme
Volumetric figures made of paper look more realistic, especially for the design of compositions and installations.
One of the autumn holidays is Halloween. Although it came to us from the West and is celebrated recently, it has taken root among many. The main symbol of the holiday was pumpkins - bright orange vegetables with carved burning eyes.
- To work you will need yellow (orange) and green colored paper.
- Cut a yellow sheet of paper into strips.
- Cut out two circles.
- Connect the stripes to the circle using a thread.
- On the other side, also secure the stripes with a circle.
- Straighten the stripes to create volume.
- Glue a leaf and a branch at the top.
- It turned out to be a pumpkin.
It often rains in autumn. Only a bright umbrella can save you from them.
- Cut out identical circles from colored paper.
- Fold them in half and in half again.
- Glue inside to connect the quarters.
- Connect all other parts to each other in the same way.
- Open the string of quarters and connect the two ends. It turns out to be the dome of an umbrella.
- For the handle, you can use a wire, a wooden stick, or another similar device. You can also roll up a handle from a strip of paper and secure it with glue to the umbrella dome.
Application "Vegetables" for schoolchildren
In elementary school, children already know how to use scissors, know vegetables and colors. They master many techniques for making appliqués, using not only paper, but also napkins, cotton pads, and natural materials.
They are able to cut out parts without templates in compliance with proportions, compose plot pictures and place parts correctly. Work using the quilling technique will be unusual.
Using this technique you can make appliqués of vegetables and fruits. A bunch of grapes made using the quilling technique looks original.
The craft “Vegetables in a Basket” can be interesting and unusual for children. The basket itself can be made from natural materials:
- birch bark,
- nut shells,
- plasticine,
- straw,
- yarn.
The basket is made separately, the strips of material are intertwined with each other, and then glued to cardboard if it is half of the basket. You can completely weave a basket and fill it with any vegetables made using different techniques and from different materials.
When creating large applications, you can organize work in pairs. The kids take turns cutting out and pasting the vegetables onto the base. This kind of work helps strengthen the team and fosters a sense of responsibility.
In any case, when creating applications of vegetables and fruits with children, it is necessary to take into account the child’s age, his skills. It is important not only to interest him in the work, but also to introduce him to vegetables and how to grow them.
In such classes, children consolidate their knowledge of geometric shapes and study colors and shades. Be sure to master different techniques for working with paper and other materials. Constantly challenge and develop your child's creativity. Give him the opportunity to show his imagination.
Support him in his endeavors by using literary material for development: riddles, poems, songs about vegetables, and then you will get a comprehensively developed child. Be sure to hold exhibitions of children's handicrafts.
Goal: improve cutting technique with scissors; gluing skills.
Tasks:
- learn to transform geometric shapes using scissors (cut a circle from a square by cutting corners);
- develop practical skills and fine motor skills;
— cultivate accuracy and personal hygiene when working with materials and tools; the ability to bring a job started to completion.
Integration of educational areas: socialization, communication, safety, cognition, physical education.
Preliminary work: conversation about people’s work in the autumn in the garden; d/i "Fruits"; telling riddles about fruits.
Material:
Demonstration – illustration of an orchard; fruits and berries; blanks of colored paper for display; equipment for application.
Handout - yellow and red squares; equipment for application.
GCD move
— Guys, in the summer the harvest of fruits and berries ripens in the gardens.
- What fruits do you know? berries?
- Let's play and imagine that we are in an orchard. Fruit trees grow there (show illustrations). The fruits and berries on the trees are already ripe.
Gymnastics for arms:
- Let's collect them. (Children raise their hands up and imitate picking apples and cherries with their movements).
Motivational game with the creation of a problem situation:
— We collected a lot of apples and cherries. They will spoil very quickly, what to do, how to preserve them?
- Remember what your mother or grandmother does with fruits and berries in the kitchen.
- Let's cook some compote and put it in jars.
(Children sit at tables)
Fixing the difficulty that has arisen in speech and searching for a way out of the problem situation:
- Look, we have empty jars, are they the same?
- What is the difference?
— What do we put in the big jar? (Apples)
- What should we put in the small one? (cherries)
- What shape are apples? cherries? (Round)
- Look at the geometric shapes you have on your trays? (Squares)
— What color are the squares? (Yellow and red)
—Are the squares the same size? (No: big and small)
- Do squares look like apples and cherries? (No) Why not?
- What should we do? Our game has stopped.
- Who knows how to cut a circle out of a square? (Cut corners)
- We will cut apples from the yellow square, and cherries from the red one.
- Watch me cut an apple out of a yellow square.
Teacher demonstration: put the scissors in the middle of the side and start cutting to the middle of the next side. Our scissors always point straight. Turn the paper.
- Who wants to show how to cut a cherry out of a red square?
A child showing how to carve a cherry.
- Now we can continue our game. Just remember the rules: everyone must participate, everyone must practice, try to cut carefully.
— How to use scissors correctly; equipment for application?
Physical education minute:
We walked around the garden (walking in place)
We washed the jars clean (hand movement)
They put all the fruits in them (movement with the other hand)
And we closed the compotes. (lean forward and straighten up)
- Now you can get to work and prepare delicious apple and cherry compote for the winter.
Independent work of children.
Summing up.
— Did you enjoy playing?
— What new have you learned?
-Can we continue this game further?
— In what games will these delicious compotes be useful?