Representatives of the bird world are found in nature in an amazing variety, they symbolize the sky, freedom, life and abundance. Sketches of birds often appear in children's albums.
Drawing birds is not only exciting, but also educational, because children get acquainted with forest, domestic and exotic species.
Parents should tell their child about their value to the natural environment, their anatomical structure and differences, sometimes even watching the winged singers from the window and feeding them in the winter.
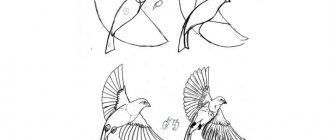
Ordinary bird
Let's try to depict a simple bird.
Master class for beginners:
- Let's start the drawing with the beak, which looks like two triangles, identical in length, only the bottom one is slightly smaller.
- The next step is the oval-shaped lower part of the body.
- We continue the egg-shaped top, and the lines below do not connect.
- It's time for the ponytail. It starts from the first line, going beyond the second, performed in a zigzag manner.
- Now we designate the wing that overlaps the body, and erase the unnecessary strokes.
- All that remains is to apply the paws with sharp claws and the eye-circle, in which the pupil is shifted to the left.
Our picture is ready, now you know how to draw a bird with a pencil. If desired, you can color it.
How to draw an owl
Since ancient times, the owl was considered the wisest bird in the world. Its plumage attracted the attention of both professional artists and amateurs. You can draw an owl in a few steps. You will need a pencil, a sketchbook and some markers.
The sheet should be in a vertical position. Start with two large circles, because... The owl's eyes are big. There should also be smaller circles inside them.
Then draw a triangular beak and draw a line from both sides of it.
Now move to the crown. From the lines drawn from the beak, draw the ears and connect them in the center with an arc.
The next item is the wings. It is necessary to draw a line from the bottom of the eyes, rounding it at the bottom. Repeat the same on the other side.
From the wings you need to draw a line for the future body. It needs to be narrowed downwards. Draw arcs in the center of the abdomen, round them at the bottom and connect them to the outer lines. The line below is necessary to connect the torso.
All that remains is to draw the paws. There are 3 small ovals per paw. Everything is ready, all that remains is to outline with a felt-tip pen and color the drawing.
Magnificent peacock
The colorful specimen does not hold back your imagination when decorating it, and it is not at all difficult to reproduce it on paper.
Step-by-step instructions for children:
- A peacock's head is a circle with a beak.
- Add a torso configuration with a neck.
- The rest of the space on the album sheet is given to a chic, flowing tail, onto which patterns similar to the leaves of a tree are applied.
- The tail background will be green. We paint the body, eyes and fragments of decoration with bright colors. Don't forget about the characteristic crest.
You can choose colors at your discretion, experimenting and achieving expressiveness.
Specific options for compositions (including collective ones) within the theme
Drawing for senior group students is offered in winter (December). Traditionally, this is the composition “Birds Blue and Red” (based on the poem by the Japanese poet Kitahira Hakushu “Bird, Red Bird”). The children learn to recreate a poetic image in a drawing, choosing the appropriate color palette and beautifully arranging the birds on the base.
A little later (for example, in February), the children can be offered the composition “Birds at the Feeder” (pigeons, tits, crows, sparrows). Moreover, it can be organized as a team effort. Please note that this work must be preceded by modeling.
In winter, it would also be appropriate to draw a bullfinch or a penguin.
After sculpting the rooster (in the spring), the teacher invites the children to draw this beautiful bird. The same applies to the turkey, which is designed as a decorative composition in the form of a Dymkovo toy: children draw this bird with its tail spread like a fan and paint it with characteristic patterns. At the same time, the emphasis is placed not only on object drawing, but on developing a sense of rhythm, color and composition in the design of the pattern.
Drawing birds is good to coincide with April 1, when Fr. On this day, children can depict any bird of their choice or those that preschoolers have not yet drawn (for example, an owl, a swan, a stork, etc.).
At the end of the school year, the children can be offered a creative topic - drawing a fairy-tale bird.
Note that the plots of the drawings can be associated with outdoor games on a bird theme: for example, “Day and Night” (owl), “Dog and Sparrows.” “Birds in the Nests” “Sparrows and the Cat.” These will be plot compositions.
In addition, preschoolers really love drawing based on fairy tales. In this regard, we can offer them the following topics:
- Based on the plots of Russian folk tales: “Hen Ryaba”, “Finist - a clear falcon”, “Winged, shaggy and oily”, “Cockerel and bean seed”, “Brave cockerel” (“Zayushkina’s hut”.
- “The Swan Princess” (based on the work of A.S. Pushkin “The Tale of Tsar Saltan”).
- “Rooster and Paints” (based on the work of Vladimir Suteev)
- “Cuckoo” (illustration for a Nenets folk tale, it could be a bird with a woman’s face and hair)
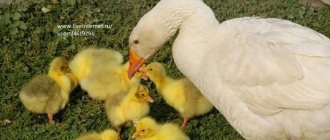
Older preschoolers enjoy doing work collectively. The teacher can offer them the following topics: “Poultry farm” (poultry), “Poultry canteen”, “Duck with ducklings”, “Hen with chickens”.
Wise Owl
This peculiar representative of the fauna is a frequent hero of children's paintings.
- Her head is represented by a flattened ball, and her pointed body is connected to it by a smooth transition with the absence of a cervical bridge.
- The legs begin with small oval panties and end with claws.
- We finish drawing the pointed ears, a crochet nose and a wing.
- We highlight the feathers on the tail. The eyes are round and yellow.
- The head area is decorated with down strokes. The breast is lighter in color.
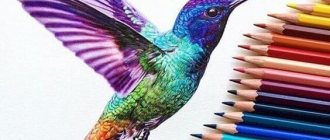
flying dove
How to draw a bird easily step by step with a pencil in flight?
A similar task is within the capabilities of young artists:
- We draw the outline of the head, which goes into the bottom of the body.
- The head line is continued by a raised wing, on the edges of which there are zigzags imitating a feather.
- We repeat the silhouette of the second element, located slightly behind.
- Add a ponytail and an eye dot.
- You can put a twig in the dove's mouth, making it a symbol of peace.
The soaring seagull looks interesting, which is characterized by long curved wings, a massive beak and webbed feet.
- Her figure will be made of a circle and an oval, from which elongated triangular wings extend.
- Fan-shaped tail below.
- They have plumage with black edges and a yellow nose.
Drawing domestic and migratory birds: lesson notes
| Author's full name | Title of the abstract |
| Volokhova O. | "Brave Cockerel" Educational objectives: learn to draw a cockerel with watercolors, conveying its characteristic features and creating an expressive image. Developmental tasks: develop color perception, sense of proportions, improve brush painting technique. Educational tasks: cultivate love and caring attitude towards poultry. Integration of educational areas: “Artistic creativity”, “Cognition”, “Communication”, “Socialization”, “Health”. Demo material: a picture of a rooster, an audio recording of a rooster crowing. Handout: sheets of white paper according to the number of children, watercolors, sippy cups, brushes, coasters, napkins. Progress of the lesson: Teacher's story about a rooster. It turns out that this bird was not always domestic. The ancestors of the rooster from India and China lived in the forest in trees and built nests on the ground. Loud singing was their protection from other birds. Domestic roosters have not lost this habit either. Villagers tell the time by the crow of a rooster. “The first roosters” sound at one o’clock in the morning, an hour later the second roosters sound, and at four o’clock the rooster’s voice is heard throughout the village, announcing that dawn will soon come. The guys look at the image of a rooster and a hen with a chicken, find out how they differ. The rooster is larger, it has a crest on its head, “spurs” on its legs (sharp claws for protection), and bright plumage, especially the tail. The teacher reads a poem about a cockerel.
A conversation about the character of the rooster in this work (brave, courageous, courageous, capable of protecting hens and chicks). He is like this in almost all fairy tales. The teacher asks the children in which fairy tales the cockerel appears. The teacher reports that since ancient times, people believed that the crow of a cock protects the house and embroidered the image of a rooster on towels, tablecloths, and painted it on dishes and furniture. Preschoolers are also asked to pretend to be a rooster. The game “Fighting Roosters” is played: two participants hide their hands behind their backs and, standing on one leg, try to push the opponent out of the circle (with their shoulder or torso). Independent work - drawing a cockerel. Exhibition of children's works. The teacher sums up the lesson and says that the cockerels will protect the children from adversity. |
| Geleverina Yu. | "Wintering Birds" The lesson begins with a game with a ball: children, standing in a circle, take turns naming the bird. Conversation about birds: · Where we meet them (in the city, in the forest, on reservoirs). · how they differ from each other (size, color, singing, habitat) · Where they find food in winter (in feeders, berries on trees). · What can be put in the feeder (bread, grains, seeds, lard). · How birds keep themselves warm in winter (they tuck their legs under them and hide them in the fluff). The didactic game “Cut Pictures” is played: children in pairs pick out images of birds. Physical school is carried out:
Didactic game “Finish the sentence (for example, a magpie is a wild bird, and a chicken...). The teacher reads the poem “Feeder”
Children are invited to draw a wintering bird of their choice. |
| Borodacheva O.V. | "Owl" The lesson begins with a riddle about an owl:
The teacher recalls with the children the fairy tale “The Owl” by V. Bianchi, and knowledge about the significance of this bird in nature is consolidated. Looking at pictures of an owl. Highlighting its distinctive features: large head and eyes, almost no neck, thick plumage. Rounded wings and a short tail help this bird fly silently. The owl's eyes, although large, see practically nothing. Since this bird is a predator, it has a powerful curved beak and sharp claws. The didactic game “Who Says What” is played (children reproduce the voices of various birds). Physical exercise "Owl"
The teacher explains the principle of drawing an owl, and then the children begin the practical part of the lesson (the owl is drawn sitting on a tree branch). Analysis of children's drawings: the teacher asks to highlight the largest owl, the smallest, as well as the sad and cheerful one. The outdoor game “Day and Night” is played. |
| Fomina I.A. | "Swan" At the beginning of the lesson, the teacher tells the children that an artist she knows gave her black and white pictures. We need to figure out together what is depicted on them - the children are shown slides depicting silhouettes of different birds. Preschoolers name them, highlighting characteristic features for each (for example, a swallow has a forked tail, a stork has a long neck, legs and beak). The conclusion is that all these birds are migratory. The didactic game “Finish the sentences” is played (all phrases are related to the swan). Demonstration of a sample image of a swan (swimming in the lake). Discussion on how to complete the drawing. Before working independently, children warm up their fingers by rolling a pencil between them. Independent activity of children. Exhibition of works. The teacher appoints one of the children as a tour guide, and he talks about the children’s works. |
Swan
The majestic specimen captivates with its grace.
Look how easy it is to draw this handsome guy:
- We outline a circle-head and an oval body; these parts are connected by an elongated swan neck, which is thickened.
- We emphasize with strokes the outlines of the wing and small tail.
- The eye is blue, and the wide beak is reddish with the obligatory nostrils.
- Using chiaroscuro we add volume to the figure.
- We accentuate the blue of the water.
You can display a pair of birds located opposite.
Another long-necked figure is the stork. It is characterized by long, ankle-shaped legs with a middle thickening of orange color and large paws.
Bullfinch
- The circle and oval are combined with rulers, the back of which will go into the wing.
- Draw the head elements and the triangular tail.
- We select the feathers and plant the bird on a branch.
We outline the outline in relief and color the winter singer, making the abdomen red, which is its distinctive feature.
How to draw a bird
The process of drawing birds will be greatly simplified if you follow the recommendations and practice regularly, improving your hand. Master classes will be useful for children of all ages, helping them cope with the difficult task of mastering artistic skills.
Owl
Let's try to recreate this expressive image step by step:
- Work begins with two circles with cross-shaped lines at the smaller top figure.
- We outline them with smooth lines, continuing the back part, ending with the tail.
- We finish drawing the legs with three toes.
- We depict round eyes with eyebrows and characteristic ears.
- Below we place a beak that looks like a hook.
Now we need to display the plumage, which lies in rows on the wing, tail, and the fluff on the chest, conveyed by shading. The pencil drawing of the bird is ready.
Penguin
Not a flying, but a floating specimen, recognizable from cartoons and movies, also belongs to the family of birds; its appearance is not difficult to reproduce in profile. You will need to outline a vertical egg ending in a small head with a beak. Draw a short tail and legs.
The most important thing is to correctly paint the picture with paints or felt-tip pens - the head area, the back with wings-flippers are black, and the abdomen is white.
Chick
The proposed version of the image of a chick is simple. We draw an arc from bottom to top, ending with an arrow-nose. We draw the eyeball with the pupil side by side. From the arrow we continue the bow to the starting point, ending it with a tail. We draw on the arched wing and thin legs.
Parrot
Many people keep these bright individuals at home; let’s draw a striking bird step by step:
- We sketch out a diagram of 2 ovals, on the left we draw a back line that turns into a falling tail.
- We use a semi-rounded ruler to mark the bottom of the wing.
- Draw the beak-hook, eyes-circles and paws.
We proceed to contrasting coloring, conveying the feeling of feathers. We use red, blue, yellow. Using a black tone we highlight the base of the beak and the edges of the feathers.
If you want to capture a parrot in flight, use a pair of arched rulers to show outstretched wings with an arched lower edge; its face will be half turned towards us, complemented by a beady eye and a hump nose.
Woodpecker
The cautious and beautiful little bird, by knocking on a tree trunk, not only gets food for itself, but also lets other “relatives” know about the boundaries of its territory, attracting females in the spring. Procedure:
- We draw an oval head and a body with extending wings.
- We draw the line of the beak, legs and move on to the hanging tail.
- We detail the wing by tracing the contours and highlighting the feather strokes.
- We remove unnecessary lines and refine the eye.
Decoration will add realism - a red head, a white chest. We emphasize the beak and other body fragments with black coloring.
Stork
This handsome guy has long legs, an ovoid body and a small head with an elongated yellow nose. Having completed the sketch, we clarify the details. Using a series of rulers we draw out the raised wings.
The ankle-shaped, yellowish limbs have a thickening in the middle. The aerial inhabitant has a snow-white color with a gray-blue tint at the tips of the plumage. Using strokes we emphasize the fluff in the chest area.
If you take on a heron, then give its neck a greater bend, and draw a crest on the back of its head, let it keep its balance on one limb, tucking the other, as it is more accustomed to do when hunting for river life.
Bullfinch
Let's depict a small bird with a colorful appearance that does not fly away to hot countries for the winter:
- Draw an oval body and a circle head.
- From them we draw a line that turns into a wing.
- We fix the neck and tail segment.
- The paws will tenaciously hold on to the branch.
We paint the figure - a bright red breast, a white spot under the eye, reminiscent of a bead with a dot, highlighted darkened plumage.
flying seagull
At first, the task seems difficult, however, even a child can do it:
- A round head and an elongated body with a lower convexity are outlined.
- The near wing has a more elongated format compared to the far element.
- The continuation of the figure will be the tail.
- The bird's legs are folded and pressed.
- We display zigzag feathers more accurately.
Hatching shows the fall of the shadow. It is worth noting that the dimensions of the wings of flyers increase in direct proportion to the size of the body.
Eagle
- The proud master of heaven is extremely attractive.
- Having sketched out the bird's body, draw an open beak and a circle-eye on the head.
- Let's detail the picture.
- We frame the open wings with zigzag feathers.
- The tail section is lowered down.
A formidable predator sits on a rock or stump, clinging to it with powerful claws. On his paws are characteristic downy pants. It's not the most affordable offer, but it's worth a try.
Parrot
The colorful Macaw is in demand, so let’s boldly get to work and try to draw this bird step by step:
- We depict a large and small oval; they are smoothly united by a back line ending in a flowing tail.
- The volumetric fragment becomes the basis of the wing, wavy at the bottom.
- Add a convex nose-hook and an eye.
- Marked semicircles will help show how the colors on the head change.
When coloring, use a red and yellow pencil, additionally using a dark blue tone on the tail section and the edges of the wings. Violet and black colors provide relief to the feathers.
And the youngest creators will love the image of a tiny chicken. They will undoubtedly cope with this task.
- The body consists of two circles, painted yellow.
- We draw on the thin paws and beak; the orange fluff along the contours will give the baby some authenticity.
The proposed sketch options provide an answer to the question of how to beautifully draw different birds that are similar to the prototype.
Fine arts lessons not only develop artistic thinking in children, but also enrich them with knowledge about the environment, which is important.
Wild birds. Storytelling and step-by-step drawing
Thanks to one of the previous articles, your children learned new things and learned to portray domestic birds. Today the focus will be on wild birds. Storytelling and step-by-step drawing are again performed according to simple and understandable patterns.
Introduce your child to birds that live in the city and in the forest. How to talk about birds?
I offer a version of the story based on the title. During the process, it is advisable to mention signs that help you recognize the bird. As a sample, I provide a text that, with a few changes, can easily be used to describe another bird.
Tit
You might think that the tit got its name from its blue color. But there is little of it in her plumage. Only the cap on the head is bluish-black. The chest is yellow, the tail is black, the back is greenish. Why is it called that?
In spring and summer, tits hide in the foliage of trees. They are difficult to see. But you can hear the song: “Si-si-si.” It was the song that gave the bird its name.
Tits live here all year round, although many people think that they appear only in winter. In summer there is a lot of food in the forest, and small birds live away from human habitation. In winter, tits fly to cities and villages - closer to people. Then they feed on seeds, grains, bread crumbs, pieces of meat and lard.
Tits are our friends; they bring great benefits in the garden and forest by destroying pests.
Let's draw our smart titmouse. In this case, the result was a blue tit. If you choose different colors for painting and remove the stripe near the eyes, you will get a different look.
What do birds eat?
The appetites of birds vary greatly. In a day, a tit or wren eats as much as their own weight. Thanks to such gluttons, nature regulates the number of insects. A blue tit can eat 1-2 thousand small bugs and larvae per day. During the period when the chicks appear, the parent birds destroy even more insects to feed the offspring. Kinglets, for example, fly up to the nest up to 400 times a day, usually the number of chicks is from 8 to 12. When the babies already begin to fly out of the nest, the whole family can catch up to 4 thousand caterpillars in a day.
In addition to insects, birds can eat plant seeds. Siskins, greenfinches and finches prefer weed seeds: horse sorrel, wormwood, quinoa. In addition to caterpillars, blackbirds also eat berries. But this food is not completely digested, and the seeds fall to the ground - new berry bushes sprout. Crossbills and tap dancers do not eat very carefully; the seeds of coniferous plants scatter around, and many then germinate. We can say that birds protect forests, gardens and vegetable gardens from insects, destroy weeds and participate in planting trees.
Helper for adults
A picture-cheat sheet that will help you out when you tell your child about birds. It is easy to communicate important points about each representative of birds and expand the stock of verbs and adjectives. If you offer a small competition to compare birds (search for similarities and differences), your child’s thinking will develop. The game is based on the phrases of an adult. For example, you say: “I will tell you about the swallow, and you?” - “I like the sparrow, I’ll tell you about him!” - “My bird has black and white feathers, what about yours? My bird flies to warm countries in winter, it is migratory, but what about yours? A swallow has 2 wings, a body, a small head, legs and a tail that looks like a fork, but what does your bird look like? My swallow eats insects, it catches them in the air on the fly, but what does your bird eat? My swallow is written about in the fairy tale “Thumbelina,” but in which book was your bird written? Let’s find this book and read it together.”
Practical exercise
Go for a walk in a public garden or park, bringing bird food with you. These can be cereals, seeds, nuts, crackers, bread, cookies (even dried or candied fruits). Place the treat in a pouch or bag where your child can easily remove the contents. Look at the birds, help your child remember the name or learn a new one. Describe the flyer’s appearance and his habits. At home you can arrange a little improvisation. Ask your child to show how a dove walks, a sparrow jumps, sing, imitate a voice (caw, tweet, squeak). Looking for birds in a picture that a child saw on a walk and naming them is also a very useful task.
Forest birds
As winter approaches, it's time to remember about migratory birds. The handsome red-breasted bullfinch is drawn almost the same as a tit.
Another bright representative of the bird kingdom is the owl. Now a very popular image among children and teenagers. You can draw with one oval, but this option is more detailed. Several techniques for drawing this night huntress were learned by the author as a child. When coloring the eyes, you can make several circles of different diameters and colors.
There is an old pine tree at the edge of the forest. A large head is visible from the hollow - a sleepy owl widens its round eyes: the bird's trilling voices woke it up too early. The bullfinches have flown in and are calling to the tits, scattering rowan trees are falling down. The result is a picture of a winter forest.
The heron and stork are easily recognized by their thin slender legs and long beak. Both birds are drawn according to a common template. If you slightly change the shape of the beak and the color of the plumage, you will get a flamingo. Let me remind you once again that this is a symbolic drawing. School-age children can be given more accurate images.
City birds
The usual winged inhabitants of streets, squares and parks are pigeons. They are fed and chased by children, and launched into the clouds by newlyweds. Using step-by-step pictures, your child will learn to draw this bird.
A small, nimble sparrow can be much more agile than the important, slow pigeons. It’s especially funny to watch how a gang of impudent winged robbers leaves their larger brothers in bewilderment, stealing a huge piece of pink salmon or other delicacy. Remember a few steps from the series of drawing a tit, add elements, color it - the sparrow is ready!
This is a variant of the image of birds in the city. Let your child come up with his own story or draw what he saw on a walk. There is a bird in the picture, the drawing of which is not discussed in the article. Can you and your child guess what techniques and forms are used to depict her? The ability to “break” an object into parts and visually identify simple geometric shapes is an excellent training in perception, attention and thinking. In addition, thanks to this skill, the child will learn to “decipher” complex images and draw them independently.
Stories with pictures instead of words about birds
Two short stories for beginning readers. After reading, ask your child to retell the story using the pictures.
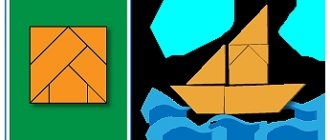
Try to periodically repeat the names of birds to your child, watch them together, sculpt, make appliqués and other creative works. For example, using a simple template, you can make an adorable card with birds.
Birds are cut out according to a template from colored or white paper, cuts are made on the wings and folds are made along the dotted lines. Apply glue along the contour of the image, except for the wings. After painting or decorating with colored fragments, bend the wings of a large bird so that it hugs the chick. The volumetric applique is ready.
On the eve of winter, make a bird feeder, place it so that the child can replenish food supplies himself and can calmly watch the birds eat. From an early age, instill in your child a caring attitude towards the surrounding nature, and set a worthy example yourself. Thanks to the materials in the article, your child will learn about what wild birds look like, where they live, and how they are useful. Storytelling and step-by-step drawing will allow you to consolidate the acquired knowledge in practice.
PS Has your child seen birds of prey?
Does the baby know about the benefits and harms that birds bring?
Child psychologist
Anna Zubareva
For advertising purposes:
Do you want to know how to properly teach your child at home? Subscribe to site updates and you will always know when a new article has appeared:
Share on social media networks
RќСЂР°РІРёС‚СЃСЏ
Related posts:
- Talking about birds and drawing step by step We continue to get acquainted with new simple drawing techniques for children. AND…
- Drawing step by step. Forest Today's material is selected for children of different ages. Thanks to the picture instructions you...
- Crafts with children. Master class on textile dolls Today’s material is dedicated to the joint creative process. This is an opportunity to have a productive…
- Learning to read. Pictures instead of words The new school year has begun. Some of the kids are mastering difficult school...
- Spring fun. Vegetable garden Seasonal games and entertainment are very useful for children. Several tasks...
Photos of bird drawings
0