What you need for work
Drawing is a purely creative process, but even this process requires a certain organization. The master will need a workplace. For children, this is a wide table, a comfortable chair and high-quality lighting.
For an adult with proper artistic skills, an easel will come in handy. To display slides for comics, it is better to stock up on a special table where the working platform is located at an angle of 35 degrees.
Also, depending on the chosen art technique, you may need:
- Watercolor.
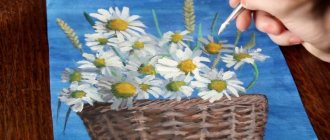
- Gouache or acrylic paints.
- Brushes in several sizes.
- Pastel crayons.
- Simple pencils of various diameters and colored pencils for children.
It is better to always have an organizer on hand, in the cells of which it is convenient to store consumables and tools (brushes, bottles or tubes of paint, hand rags).
Background
Buildings located in the background should be smaller than those in front. The tallest buildings will look good here. Draw sidewalks and walkways between buildings.
Final stage
- Next, we draw the road by drawing two lines from the support point down the sheet at a slight angle. Draw a dividing strip on it.
- Turn the arch point into a light source - a small moon or sun.
- All that remains is to shade each element. Areas should be better shaded in areas that are further away from the light source.
This pencil sketch can later be painted over in different colors. It will be a wonderful coloring book for your children.
Materials
The selection of materials depends on the technique and image style. We recommend starting with a simple black pencil. With its help, it will be easier for you to start mastering other areas.
Subsequently, you can use different colors to apply paint. Other tools you will need are gel pens, watercolors, paper and a ruler.
Sketching houses from the foreground
From the left side to the support point, draw several vertical lines to indicate the position of multi-story buildings. If you are an experienced enough artist, you can easily do this by hand.
For beginners, we recommend using a ruler. Be sure to ensure that the lines of the houses are perpendicular to the edges of the sheet.
Do the same manipulations on the right side. The top and bottom of the buildings should coincide at the central reference point of the vault. You shouldn’t draw a lot of buildings at once; two or three will be enough, and add the rest in the process of subsequent work. The main thing is to maintain harmony.
Drawing a cityscape
The second drawing option is an image of a city landscape. In this case, great attention is paid not only to the relative position of the lines, but also to the smallest details that define the look.
This could be a competition drawing “My City” or just a painting for home creativity. Instructions on how to depict a beautiful landscape within the city:
- A sheet of paper is placed in front of you in a longitudinal plane.
- Using a simple pencil, you need to make six lines: two parallel straight in the center, two parallel along the left flank, one at the bottom right, and one broken line at the top right. These stripes are sketches of future buildings.
- Next, it is necessary to give the buildings a more specific shape. To do this, all lines are brought to normal sizes and the vertical boundaries of the buildings are drawn. The broken line represents the roof of a residential building. Using double and oblique lines, they add volume to the roofs; under the roof of one of the buildings you can draw an attic window. By adding curtains, you can indicate that the attic is a living space.
- To get a beautiful cityscape, you need to abandon the straight central road with markings. The best option is a paving stone road that turns around the front of the building. To do this, draw a smooth line that originates between two adjacent buildings. Add a second line to indicate the height of the sidewalk. To complement the image, you can draw storm systems and gratings on the sidewalk.
- Don't forget about details such as street markings, road signs and store signs.
A branched tree trunk is drawn near one of the sidewalks. To draw foliage, you will need to outline the contours of the future crown in the form of a broken line. Small strokes will then be added, and extra lines will be removed using an eraser.


