Age characteristics of children
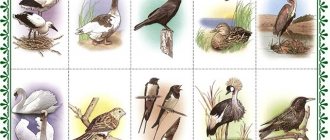
A child of preschool and primary school age has different developmental characteristics. The variety of application techniques allows you to implement them, regardless of category. For example, putting together a composition from ready-made elements will interest children; the appliqué “Birds of Migratory” in the senior group of a preschool institution is more complex in nature (children are asked to independently cut out parts of the composition and put them together in the required sequence); a child 5-8 years old can independently design a craft.
In this work, you can use many techniques that will allow you to fully unleash your child’s creative potential. In this case, not only elements made of paper and cardboard are used, but also various natural materials, such as feathers or down.
Summary of educational activities for the application senior preschool age “Birds of Migratory”.
Next we move on to the main part of our work. We are carving birds.
Look: I take a white rectangular sheet and fold it in half. Next, I apply the bird stencil to the fold, carefully trace it with a pencil and cut it out. I need to cut out six of these birds, because our birds fly in a wedge. I take a stencil of the sun, apply it to a sheet of paper, trace it and cut it out. I cut out clouds in the same way. Next, I place everything on a sheet of tinted paper and glue it.
But before we begin, let's prepare our hands for further work.
Finger gymnastics:
"Ten birds flock"
.
Sing it, sing it, sing along:
Ten birds are a flock. (Clap our hands)
This bird is a nightingale,
(We bend the fingers on the right hand one by one, starting with the little finger)
This bird is a sparrow.
This bird is an owl, a sleepy little head.
This bird is a waxwing,
This bird is a crake,
This bird is a little gray feather.
(We bend the fingers on the left hand one by one, starting with the little finger)
This one is a finch.
This one is a swift.
This one is a cheerful little siskin.
Well, this one is an evil eagle.
(Raise both hands up, fingers in the form of claws)
Birds, birds - go home!
(We wave our arms like wings, join our hands above our heads - the roof)
.
Repeat with children the rules of working with scissors
The scissors should be closed on the table.
They should be passed in rings forward, holding them by the closed blades.
When cutting paper in a straight line, the scissors are not spread wide and the ends are not brought together.
When making cuts, you must use the tips of scissors.
When cutting the sheet with scissors, do not tear it too far from the table.
When working with scissors, turn the paper or other material, but not the tool.
Small parts are not cut out from a large sheet of paper - this is inconvenient. It is better to cut a piece of the required format.
A cut in the shape of an acute angle is made in two steps.
If you make a cut along the fold line, then first unroll the paper.
Round parts are cut counterclockwise.
Now we can get to work.
Educator: take rectangles of white paper, fold it in half. Take the bird stencils, place them correctly on the fold of the rectangle and trace with a pencil. Then carefully cut it out. Let's open it up and see what happens. We make 5 birds. Next, take a small square of white paper and a circle stencil, apply it to the paper, trace it and cut it out. This is our sun. We take the cloud stencil, apply it to the paper, trace it and cut it out. We place our parts on a sheet of colored paper. Let's create a composition. Carefully glue the elements. Add the beak to the birds (with a red felt-tip pen)
and eyes
(with a black felt-tip pen)
.
Poultry
As a rule, children's acquaintance with the world of birds begins with poultry, because this is most expedient. Therefore, already in kindergarten, children know perfectly well what poultry is and what they look like.
It is advisable to start getting acquainted with this type of creativity with familiar images, so it will be much easier for the child to consolidate the acquired knowledge in memory.
Poultry includes ducks, chickens, geese, turkeys; all of them are quite easy to make from paper, cardboard or other improvised means that you decide to use in the craft.
The easiest way to assemble a craft is from paper or cardboard, because it is a hard material from which absolutely any shape can be cut.
For the craft you will need:
- Base (colored cardboard)
- Watercolor or gouache
- Plasticine
- Glue stick
- Cotton pads, napkins
Assembly
Let's start assembling the small chicken.
The assembly instructions are very simple; the body will be a solid cotton pad, which needs to be glued to the base using a glue stick.
Next, to complement the image, giving it an increasingly realistic look, you need to place another cotton pad a little higher; it will serve as the head of the craft. Please note that these 2 cotton pads should be touching each other.
At this stage it is necessary to paint the workpiece using yellow paint. It is worth remembering that cotton pads absorb moisture well, so you should try to squeeze out the brush, leaving only paint with less water on it.
Once they are carefully painted yellow, you need to give them some time for the paint to dry.
When it is dry, you can begin further assembly. To make chicken wings, you need to take a new cotton pad and use scissors to cut it into 2 equal parts. Only one half is needed for this craft.
It should be placed on the body so that the rounded part of the disk is at the bottom. The part of the cotton pad itself should be located exactly in the middle of the body.
The wing also needs to be carefully glued, wait until the glue dries, and then paint it yellow, like the rest of the parts. All that remains is to make the beak, eyes and legs.
For the beak and paws, red or burgundy plasticine is used. A part of the desired shape is carefully molded from it, after which it is glued to the base with a slight movement.
To make an eye, it is recommended to use a black felt-tip pen; you just need to gently press once on the desired place, and an even circle will be ready.
This completes the assembly of a simple craft; the time spent on manufacturing and combining all the parts does not exceed 30 minutes, which is very convenient.
Chickens and geese
These poultry have abundant plumage, which also needs to be indicated on the applique. Depending on the age of the child, applique with these birds can be of different types.
For the little ones, the same approach is used as when making chicken. As a final step, the child will need to place cotton wool on it, which will imitate plumage.
For older children, for example, for the second or third year of being in kindergarten, pre-prepared bird templates are used. They are printed on paper and given to children. And they, in turn, must correctly fill the template with cotton wool where it is needed.
The remaining parts should be colored with felt-tip pens, pencils or colored pens, whichever is more convenient for you.
For this craft you will need:
- Glue stick
- Outline drawings of birds
- Paints, pencils, pens
- cotton wool
- Scissors
Crafts addition
So that the craft does not seem empty, you need to create the right environment for the birds. For example, for a chicken craft, you can create scattered food around it.
To imitate it, real seeds glued to the base of the craft are perfect. However, gluing small parts is a very painstaking job that requires maximum care.
In addition, working with small parts is not recommended for children under 3 years of age without parental or teacher supervision.
You can also create a small house, make grass, sun and clouds. You can add virtually anything, the child must imagine the environment himself, there is no need to interfere with his creative impulses.
It only makes sense to guide him, telling him how to correctly make this or that detail for his craft.
Creating a house
The simplest thing would be to make one or more small bird houses in the background. To do this, you first need to cut out a square or rectangle that will serve as the base.
Next, you need to make a roof; for this, a triangle is cut out in size suitable for a square or rectangle. Its color may differ from the base, at the request of the child.
All this is glued to the base of the craft using a glue stick. Next, you need to make windows; for this, small squares are cut out of white or blue paper, which are then glued to the walls of the house.
To make frames, you can draw classic crosses on top of the window blanks with a pencil or felt-tip pen. All that remains to be done is the chimney, an integral attribute of village houses.
For this purpose, you need to cut a small strip from the same paper from which the roof was cut. Next, you just need to glue it to the roof in any place where it will be most convenient.
