Summary of the lesson in the senior group of the preschool educational institution “My city is my small Motherland”
- September 30, 2016
Purpose of the lesson: speech development, learning to compose stories about the small Motherland.
Tasks:
- disclosure of the concept of “city”;
- acquaintance with the native village, enrichment and expansion of knowledge about the memorable places of the village;
- determining the distinctive features of a village and a city;
- nurturing love for one’s native village;
- acquaintance with oral folk art through proverbs and sayings about the Motherland, native land.
Progress of the lesson
- Guys, let's imagine that today you and I are going on a trip. What do you think you should take with you when going on a long journey so as not to get lost? (Children's answers)
- That's right, you need to take a card. I decided to take this card. What do these dots represent on it? (Children's answers). Why are the dots different, big and small? (Children's answers).
– Do you know why a place where many people live is called a city? Let us say the word “city” slowly, and listen to this word.
the city in the ancient way : Moscow-grad, Chelyabinsk-grad. In ancient times, there were frequent wars over land. To protect themselves from enemies, people fenced themselves with high fences and then erected fortresses. Do you hear a familiar word in the words “fence”, “fenced”? (Children's answers).
Yes, the word is "city". Since then, the fenced area has been called a city. Thus, from the ancient word “hail” the modern word “city” was formed.
– There are many cities on our planet. Everyone has their own name, just like a person. Cities are young and old, noisy and calm. What cities have you visited? (Children's answers).
Where do you and I live? (Children's answers).
- That's right, in the village of Novogorny. Tell me, what is the difference between a village and a city? (Children's answers).
– Yes, they differ in size: the city is large, and the village is small. And in cities there are tall buildings - skyscrapers . Repeat “skyscraper” with me. These houses are so called because they rise above other houses, and it seems that the roof reaches the sky, that is, “scraping” the sky. Hence the name “skyscraper”.
– There are a lot of cars moving along the city streets, but in our village there are few.
– Also, a lot of people live in cities, but in our villages there are fewer.
– Guys, please tell us about our village. And so as not to forget anything during the story, I propose to draw up an outline of this story from the helper pictures. The first picture will indicate the name of our village.
– Based on the second beautiful picture, you will need to describe how beautiful our village is. The third picture will help you tell how beautiful our village is at any time of the year. Based on the last picture, tell us about your favorite place in our village.
(Listening to children's stories).
– Well done, you have some interesting stories! You and I are one big, friendly family living in the same village. They say about us that they are fellow countrymen. You and I love our hometown, our land. People have been glorifying their land for a long time. There are many proverbs and sayings about this. What proverbs and sayings do you know? (Children's answers).
- Everyone loves their native side
- Where someone is born, that’s where they will come in handy
- Houses and walls help
- Your own land is sweet in a handful
- You can even dream about your native land.
– Please name the main attractions of our village.
– What kind of plant do we have?
– What enterprises do the residents of our village work at?
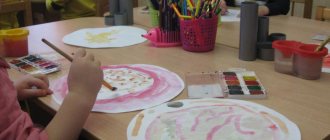
- Well done, we will love our native village, take care of its purity and beauty. And now I propose to draw your favorite places in the village.
Summing up: children can talk about their hometown, try to come up with a short story on a given topic; able to use simple symbols and diagrams.
Author: Teacher of the senior group of kindergarten Elovik Tatyana Aleksandrovna, Novogorny village.
Abstract of the OD “Artistic Creativity” (application) on the topic “Big House” in the middle group.
Abstract OD "Artistic creativity (application)"
Topic: Big house.
Goal: teaching children to create an image of a large house in an applique.
Objectives: 1. To train children in the ability to cut corners on a strip of paper, to consolidate the ability to cut a strip of paper in a straight line, and to compose an image from parts. Reinforce techniques for careful gluing.
2. Develop a sense of proportions, fine motor skills, and attention.
3. Foster independence, interest in future work, and a desire to help the hero.
Activation of the dictionary: one-story house, multi-story house, trapezoid.
Materials: glue, brushes, napkins, scissors, oilcloth, sheet of paper, rectangle of colored paper and strips of colored paper for windows, roofs, bunny toy, laptop.
Preliminary work: looking at illustrations of houses.
1. Introductory part. Mental warm-up
All the children gathered in a circle, I am your friend, and you are my friend.
Let's hold hands tightly and smile at each other.
I wish that we have a good mood all day.
Guys, today I went to kindergarten and met a bunny, he was very sad. When I asked him what happened, the bunny replied that he had no home, he had nowhere to live, nowhere to hide from the wolf and fox, nowhere to invite guests. He really wants to have his own home. And I invited the little bunny to our kindergarten, told him how kind the guys were in my group and promised that you would definitely help him. How can we help the bunny? (children's answers: build a house). What kind of houses are there? (single-story and multi-story).
The bunny has many friends, what kind of house can you build him? (multi-story)
- Do you think we can build a big brick house now? (We can't).
What can we make multi-storey buildings from?
(From paper)
- Yes, and I think we can do it.
Then I invite you to come to our creative workshop. (we sit down at the tables) Posture.
The teacher displays a sample of the “Big House” application, completed in advance.
— What parts does the house consist of? (roof, windows, base)
— What shape does the base of the house have? (rectangular)
Window? (square)
Children, under the guidance of a teacher, draw up a work algorithm:
— Guys, let’s discuss together the sequence of our work... (Support diagrams are set up one by one)
You have a large rectangle on your table - this is the base of the house. In order to get windows for our house, you need to cut a strip of paper in half along the line (diagram on the board), you get two squares, two windows. You have two such strips, since our house is multi-story, so we get 4 windows, 2 windows are glued on top, 2 windows on the bottom. Then we prepare the roof. For this, you also have a strip of paper, a little larger than for the windows. How to make a roof from a rectangle? (diagram) Starting from the bottom corner, along an oblique, the scissors are slightly tilted to the side, move up, cut off the upper corner, then turn it over and in the same way from the bottom corner, along an upward slope, cut off the corner. We got a roof in the form of a figure unfamiliar to you - a trapezoid. After everything is ready for gluing, be sure to carefully lay out the base of the house, the roof, and arrange the windows on a sheet of paper. We have a lot of work, we need to rest.
— Physical training “Home”
One, two, three, four, five (step in place)
Let's build and play.
We build a big, tall house (on tiptoes, hands up)
We install windows and build a roof (show)
What a beautiful house and everyone lives in it together! (clap our hands).
Look at the board, remember the rules for working with scissors. (picture)
gluing rules.
The little bunny is really looking forward to his beautiful multi-storey house, let's get to work, I wish you good luck.
— Independent work of children, individual assistance from the teacher. (calm music sounds).
3. Final part.
Well done boys. Let's go out in a circle with our works. Look what wonderful houses we have made. Who's visiting today? Were we able to help the little bunny? Guys, what kind of houses did we get? (multi-story)
…., whose house did you like, why? What difficulties did you encounter while doing your job? What was easy? (praise from children) I think the bunny can’t wait to invite all his friends to visit, because now he has somewhere to invite them. Let's put our houses near the bunny and he will choose the best one for himself.
How to make a house in the form of an applique
House appliqué is a standard technique of gluing pieces of paper cut out in a specific shape onto a sheet or cardboard. If we talk about forms, they are selected in accordance with the selected type of building. So, there are separate templates for a Russian hut or apartment building. We must not forget about the non-standard forms of famous buildings, for example, skyscrapers or a high-rise building on Kotelnicheskaya Embankment in Moscow.
Detailed information here
Required materials and tools
The hut applique is assembled in accordance with one’s own visions or on the instructions of an educator or teacher. To work, your child will need:
- colored and plain white office paper;
- cardboard: white, colored;
- scissors, a stationery knife if necessary;
- glue: PVA or pencil;
- paints, brushes, pen, pencil, ruler and other items that may be needed in your work.
Sometimes ready-made cutting templates are used, which must first be printed.
Children should not attempt to print and work with scissors or a utility knife on their own if they have not done so before. Preschoolers should always have parents with them to supervise the process.
Step-by-step assembly with photos
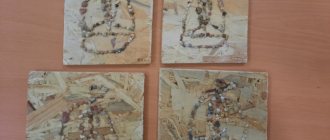
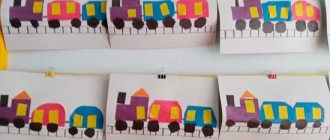
For step-by-step assembly, we will consider one applique of a house made of colored paper made using standard techniques. In this option, it is proposed to make several houses in a clearing at once and add flowers to the composition.
The step-by-step assembly is as follows:
- First you need to prepare the materials and tools for work. The younger group or the second youngest group (children 4-5 years old) can use pre-cut blanks. The teacher will make the blanks, so the children will not have to work with scissors.
- Next, you need to take a blue sheet of paper and stick a green clearing on top of it. The clearing is represented as a semicircular figure, which will look like a hill.
- Then cut out the parts of the houses. To do this, you can use a special house stencil for cutting. But for the craft in question, it is enough to cut squares of brown paper, triangles of different colors and yellow rectangles.
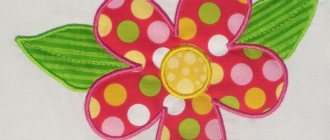
- Cut out blanks for daisies from white and yellow paper.
- Now you need to assemble fairy houses by gluing them onto a green clearing. Also glue the flowers: first a white blank, then a yellow circle is attached to it. In addition, you can cut a track.
The pictures for the application can be changed if you use your imagination. You can use a lot of ready-made projects to come up with your own version of the craft.
Recommendations for design
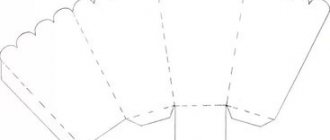
The design of paper houses directly depends on the age of the child. Younger groups make simple compositions, where it is better to use ready-made hut templates. You can print them out or make them yourself for an adult.
Children from the preparatory group can complement their composition by decorating the adjacent area of the house. These could be trees, animals, flowers, a fence or household utensils, an imitation of a vegetable garden, etc. If it’s an apartment building, it means the whole city is gathered around. To do this, pre-cut people, cars and roads are glued on. As an example and to simplify the work, templates are offered for cutting out a house in a village and in a metropolis.
You can use window and door templates for a house or apartment building. Often, the formation of these additional elements occurs by cutting out parts with stationery knives. Older children can do this on their own, but under the close supervision of adults.
Video master class
We offer you a video master class on how to assemble a city yourself. The presented version considers a task for children using a large number of ready-made templates.
Simple instructions on how to make a house with kids
A paper house applique for kids should only be presented in the form of active use of templates. There is no need to burden your child with cutting out shapes if it is difficult for him to work with scissors. It is enough to offer him ready-made options for different bases, windows and doors, and try together with him to combine them in the right sequence. These can be colored houses, cut out individually from colored paper, or white buildings, pre-cut out of white paper according to a template.
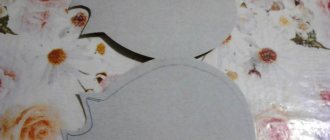
Parents are also recommended to print out the finished compositions and try with their child to glue colored paper according to the pattern. You can print out a Russian hut, depicted with outlines, and glue colored shapes onto it. You can make the windows and door for such a house yourself. Children under 3 years old are allowed to use the window and door templates.
Origami schemes
Older children try to master complex techniques, which in the case of the house are represented by origami. Origami is a technique where work occurs only with the use of paper of various shapes, densities, and varieties. With a few simple movements you get a real craft.
Kids are offered several options for assembling a structure of varying degrees of complexity. Little builders will try to make several houses.