Why learn to draw mushrooms
A simple technique for drawing mushrooms is useful not only for those who are learning to draw professionally. This type of training helps the child train his hand. And for parents, this is an opportunity to spend quality time with their son or daughter.
In addition, the ability to draw a mushroom gradually expands a child’s horizons. They remember what its structure is, where it grows, and how cleverly it camouflages itself among the grass and fallen leaves.
In addition, through drawing, the child remembers different types of mushrooms, and also learns to distinguish edible from inedible. And these skills are remembered much better than after looking at pictures in a book.
Summary of directly organized educational activities on drawing “Mushrooms”
Olga Rybalko
Summary of directly organized educational activities on drawing “Mushrooms”
summary with the integration of educational areas on the topic : “ Mushrooms ”
Leading educational field : “Artistic and aesthetic development”
—
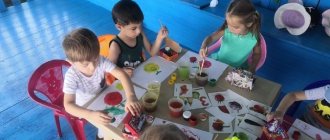
visual activity .
Goal: To teach children to create an image of mushrooms in drawing ; place the image over the entire sheet of paper, draw large , on the entire sheet. Arouse children's interest in drawing - mushrooms ; Learn to look at their parts, color; consolidate children's knowledge that there are edible and inedible mushrooms
Objectives: Activate children’s vocabulary on the lexical topic “ Mushrooms ”
.
To develop children's interest in drawing ; fine and gross motor skills of the hands, coordination of speech with movement.
Foster independence, activity, encourage friendliness and willingness to help.
Types of activities : gaming, motor, visual .
Forms of organization : individual, group.
Forms of implementation of children's activities : making a product of children's creativity ( drawing a mushroom )
Equipment: landscape sheets of paper (A4 format)
, illustration with
the image of mushrooms , oilcloth on the table for each child, gouache (brown, cups, brush, wet napkins, hedgehog toy.
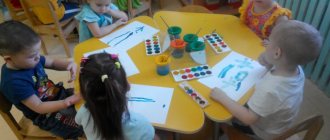
Participants: children of the middle group
Preliminary work: Reading poems and guessing riddles about mushrooms , watching the cartoon “Under the Mushroom ”
.
fly agaric
This is the most famous of the poisonous mushrooms, attracting attention with its unusual appearance.
Here's how to draw a fly agaric step by step with a pencil:
- First you should draw the outlines for the three legs, taking into account that the tallest mushroom will be in the center.
- To make the composition look interesting, fly agaric mushrooms can be made with different caps. The smallest of them will have a russula-like top. The second one will have a hat that looks like a circle with a completed arc. The tallest mushroom will have a circle-like top with wavy edges.
- Now folds with wavy lines are drawn on the legs, characteristic only of fly agarics. And on the caps the plates are drawn where their lower part is visible.
- All that remains is to add white dots on the top side of the caps, making circles of different sizes.
- If you used a black gel pen to draw the main outlines, you will need to wait until the ink dries.
- Now you can start coloring. The leg is made gray, the shadows are created brown. Bright hats are made with three pencils. The middle is painted orange, the center - red, the edges - burgundy.
- Next to fly agaric mushrooms you can draw moss, which is colored green.
Having looked at how to draw a mushroom easily, let’s summarize: this skill is useful for children even in areas of life not related to drawing. This way you can have a pleasant and useful time with your child, developing his skills and expanding his horizons.
To draw mushrooms common in the forest, you can use pencils and step-by-step diagrams. Therefore, it makes sense to prepare a sheet of paper, pencils, an eraser and try it.
Pencil drawing master class
Regardless of the chosen type, the diagram of how to draw a mushroom with a pencil requires the following steps:
- Creating outlines. This is an oval cap with a stem attached to the bottom.
- Contour detailing.
- Erase auxiliary lines.
The completion is painting. To do this, you can use colored pencils, felt-tip pens or paints.
