We sculpt a fly agaric from plasticine step by step
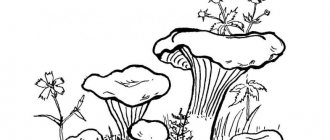
1) What does a fly agaric look like? Be sure to ask your children about this, especially if you go to the forest together to pick mushrooms in the fall. Children should know that a bright red mushroom with white spots on a beautiful thin white stalk is a poisonous toadstool. The fly agaric's cap is not flat, but elongated upward. It is also worth covering it from below with white plasticine and showing small plates. The thin leg has a collar or skirt, which is also characteristic of this representative. Prepare red and white plasticine for sculpting a mushroom, green plasticine for grass, knead all these pieces separately.
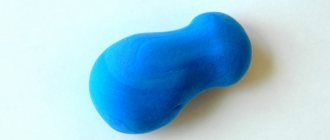
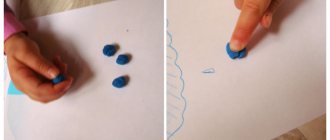
2) Crush the green plasticine with your fingers into a round cake.
3) Lift the ends of the cake up, creating a kind of vase. The hole in the vase will become a bed for the mushroom stem. Using a tool, make notches on the outside to reveal blades of grass.
4) Make a tube for the leg from white plasticine, expanding it towards the bottom, and also additionally prepare a thin sausage for the collar.
5) Glue a thin sausage across the leg, press it around the circumference with your fingers, highlighting the collar, and also treat it with a stack.
6) Make a hat out of a red ball by pulling the plasticine out to the sides with your fingers. Try to distribute the plasticine evenly around the circumference. Additionally, make a white cake, the circumference of which corresponds to the circumference of the cap.
7) Glue the white cake to the bottom of the cap and begin to cut through thin plates in a stack. Work your way out from the center of the mushroom and pull the cuts outward.
 Cover the bottom of the red cap with cuts all the way around.
9) Turn the hat over with the red side facing you and use white pieces of plasticine to show the characteristic spots that decorate the fly agaric.
10) Connect the cap and the stem. The poisonous mushroom itself is already ready. Insert the bottom of the leg into the green blank to get a more realistic craft.
The result is a beautiful and poisonous fly agaric mushroom made from plasticine - an excellent children's craft.
Summary of the lesson on modeling “Mushrooms”
Olga Khlebnikova
Summary of the lesson on modeling “Mushrooms”
Goal: Making a mushroom from plasticine .
Objectives: Expand knowledge about mushrooms - edible and non-edible.
The ability to roll out plasticine correctly - a leg, a cap.
Develop fine motor skills, attentiveness, concentration, memory.
Foster interest and respect for nature.
Preliminary work: Conversation about mushrooms - where mushrooms grow , edible and non-edible. Looking at pictures.
How to make a fly agaric from plasticine step by step
Perhaps the fly agaric is the most beautiful mushroom in the forest. It always grows in the most visible place, like other toadstools. The mushroom likes to show off its bright hat, slender leg, and it reaches enormous sizes. Indeed, who would pick the fly agaric, because it is the most dangerous mushroom in the forest. You can only see and admire such a handsome man, but you shouldn’t pick him up. A completely different matter is the fly agaric craft; you can mold this mushroom from plasticine. This tutorial shows how to do this. A fly agaric made from plasticine is an easy option for preschool children. You can make it with plasticine in two colors - red and white.
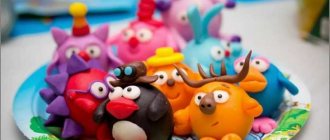
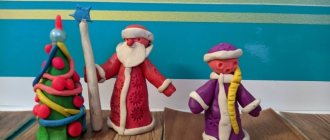
Photo gallery: works of secondary group students
The teacher gives the children free-shaped green cardboard with wavy edges (clearing), leaves and blades of grass.
The children sculpted the basket from a long yellow rope of plasticine.
Each child can make any number of mushrooms
An original idea is to make a large stump out of cardboard on which children's plasticine mushrooms will grow
All mushrooms are arranged in a collective composition using artificial grass and appliqué
Mushrooms are supplemented with a plasticine basket and dry leaves
In the middle group, the guys can quite realistically depict a fly agaric, even sculpting its characteristic skirt
Fly agaric is a beautiful bright mushroom that children always like to sculpt
A shaggy green rug is ideal for creating the look of a clearing.
A bright fantasy composition is placed on a cardboard clearing stand
Plasticine fly agarics can be placed on real moss
Modeling classes always captivate preschoolers, especially when they make familiar objects that can be observed in nature or everyday life. Students in the middle group are already creating more realistic images of mushrooms, paying attention to the characteristic colors, shapes, and details. Children can organically complement the composition with suitable elements (grass, basket, berries). The main thing is to teach kids specific modeling techniques and inspire them to be creative.
Composition options based on theme
In the visual arts program for the middle group, mushroom sculpting is offered to children in October (after all, these are the same gifts of autumn as vegetables and fruits). The topic can be defined more specifically, for example, “Handsome Fly Agaric” or “Boletus”, focusing on the characteristics of a particular mushroom.
You can suggest a topic such as “Mushrooms for a hedgehog” (squirrels, forest animals). The teacher plays out a specific image of an animal in the motivational part of the lesson.
In addition, the children can sculpt mushrooms in the clearing. This can be individual (3-4 mushrooms on the grass) or a collective composition. In the second case, the teacher prepares a large base: it can be a sheet of A3 cardboard, painted green, artificial grass, moss, etc.
The clearing (the basis for collective modeling) is prepared by the teacher using cardboard, paper, artificial grass and other materials
Another version of the theme is “Basket with mushrooms.” Again, it can be played out as individual and collective work. The children can make small baskets where they will place their mushrooms (several pieces), or the teacher prepares a basket in advance (for example, from cardboard strips), and the children put their mushrooms there.
Each child builds a basket in the most convenient way
During the lesson you can also sculpt mushrooms and berries (fruits of the forest) at the same time. For example, on the cap of a large mushroom or next to it there may be a raspberry or a sprig of currant made of plasticine.