Short poems and quatrains about traffic lights for children
Our friend, the traffic light, has been helping children for a long time. He will explain the traffic rules to children without stress.
∞∞∞∞∞∞∞∞∞∞∞∞∞∞∞∞∞∞∞∞∞∞∞
Color green - Come in! Yellow - Wait a little. Well, if it’s red – Stop, my friend! Dangerous!
∞∞∞∞∞∞∞∞∞∞∞∞∞∞∞∞∞∞∞∞∞∞∞
The traffic light is shining red for us - Stop! You can't go, it's dangerous. Yellow and red are suddenly lit - We are standing, waiting for green. Do not immediately cross the green signal. Turn your head left and right before doing this: Make sure that there are no rushing cars on the left or right, and then walk calmly. Everyone will understand: you have become big.
∞∞∞∞∞∞∞∞∞∞∞∞∞∞∞∞∞∞∞∞∞∞∞
Three multi-colored circles: RED light - WAIT, and YELLOW light - STOP, my friend, GREEN light - GO! The traffic light gives advice on how to cross the road. A pedestrian in this matter cannot find a better friend!
∞∞∞∞∞∞∞∞∞∞∞∞∞∞∞∞∞∞∞∞∞∞∞
For order on the road, HE has been installed for a long time: Remarkably tall... What is this? - TRAFFIC LIGHT!
Blinks a RED eye - STOP! FREEZE like a sentry! YELLOW light warns: don’t step on the road! AND GREEN - DIE! The path is clear ahead!
∞∞∞∞∞∞∞∞∞∞∞∞∞∞∞∞∞∞∞∞∞∞∞
Listen and remember And always follow them. The RED light came on, Stop, baby, there is no way through. Look, the YELLOW light is on. Get ready, he says. And the light turned on GREEN. Come in, my scientist friend. Remember the rules of movement Like the multiplication table!
∞∞∞∞∞∞∞∞∞∞∞∞∞∞∞∞∞∞∞∞∞∞∞
A traffic light has three eyes. Well, remember them, my friend, Walk the streets so that soon you can do it on your own. That red eye... Be afraid of it! When it burns, there is no way. Flashing yellow - get ready! Green light - go!
∞∞∞∞∞∞∞∞∞∞∞∞∞∞∞∞∞∞∞∞∞∞∞
He stands at the Striped intersection, like in a sailor suit. The children were surprised at once: “Why does he have three eyes?” Red – stop all movement. Yellow is our respect. And the green light will light up, you can continue on your way. It has been called for a long time. Very simply - traffic light.
∞∞∞∞∞∞∞∞∞∞∞∞∞∞∞∞∞∞∞∞∞∞∞
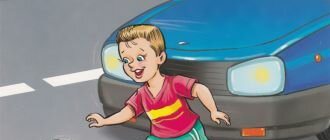
Fast cars are rushing. Rotating tires rub the asphalt. We need to go to kindergarten. How to cross the road? It has been helping for a long time, this is to make a traffic light: The yellow eye will light up - The transition is closed for you! The green light turns on - the pedestrian strives forward. Where the red light is on, the path is closed to all cars.
∞∞∞∞∞∞∞∞∞∞∞∞∞∞∞∞∞∞∞∞∞∞∞
“The most important one on the road,” my friends told me, “he has different eyes, one leg, and you can’t joke with him.” I was a little scared, hearing this conversation, but when I saw it, I guessed, It’s just a traffic light.
How to organize the process
First, you should prepare your work surface. The table should be as free as possible and the space should be bright. Make sure that the task is not too difficult and will be as age-appropriate as possible.
For the work of the little ones, you can immediately make blanks, or you can control the use of objects. You need to be especially careful with small parts and scissors.
For comfort, you can take a plastic cup, which will be convenient to trace on paper.
What might you need?
- Cardboard,
- Paints
- Scissors,
- Cotton sponges,
- PVA glue,
- Tassels,
- Colored paper,
- Scotch.
To make a fake interesting and original, you don’t have to buy expensive materials or specifically run to the stationery department for colored paper.
If it is not there, but there are pencils, markers and paints, you can decorate the product yourself, and the child will be even more involved in the process.
Poems about traffic lights by famous poets
If the light turns red, it means it is dangerous to move. The green light says: “Come on, the way is open!” Yellow light - warning: Wait for the signal to move. S. Mikhalkov
∞∞∞∞∞∞∞∞∞∞∞∞∞∞∞∞∞∞∞∞∞∞∞
The traffic light has three colors. They are clear to the driver: Red light - no passage, Yellow - be ready to go, And green light - go!
S. Marshak
∞∞∞∞∞∞∞∞∞∞∞∞∞∞∞∞∞∞∞∞∞∞∞
Stop, car! Stop, motor! Brake quickly, Driver! The red eye looks point blank - This is a strict traffic light. He looks menacing, lets me go further... The driver waited for a while, looked out the window again. The traffic light this time showed a green eye, winked and said: “You can go, the way is open!”
M. Plyatskovsky
∞∞∞∞∞∞∞∞∞∞∞∞∞∞∞∞∞∞∞∞∞∞∞
He has three eyes, three on each side, and although he has never looked at them all at once, he needs all the eyes. He's been hanging here for a long time And he's staring at everyone. What is this? (Traffic light)
Z. Mostovoy
∞∞∞∞∞∞∞∞∞∞∞∞∞∞∞∞∞∞∞∞∞∞∞
Where there is a noisy intersection, Where there are too many cars to count, Crossing is not so easy, If you don’t know the rules.
Let the children firmly remember: The one who walks across the street only when the light is green does the right thing!
N. Sorokin
∞∞∞∞∞∞∞∞∞∞∞∞∞∞∞∞∞∞∞∞∞∞∞
A rather strange citizen is walking down the street. They give him good advice: “The traffic light is red.” There is no way to go. There's no way to go now!
- I don't care about red lights! The citizen said in response. He walks across the street, not where the sign “Crossing” is, Throwing roughly as he goes: “Where I want, I’ll cross there!”
The driver looks with all his eyes: The gap is ahead! Hurry up and hit the brakes - have mercy on me!..
What if the driver said: “I don’t care about the traffic lights!” - And how did you start driving? Would the guard leave his post? Would the tram run the way you wanted? Would everyone walk as best they could?
Yes... where the street was, Where you were used to walking, Incredible things would happen in an instant!
Signals, screams and you know: The car is heading straight towards the tram, The tram ran into the car, The car crashed into a shop window...
But no: there is a traffic policeman standing on the pavement, There is a three-eyed traffic light, And the driver knows the rules.
O. Bedarev
∞∞∞∞∞∞∞∞∞∞∞∞∞∞∞∞∞∞∞∞∞∞∞
It’s easy to explain, whether you’re young or old: The pavement is for transport, The sidewalk is for you!
Walk across the street, pedestrian, where the sign shows you the “crossing”!
The traffic light is red! The path is dangerous - there is no passage! And if the yellow light is on, He says “get ready.”
Green flashed ahead - The way is clear, cross.
Where you need to cross the street, remember the simple rule: Look to the left first, look to the right later!
It’s stupid to think: “Somehow I’ll pass the tram track!” Never forget that the tram is faster than you!
V. Timofeev
∞∞∞∞∞∞∞∞∞∞∞∞∞∞∞∞∞∞∞∞∞∞∞
To help you pass the dangerous path, We burn day and night, Green, yellow, red.
Our house is a traffic light - We are three brothers, We have been shining for a long time On the road for all the guys.
We are three wonderful colors, You often see us, But sometimes you don’t listen to our advice.
The strictest is red light. If it's on fire: Stop! There is no further road, the path is closed to everyone.
So that you can cross calmly, listen to our advice: Wait! You will soon see a yellow light in the middle.
And behind him, a green light will flash ahead, He will say: - There are no obstacles, Go boldly on the path.
If you follow the traffic lights without arguing, you will get home and to school, Of course, very soon.
A. Northern
∞∞∞∞∞∞∞∞∞∞∞∞∞∞∞∞∞∞∞∞∞∞∞
Traffic lights, traffic lights - Red, yellow and green... Three cheerful lights on all the streets are burning Red, yellow and green - Leaves of ash and maple trees, As if to help the traffic lights, Also hanging on the fences. What is there ahead - the path is closed? Or is it on the way - the leaf is burning? Red light or aspen? Yellow light or willow? Autumn has confused all the light signals!
I. Zagraevskaya
∞∞∞∞∞∞∞∞∞∞∞∞∞∞∞∞∞∞∞∞∞∞∞
HE HAS only three eyes, but not all are open at once. If the red eye is open, it means he is angry - He does not give permission to move forward! Opens a yellow eye - Be careful now - Wait for the green color near the eye. And I saw it - right away you can go and go! And bon voyage!
T. Goette
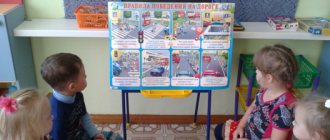
Basic road signs that a child should know about
Tell your child that signs are used on roads to make it easier for pedestrians and drivers to navigate. During walks, tell your child about certain signs, ask him to name some of them as he learns them.
Teach your child to get ready for the trip so that he has a normal amount of time left for a walk. Then he won’t have to run somewhere, he will be able to focus on what surrounds him and will not forget about the rules of the road.
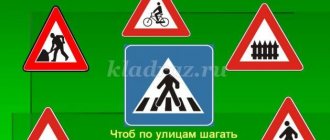
Start learning with the following signs
Pedestrian crossing sign.
An important sign for a child. This sign marks a place where pedestrians can legally cross the street (where they are likely to yield to cars, even if there is no traffic light). Usually installed in front of intersections, near bus stops, shopping centers and crowded places. There are three types of crossings - above-ground ZEBRA, above-ground and underground. The signs of such transitions are slightly different. In the case of an underground and overground passage, the person depicted on the sign is supplemented with a ladder - up or down.
Sign "Caution, children!"
Sign "Caution, children!" serves as a warning to the driver. It means that a child may run out onto the road, and the driver should slow down. Typically, such a sign is installed near schools and playgrounds. But children must know firmly: even under this sign you cannot cross the road if there are no markings and a pedestrian crossing sign.
No Bicycles Sign
This sign applies to cyclists and people on scooters and mopeds. The rule has no exceptions, so in order not to be a violator, you just need to walk and roll your bicycle, moped or scooter to your destination. The same applies to a scooter.
Sign "Pedestrian traffic prohibited"
The traffic rules set by this sign apply only to the part of the road where it is installed. Usually located in places where there are no curbs or sidewalks and the traffic is quite busy.
Road Works Sign
This sign is installed when repairing the roadway, cutting branches on the side of the road, etc. The child needs to be explained that they should not go to the place where repair work is going on, since if you find yourself in that place, you can get hurt, even if you just pass by.
Stop sign
“Stop” is a sign warning that there is a bus, trolleybus, or tram stop here. Only in this place can you get on or off transport . Stopping is prohibited in other places.
Pedestrian zone sign
Pedestrian zone is a section of the road where movement is permitted only on foot. It is important to show not only the beginning of the pedestrian zone (this is where the sign is located), but also its end. After all, where the pedestrian zone ends, the vehicle traffic zone begins.
Mosaic
Torn or carved mosaics are not that difficult to make. This process may especially appeal to those children who need to develop fine motor skills. What is the essence of the creation: you need to cut or tear slices (pieces) of leaves of three colors.
On A4 format we make markings for the child in the form of three circles, then take one of the prepared fragments, and the task is to fill as much white space as possible. This is not an easy task for kids, but for older children it is a very exciting task.
The traffic light itself symbolizes prohibition, preparation and movement. Red, yellow, green. Ban, wait, go. To the start, get ready, march! All this is just one of the few examples with which a teacher and a child can play in association.
conclusions
As you can see, the large-scale nature of such an idea as creating a simple traffic light can be very interesting and creative if you approach the issue outside the box. So, for example, you can create an entire layout, plan, or the simplest fake from scrap materials.
Everything depends on taste, color, availability of time and materials. Children should not be limited in their imagination, as this is an important element of learning.
Materials and tools for drawing
Before you start drawing a traffic light, you need to select the right tools and materials.
Depending on the drawing technique, you may need the following creative set:
- Simple pencils.
- Colour pencils.
- Colored felt-tip pens or markers.
- Watercolors or gouache.
- Oil pastels or wax crayons.
- Thin black felt-tip pen, marker or liner.
- Brushes of different sizes.
- Erasers.
- Palette.
For drawing a traffic light, two types of simple pencils are suitable - hard and soft (it is designated “), and for shading elements you can have a soft pencil with the designation “M” or “B” in your arsenal. Children are not recommended to use hard pencils marked “2T” or “2h” as they leave a very light mark and can tear the paper if pressed hard.
Traffic light drawing for children
In addition, a hard pencil is more difficult to erase, and the child often needs to correct the drawing. In addition to a pencil, you need to have a good sharpener ready, preferably with a storage container, and a small white eraser.
A traffic light drawing for preschool children requires a careful selection of tools for coloring. Colored pencils should also be soft enough, this will speed up and facilitate the toning process. It is more convenient for preschoolers to use pencils with edges rather than round ones; they are easier to hold in the hand.
It is best for a beginning artist to choose not professional, but “honey” watercolors. It is brighter and easier to put on a sheet of paper. Children need to be drawn to the fact that in addition to a small amount of honey, the paint contains pigment and other substances; moreover, honey is often replaced with glycerin or potato starch, so there is no need to taste the paint.
To draw a traffic light, the basic colors of watercolor and gouache are enough; the missing colors can be obtained by mixing.
However, it is imperative that the gouache set contains white color. For ease of working with paints, you will need a white plastic palette and a sippy cup.
You can color and make an outline not only with pencils, paints and felt-tip pens; wax crayons and oil pastels are well suited for this purpose. Pastel gives a more saturated color and is easier to draw with, but it stains your hands more and can be smeared with careless movement.
In almost any technique, the image of a traffic light requires clear contours - they can be made with an ordinary black felt-tip pen, marker or liner. There are only two requirements for a felt-tip pen - suitable thickness and quality (it should not leak).
Also, for younger students it is better to use washable markers. A more professional stroke can be achieved using a liner (also known as a liner or a thin marker), the thickness of the marker depends on the purpose of use, the most common stroke diameter is 0.6 mm.
It must be remembered that the liner is a permanent marker; moisture-resistant ink will be more difficult to remove from clothing, so children should use it under adult supervision.
To make the image of a traffic light beautiful and make drawing more convenient, it is important to choose the right paper:
| Paper density | Paper texture | Pattern type |
| Printing paper 70-80 gsm. m | Smooth, not glossy | You can draw with a pencil, felt-tip pen and crayons, but the drawing is not of very high quality, since you have to press on the felt-tip pens and crayons, and the felt-tip pen shines through the sheet and spreads |
| Paper for drawings and drawings 120–180 g/m2. m (standard landscape paper) | Slightly porous, ribbed | You can draw with a pencil, felt-tip pens, crayons, pastels and paints, but if you add too much water, the paper comes out in waves. |
| Paper for watercolors 170–850 gsm. m | Smooth, but not glossy, or textured (grainy) | Ideal for working with paints |
Master class: have fun with markers and pencils
Materials and tools:
- Drawing paper.
- Simple pencil (TM).
- An eraser.
- Thin black marker, felt-tip pen or liner.
Progress:
Before drawing, children need to be shown photos of real and drawings of cartoon traffic lights. Find out what the similarities and differences are. Please note that the funny traffic lights have a red signal light instead of a nose.
You can ask the children if they know the difference between a traffic light for pedestrians and cars, what is in the hands of a cheerful traffic light (a striped rod). It will also be interesting to discuss who needs the baton (the traffic controller who finds himself at an intersection when the traffic light breaks down).
The image of a traffic light can be created according to this plan:
- At the first stage, the dimensions of the image and the location of the traffic light on the sheet are marked with pencil strokes.
- Next, the main details are schematically drawn with a pencil. The body of the traffic light is a rectangle with slightly curved sides, as if the Traffic Light is sticking out its chest. Police cap - oval and rectangle. Lines mark bent arms. Instead of gloved hands there are ovals. A line is drawn down the center of the body to help place signal lights. Circles can be drawn by hand or using a template.
- At the next stage, the main lines are outlined with a black felt-tip pen or marker and the details are drawn. The most difficult thing for children is to depict a hand squeezing a rod. To make the process easier, you can consider your own fist with a clamped object. Then the secondary lines are erased. Older children and adults can draw directly with a marker without a pencil sketch; in this case, you need to start with those details that are on top of the rest. You need to draw in the following sequence - a cap with a visor, the front wall of the traffic light housing, signals and parts of the face, hands and gloves, the side wall and the baton. If there are errors, they can be corrected with correction fluid.
- Next, the traffic light can be colored with pencils and felt-tip pens. For the traffic light body, a simple pencil is suitable so that the color appears uniform; it can be rubbed with a cotton pad.
The drawing of a traffic light for children, presented in the master class, is suitable for drawing with both children and older children. Younger preschoolers can color an image prepared by adults, and younger schoolchildren can draw such a traffic light from scratch.
Traffic light made from palms
For this fake you will need colored paper. The hand should be outlined with a pencil, and then the child simply cuts it out. Three finished blanks of the desired colors can be fastened with glue, or a stapler or tape.
An alternative could be the interesting idea of placing colored palms on an A4 sheet. Having arranged them in the desired sequence, simply glue them onto the sheet.
Master class with watercolors
Tools and materials:
- Drawing paper (not glossy, thick).
- Simple pencil (TM).
- An eraser.
- Watercolor of primary colors.
- White gouache or white wax crayon (optional).
- Brushes (thin and medium thickness).
- Palette.
Progress:
Drawing a traffic light for children is always not only creativity, but also knowledge about life in the city. At the beginning of the lesson, you need to repeat the purpose of the traffic light, consider the difference between a traffic light for transport and pedestrians, and pay attention to the different ways of attaching traffic lights. Children will have to draw a hanging traffic light, but if desired, it can also be depicted on a stand.
Before drawing, it is advisable to consider different projection options using any small parallelepiped (for example, a box, boxes or a Lego cube). Using a specific example, children will see that when viewed from the side, two walls of the traffic light are visible, but if viewed from below, the bottom will be visible. When drawing, you can copy a sample or experiment with projections; this may be interesting for children over 7-8 years old.
A traffic light drawing for children is suitable both for introducing watercolors and for practicing skills. The difficulty of painting depends on the level of the students (for beginners, you can not focus on halftones).
Drawing is based on this plan:
- At the first stage, the dimensions and location of the traffic light are outlined with a simple pencil, and the wire and trapezoid of the housing are depicted. It is necessary to draw children's attention to the fact that the traffic light is deliberately made wider at the top than at the base, drawing attention to the burning red signal. This is an artistic design. You can not violate the rules of projection and draw a more realistic traffic light, taking the initial view from below or from the side.
- Next, draw the details with a pencil. Draw the side edge at an angle. Then signal lights are depicted. In accordance with the design of the design, the lights are lined up from largest to smallest one after the other with a slight offset to the right edge, as if they are being viewed from above. It is difficult for children to correctly track the change in size, so it is better to make three templates or select three round caps of different diameters.
- Next, a visor consisting of a wave and a semicircle is made above each signal.
- Then they erase the auxiliary lines and carefully remove all the crumbs from the gum.
- At the next stage, paint of any blue shade is laid out on the palette and a sufficient amount of water is added. The color should not be very bright. Next, use light strokes of a wide brush to paint over the background around the traffic light, without affecting the area around the red signal. The strokes are made in the direction from the silhouette of the traffic light. Then take a little red paint, dilute it heavily with water and tint the area around the red signal, simulating a glow. With a damp brush you can correct the smooth transition at the junction of two colors.
- Next, you need to wait 3-5 minutes for the background to dry. At this point you need to mix the colors for the traffic light body. Lay out the background color on the palette and add just a little black paint to it. Using a medium-thick brush, tint the front edge of the traffic light without touching the signal lights.
- Then more black paint is added to the background color and the side edge and visors are painted over. The top of the visor should be lighter. To emphasize this, you can run a damp, dry brush over this area several times. The inside of the visor can be painted with black paint.
- When the background has dried a little, start painting the signal lights. They should have light highlights in two places. This effect can be achieved in several ways: The classic approach for watercolors is to simply leave the highlights unpainted; for children this is a rather difficult task. You can also move a wet brush over the painted circle several times, but this technique allows you to make the color not so bright, but does not work well in spot application. Another option, which is easiest for children, is to apply highlights with white gouache on top. You can also draw highlights in advance with white wax chalk or pastels and paint over the top with watercolors, the chalk will show through the paint.
- When the image dries a little, the main lines are outlined with strokes of black paint. To do this, apply watercolor to a thin brush. Don't add a lot of water. Lines can overlap each other. There is no need for clarity as the black paint imitates pencil strokes.
A watercolor drawing of a traffic light can be an ideal option for children to practice different brush techniques and mixing paints.