Sea of paper
You will need: a sheet of blue double-sided cardboard, a simple pencil, scissors, colored cardboard, glue.
Master Class
- Fold a sheet of cardboard in half.
- Draw waves with a pencil and make cuts as shown in the image.
- Straighten the cardboard so that the waves alternate one on each side.
- Cut out small fish, jellyfish and algae from colored paper.
- Glue sea creatures to the waves.
- Make a boat out of paper and glue it to the top wave.
The paper sea is ready!
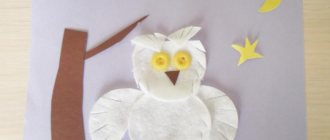
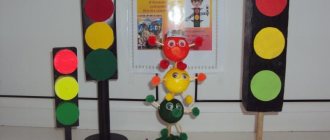
Winter craft Polar bear
The polar bear is another popular winter craft character. You can make a charming “polar bear” pendant from felt.
Felt polar bear
An original way to make a polar bear is to make it from pompoms.
White bear made from pompoms
Skilled needlewomen can sew a beautiful polar bear. How to do this, watch the video:
Underwater world in a bottle
You will need: plastic bottle, water, blue food coloring, sunflower oil, fish, shells, pebbles, stars, glitter, cocktail tube, funnel.
Master Class
- Fill a third of the bottle with water.
- Add a few drops of dye and mix it thoroughly with a straw.
- Throw shells, fish, glitter and pebbles into the bottle.
- Pour the oil into the bottle through a funnel.
- Close the lid tightly.
The underwater world in a bottle is ready! I recommend watching this video!
Aquarium with fish
You will need: a cardboard box, a simple pencil, a ruler, paints, a brush, scissors or a stationery knife, colored paper, markers, threads, glue, pebbles, shells.
Master Class
- Paint the inside of the boxes blue and the outside white, then leave to dry.
- Draw the outline of the glass using a pencil and ruler.
- Cut out the "glass".
- Draw or print bright fish, then cut them out.
- Cut out the bottom and seaweed from paper, then glue them on.
- Glue shells and pebbles to the bottom of the aquarium.
- Glue the threads to the fish, and use a needle to thread them through the top of the box and secure the knot, then hide the knots by gluing a strip of white paper.
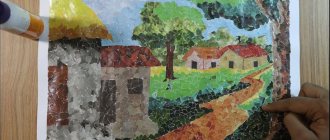
Winter forest
Making panels is the most common type of creativity. In most cases, a natural theme is proposed, and the child comes up with his own story.
It makes more sense to start by making a simple creative work on the theme of a winter landscape.
Read also: Pumps with jeans (33 photos)
Required:
- Stationery glue;
- Blue cardboard;
- Green dye;
- Rice cereal;
- Medical cotton wool;
- Simple pencil;
- Colored paper.
Work progress:
- A line is drawn on a cardboard piece of paper, indicating the line between the blue sky and white snow.
- Then they draw diagrams of oval or triangular trees, similar to a Christmas tree.
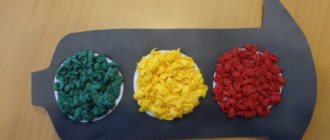
- Next, you need to mix a small spoon of water with a drop of green dye and pour the resulting pigment into the bag.
- Half a glass of rice is poured into a bag with pigment and mixed until the grain is uniformly colored. Each part is smeared with glue.
- After this, the green mass is laid out on tree diagrams and left until completely dry.
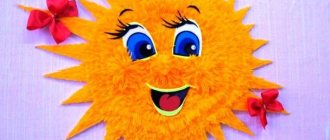
- All that remains is to stick on pieces of cotton wool that imitate snow and cut out a bright sun from bright yellow paper.
The winter forest craft is ready!
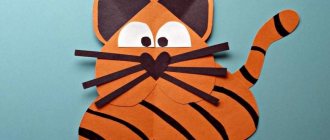
water kingdom
You will need: blue plastic lids, colored paper, a sheet of blue cardboard, PVA glue, plastic eyes, glitter, white paint or line, scissors.
Master Class
- Cut out triangles from colored paper to represent fish tails.
- Glue them to a sheet of cardboard.
- Glue the lids and eyes.
- Decorate the fish with glitter.
- Draw the bubbles in white.
- Cut out seaweed from green paper and glue it on.
The water kingdom is ready!
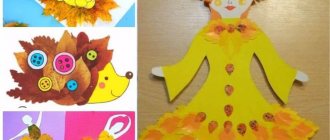
Application for artistic and aesthetic development “Raindrops”
Olga Armyaninova
Application for artistic and aesthetic development “Raindrops”
• teaching children how to glue a strip of paper into a droplet ;
• develop the creativity of students;
• expand children’s figurative ideas, develop the ability to create images of the same objects in varied ways;
• continue to develop application ;
• evoke a feeling of joy from the created image;
• develop the ability to apply acquired skills and abilities in various methods of application .
Speech development :
• enrich your vocabulary;
• develop speech motor skills - the motor apparatus;
• develop speech , speech breathing;
• develop memory and attention;
• continue to teach children how to form common sentences.
Cognitive development :
• continue to cultivate a love for flowers, nature, a careful and caring attitude towards them;
• teach children to distinguish and name flowers and grass;
• to form in children the concept that plants cannot exist without water;
• learn to recognize by appearance;
• consolidate the names of natural phenomena;
• clarify and expand knowledge about why water is needed;
• formation of a holistic picture of the world, broadening one’s horizons;
• cultivate aesthetic taste, love and respect for nature.
Social and communicative development :
• develop the ability to determine mood, cultivate empathy, group cohesion;
• learn to manage your activities, organize your work independently, and perform various actions.
Physical development :
• Develop expressiveness of movements (facial expressions, pantomime)
.
Artistic and aesthetic development:
• develop children's creativity and visual abilities;
• strengthen the skills of safe use of glue;
• develop fine motor skills and creativity;
• developing raindrops from paper :
• introduce the technique of folding paper with a loop;
• learn to glue a loop, choose a place on the base yourself;
• expand children's imaginative ideas.
• examining illustrations depicting flowers, clouds, the sun and the sky;
• reading and memorizing poems about flowers;
• examination of illustrations, clarification of names;
• highlighting structural features and appearance, didactic game “Collect a flower”
;
• reading fiction ;
• various types of musical activities - singing, listening to music.
• conversation, playing out the fairy-tale character Droplets .
Equipment and materials:
• pictures of flowers, clouds, sun and droplets ;
• audio recordings of musical works with the sound of rain , thunder;
• easel, Whatman paper with the image of a clearing with flowers;
• flowers on the field, watering can, Whatman paper with “flowerbed” applique
, a cloud of cardboard, strips of colored paper, glue, napkins.
• search activity will develop;
• master the ability to analyze work;
• a positive attitude towards work will be formed;
• constructive, cognitive, creative and artistic abilities ;
• the creativity of pupils in conveying the image will develop;
Marine life
The underwater world is so rich in living organisms that scientists are still discovering new species. We present to your attention step-by-step master classes that you will find in the photo gallery. Get inspired and create the most original inhabitants for your craft.
Follow the step-by-step master classes, fantasize, experiment and you will undoubtedly succeed! Create masterpieces slowly and enjoy the manufacturing process. Handicraft is a hobby that you should enjoy, and its ending will bring joy and surprise those around you.
Volumetric applique “Fish in an aquarium”
Bright and nimble waterfowl attract all children, so they will definitely love the voluminous applique “Fish in the Aquarium”. But the fish themselves in this work are quite complex. Therefore, if children are small, it is better to make simple multi-colored fish in a flat form. You also don’t need to make a very small aquarium, since making small fish using this technique is quite problematic, especially for children.
Recommendations
To make it interesting for your child to work, and to make the process real fun, you should follow some recommendations:
- You need to choose colorful colors to make the craft bright and colorful.
- The difficulty level is selected according to the child's abilities.
- It is advisable to use stencils that guarantee quality.
You can make a real aquarium with your own hands if you use regular colored paper. Various colored fish will become a real decoration for children's crafts. In this case, you can use completely simple manufacturing schemes and creation algorithms.
How to make an aquarium out of paper?
Draw a round aquarium on a white piece of cardboard and cut it out. Don't make it very small, because small voluminous fish are very difficult to make.
Place the aquarium on the blue paper and circle it. And then draw a parallel inner line next to it, since the water should follow the contour of the aquarium, but be slightly smaller. Draw a wavy line at the top. Cut out the water.