Types of applications
Before you start learning how to make beautiful appliqués with your own hands, you should understand what types of this technique exist.
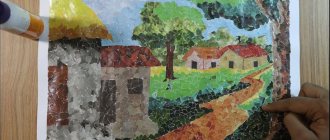
- Mosaic applique - first the contours of the image are drawn, then parts of geometric shapes and different sizes are glued inside it.
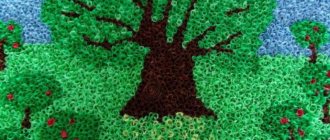
- If you twist colored paper into a spiral, the technique is called quilling.
- For symmetrical applique, before cutting out the part, the paper blank is folded in half.
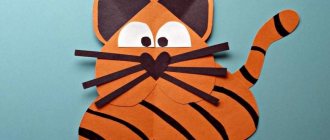
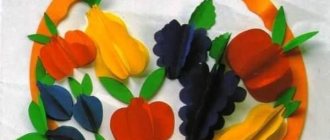
- A multi-layer applique is one that is created from parts of different sizes, small ones are glued onto large ones.
- If you trace the palm and use this figure as a base, you will get a palm applique.
Owl creation technique
- Take cardboard - it will be the base.
- Glue a twig cut from colored paper.
- Now paint the background with paints, you can paint with your fingers.
- Glue clouds, moon and other background elements as you wish.
- Using the templates, trace the outline of the owl on the branch with a pencil.
- Tear off pieces of paper and glue them inside the outline.
- Make a second layer on top of the first.
- You can draw the eyes and beak with felt-tip pens or make them out of colored paper and glue them on.
What paper is suitable for appliques?
Of course, first of all, to create a paper applique you will need the paper itself. Absolutely any paper is suitable for creating an applique, since everything depends on the work itself.
It will be best if the paper is not too thick and two-color in its characteristics.
The paper may be thick, but it is worth taking into account the characteristics of a particular craft.
Firebird
The process of creating such a craft perfectly develops the imagination, because the character is magical and very bright.
- To make the head and body, cut out a ten-centimeter square piece from colored paper.
- Form a square into a triangle and bend along the larger side.
- Now expand the square - it is divided into four sectors.
- To get the body of the bird, glue both edges overlapping.
- The belly is the larger side, and the smaller side is the back.
- To create a chic ponytail, cut nine nine-centimeter strips - curl them or leave them straight.
- Glue three stripes to the back, six will serve as material for making wings also on the back.
- You can also make both the tail and wings using the palm technique.
- You can cut out eyes and other small details from colored paper or draw them.
- Attach the bird to the background on a branch of colored paper, decorate the background by painting it and gluing parts from colored paper.
Crafts made from dry leaves
To create a firebird from dry leaves, prepare dry leaves, a glue gun, paint, and a sheet of cardboard.
- For the background, paint cardboard or use colored cardboard.
- Spread the paper and carefully arrange the leaves, and then color them.
- Now dry the leaves. Apply hot glue to the cardboard and glue colorful leaves.
- To do this, there must be an adhesive layer on the cardboard sheet, as well as spot-applied glue on the leaves.
- First, form the shape of a tail, then a larger leaf that stands out in shade - this will be the body of the firebird.
- Paws and eyes can be made from colored paper or cardboard.
- The magic bird is ready!
Leaf craft
Making a firebird from leaves is not at all difficult, just take:
- Dry leaves;
- Glue;
- Paints;
- Glue gun;
- Cardboard for the base.
The first step is to prepare the cardboard for the base. You can paint it the color you want or choose a pre-colored one.
When the paint on the leaves has dried, glue them to the base. Apply a thick layer of hot glue to the cardboard, and also put dots on each leaf so that it sticks well. We lay the leaves on the cardboard as intended and press well. You can use a napkin to remove excess glue.
It's important to remember that hot glue hardens very quickly, so if there are visible marks left, you can paint them with the same paint as the leaves to help the colors blend together.
The next step is to create the body of the bird. For it you will need a dry leaf, different in color from the ones we chose for the tail. We glue it on top of the tail, and also press it tightly with a napkin so that the body sticks well to the leaves.
Cut out the legs and eyes from a dark piece of paper or cardboard and glue them to the body of the firebird.
Migratory birds
Materials you will need:
- Sheet of cardboard,
- colored paper,
- And also scissors
- Paints and glue.
Operating procedure:
- A piece of cardboard is the sky.
- Color it or get a colored one.
- Cut out clouds from white cardboard and glue them to form a background.
- Draw and cut out the birds and then glue them to the cardboard.
- Draw the details - eyes, feathers, beak, and also add trees and other elements as desired.
Paper birds
You can make an applique of migratory birds from paper using:
- Colored paper;
- Scissors;
- Glue;
- Paint;
- Cardboard for the base.
First, let's prepare the background. It will be blue skies with some clouds. To do this, take blue and white cardboard. We cut out small clouds from white cardboard and glue them to the blue background.
Next we make birds from paper. To do this, first draw silhouettes of flying birds on paper as shown in the pictures. The birds for your application can be anything - starlings, swans or others.
When the birds are cut out of colored paper, glue them to the cardboard. The finished picture can be supplemented with trees below, cut out of paper or drawn by hand.
You can also make an applique “Birds on Branches” from paper.
You need to take colored paper, scissors, glue and cardboard for the base.
From paper we cut out the details of the bird: body, tummy, wings, eyes, legs and beak. We also cut out a branch on which the bird will sit. When the parts are ready, glue them in order.
First, glue the branch to the cardboard, then the torso and tummy. Then paws so that the bird is sitting on a branch. Next we glue the head to the body, wings, place the eyes and beak. You can decorate the space of the painting at will with the sun, berries on a branch, clouds, and so on.
Chickens
In order to make a craft with the image of funny chickens or other poultry, take a sheet of colored cardboard, cotton pads, a brush with paints, as well as glue and plasticine.
- The entire cotton pad will play the role of the head, as well as the body of the bird; if you separate half of the disc, you will get wings or a tail. Pre-paint them with paints and then glue them to the cardboard.
- All other elements (paws, eyes, beak) can be made from plasticine.
- To create a goose or chicken, you need to make a printout with a picture of a bird, and also stock up on a piece of cotton wool and PVA glue.
- Roll cotton balls to fill the image.
- You can also add colors to your work - paint some elements if necessary, add details.
- This way you will get a bird with plumage, the effect of which is created by cotton wool.
Feather birds
Feathers also make great bird crafts! For example, a craft made from a pine cone, paper and feathers will be an excellent interior decoration.
In order to make such a craft, we will need:
- Cone;
- Multi-colored feathers;
- Thick paper for making the head and paws;
- Glue gun.
Before starting work, the pine cone must be dried in the oven for 20-30 minutes. This will get rid of excess moisture and insects inside.
The dried cone can be painted with paints, or you can leave the natural color and texture. We glue the cut out parts of the paws to the bottom of the cone, and also glue the head to the pointed end of the cone. You can glue toy eyes to your head, or you can draw them yourself. Now all that remains is to attach the feathers. We carefully place them on glue. The more feathers there are, the more magnificent the bird’s “hair” will be.
Related article: Topiary from fruits and berries: master class with photos and videos
There is also another way to make a bird from feathers.
We will need:
- 2 sheets of cardboard (white and any color);
- Glue;
- Scissors;
- Feathers.
Cut out the silhouette of a bird from white cardboard. In our case, this is the firebird. The silhouette, starting from the tail, must be covered with feathers. You can stick them on top of each other. Then we glue the cutout with feathers to colored cardboard. The painting can be framed and will be a great decoration for any room in your home!
Cockerel and hen
- Take a white sheet of paper, a brush with paints, images with a pre-printed chicken and cockerel, colored paper, napkins of different colors, and you can’t do without a hole punch, glue and scissors.
- Prepare your future background: for this you need to paint a white sheet of paper and draw on it the background elements that you come up with.
- Illustrate the earth as well as the sky in your work.
- You can use colored paper to create images of a house, fence and other details.
Now cut out the birds.
- You can move on to decorating the characters of the craft - cut out feathers from colored paper, twist lumps from a napkin, a hole punch will be useful for making confetti.
- Glue the resulting plumage, now you can glue the birds to the background.
- If you wish, you can create a large work in a group, which will include an entire poultry yard.
There are many techniques for creating applications with images of birds. Using those presented in this article, you will create unique paintings that will decorate your child’s room, and the process of creating this masterpiece will give him a lot of positive emotions.
Also, all these techniques can be safely used for classes in kindergarten, all of them will develop the imagination of children and teach them to be neat, and will give them experience in running their own small project.
Application “Birds on the branches” outline of a lesson on applique, modeling (middle group)
GCD applique “Birds on branches”.Teamwork (middle group)
Goal: - to teach children to make an application in the form of a bird; - consolidate the idea of their name, structural features, body shape, wings, tail, distinctive features of different types of birds; - to cultivate love and caring attitude towards birds; - strengthen the ability to carefully use glue; -develop fine motor skills of the fingers, the ability to listen and hear birds singing; -develop observation and attention; - practice correct sound pronunciation; develop a response to a verbal signal.
Equipment: template made of colored paper: body, wing, tail, beak; oilcloth, brushes, glue, napkins. Image of birds: tit, sparrow, woodpecker, swallow; image of a tree. Audio recording of birds singing. Toy steering wheel.
Progress of the lesson: -We go on a trip to a forest clearing. We'll go by car. How does he signal? (Children enter the group in which images of birds are pre-attached) -Listen, guys, who sings so beautifully? (Birds) -Where did they hide? Let's find them and see what kind of birds flew to us. This is a magpie. It is also called the white-sided magpie because its sides are white. This is a little sparrow. Nimble jumper. How does he tweet? Chick-chirp! -What kind of bird is this? In a red riding hood, he knocks and knocks on wood with his sharp beak. (Woodpecker). -And this is a titmouse - she has a yellow belly. All these birds live next to us both in winter and summer. - But this bird flew to us from the south. This is a swallow. It flies very quickly, catches midges, mosquitoes and other harmful insects. -Look, guys, what is this unusual bird? Where did she come from here? I think I know: this bird was made by children from another kindergarten and sent to see the world. Is it really beautiful? -Yes! - Do you want me to teach you how to make such beautiful birds? And when you do them, we will let them fly to other kindergartens to visit the children. -Let's first figure out what the bird will consist of. I will show, and you name the parts. - Head. -Which smoothly passes into the body. - Wing. (why do you need a wing?) -Tail. (why do you need a ponytail?) -Eye. (why do you need an eye?) -Beak. (why do you need a beak?) - Now show me quietly how birds fly? The birds flew, flew around and sat down quietly at the tables so as not to make noise in the forest clearing. -Look at what lies on the table in front of you. 1. A twig depicted on a leaf. 2. The body of your future bird. 3. Wing. 4. Tail. 5. Round little eye. - The first thing we do is put a twig in front of us. Then we smear the body with glue and “plant” the bird on a branch. The bird's head is at the top, and the tail will be at the bottom. Glue the wing and glue the tail. Then glue the eye and beak. -Our birds are ready, let's put them on a common tree, and they will sing clear songs for us. -Oh, how loudly the birds sang, what do they want? I think I know. They invite us to play the game “Sparrows and the Car.” (game) - What did you learn to do in the forest clearing? — Did you like our trip?
-It's time for us to return home: wave goodbye to the birds and
we get into the little car.
