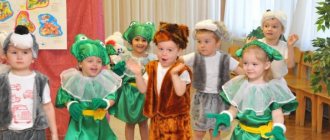
Drawing on the theme “Beautiful Bird” in the middle group of kindergarten
Birds are representatives of wildlife that are familiar to children from an early age through fairy tales and personal observations. These animals differ in plumage, size, and habits, so every boy or girl will be able to find their favorite breed among them, which they want to portray.
One of the simplest and most interesting drawings"
The purpose of drawing on the theme “Beautiful Bird” in a preschool educational institution
The main goal of this event is to develop children's creative abilities and gain skills in individual and group work.
Example of lesson notes
- Introducing children to the topic of the lesson;
- Distribution of additional materials;
- Reviewing with students diagrams, templates, illustrations of what they need to draw;
- Step by step drawing;
- Discussion of the work done and summing up the results.
Summary of GCD for drawing in the middle group “Painting clay birds”
Objectives: 1. To develop the ability to independently compose a pattern from the elements of Dymkovo painting (dots, circles, rings, wavy lines. 2. To expand and deepen children’s knowledge about the Dymkovo toy. 3. To consolidate the color combinations characteristic of Dymkovo painting. 4. To foster interest in Russian folk art. Vocabulary work. Active vocabulary: fair, young lady, goat, ram, horse, turkey, pattern, rings, circles, dots, birds. Passive vocabulary: honest gentlemen, mountain spurs, Dymkovo toys, perky, peddler, workshop, box . Materials. Demonstration material: illustrations, Dymkovo toys, boxes. Handouts: clay birds for each child, coasters, palette, gouache, napkins, tassels, aprons and sleeves for each child. Preliminary work. Examination of illustrations depicting Dymkovo toys, story about the village of Dymkovo, about the craftsmen, looking at Dymkovo toys.
Educator. Guys, we have guests today, let's say hello to them. Children. Hello. Educator. Look guys in our group it’s beautiful like at a fair. Peddler.
Hey, honest gentlemen! Come join us here! How do we have containers and bars, all sorts of different goods. Clay horses race on whatever stands they have, And you can’t hold on to the tail, If you let the mane go. Across mountain spurs Across the roofs of villages A red-legged, yellow-horned clay deer rushes. These birds are vocal and elegant like calico! Whoops, whew, whew, whew!
Fu-ti, fu-ti, I’m looking at the nest.
Educator.
Here, in a bright pattern in spring coloring, the craftsmen's features remain: Sudden sadness and light fun, which are simple in appearance.
Today we went to the fair. Who knows what a fair is? Children. A fair is a big auction that is held in one place and at the same time with fun and entertainment. Educator. At the fair, people buy goods and have fun. It’s not for nothing that people say: “The noise is like at a fair.” When were the toy fairs held? Children. Toy fairs were held in the spring. Educator. List what toys you see at our fair? Children. Goat, ram, horse, young lady, turkey. Educator. What material are they made of? Children. These toys are made of clay. Educator. What are these toys called? Children. Clay. Educator. Let's remember where these toys were made? Children. Village of Dymkovo. Educator. People lived in the same village. When it was cold outside and the winter frost froze the ground, the stoves in the houses flooded, smoke enveloped the roofs, so much so that nothing was visible. One smoke. So they named the village Dymkovo. The adults in that village worked from morning until late evening: they dug the ground, prepared food, herded cattle, and the children joked, played in the meadow, and sang songs. They didn't have toys like you. And the adults began to think: how to please the children. They collected clay from the river bank, sculpted various funny figures, fired them in the oven, covered them with chalk diluted in milk, and painted them. This is how Dymkovo toys appeared. Bright, cheerful, playful - children loved them. Look at our toys and tell me what mood they create? Children. Fun. Educator. How did the masters convey to us a joyful mood? Children. The toys are bright and light. Educator. Let's guys take a closer look at them and admire the bright toys. Tell me, what colors did the masters use to paint Dymkovo toys? Children. Yellow, blue, red, gold. Educator. On what background are the elements of the painting located? Children. Bel. Educator. What patterns are the toys decorated with? Children. Rings, circles, dots. Educator. He picks up a toy and asks: “How are the patterns arranged?” Children. In rows. Educator. What large element is found in the pattern of each toy? Children. Ring. Educator. What is the smallest element found in the toy's pattern? Children. Dots. Educator. What bright, cheerful, playful toys we have at the fair. There was also fun at the fair. Now we will also have fun and play the game “Carousel” .
Barely, barely, barely The carousel was spinning And then, then, then Everybody run, run, run Quiet, quiet, don't run, Stop the carousel One, two, one, two - So the game is over.
Did you enjoy riding on the merry-go-round? Oh look, what a sad peddler. What happened to you, tell us. Box I brought toys as gifts for the kids, but they were so sad. Your toys are funny, colorful, playful. And my toys are sad, how will I give them to the kids? Educator. Guys, let's think about how we can help the peddler? Children. Paint the toys. Educator. Let's turn into Dymkovo masters and paint clay birds. “One, two, three times we turned into Dymkovo masters.” And here is our workshop and work clothes. Let's put on our work clothes and get to work. Take your jobs and, like real masters, we will paint birds for kids. Don’t forget that you need to hold the brush correctly and choose the right elements of the pattern, and you, a peddler, join and help our masters. (In the process of painting birds, provide individual assistance to those children who need it. Approve those who independently complete the task.)
Admire how beautiful, cheerful, playful, colorful birds you have turned out to be. This is why people love the Dymkovo toy. Now guys, let’s put the birds in the peddler’s box and turn into guys again. “One, two, three times we spun and we turned into children.”
Thanks guys for the beautiful birds. And now I’ll go to the kids and give them beautiful birds and tell them what real masters you are. Goodbye guys, goodbye dear guests! Educator. Goodbye, come and see us again.
The sun has set. Our fair has closed.
Guys, where were we today? What did you see? What did you do? We did a good deed today. We painted birds for kids: How beautiful they are. Well done boys. Today we visited the Dymkovo masters again, and you did a very good job. Guys, let's say goodbye to our guests. Children. Goodbye!
Materials and equipment needed for the lesson
Before starting the lesson, you need to prepare all the materials that will be needed during the lesson. They can be divided into 2 categories:
- Demonstration. Illustrate what children need to do. Since the goal of the lesson in the middle group is to draw a beautiful bird, it is necessary to show this animal. This can be done using a computer and a projector connected to it or illustrations from books.
Note! Children should see not only the familiar birds that live in Russia (sparrow, waxwing, woodpecker, owl), but also exotic ones (kiwi, peacock, flamingo). This will help the children realize how diverse the world around them is.
You can give children coloring books as practice."
- Handouts. Necessary for drawing. These include A4 drawing paper, pencils or paints, brushes and sharpeners, and water in special glasses. If desired, you can distribute templates, but it is better for children to learn to draw on their own.
Important! Give each child a cloth with which they can dry their brush. The fabric will also come in handy if someone gets dirty with paint, which often happens even among adult artists. If the purpose of the lesson is to draw with pencils, then you need to distribute an additional piece of paper that can be used to shade hard lines. Paper is also needed to prevent the material from imprinting on their hands, which children can place directly on the drawing.
Modern easy beautiful dances for girls
Pencil drawings step by step of a bird in flight
Drawing birds is a fun activity. Not every person knows how to draw a bird. Many people think it is difficult. In fact, drawing a drawing of a bird in flight with a pencil is not difficult for beginners or even children if you do it step by step with the help of samples and templates. It's easier to draw the outline of the bird first, and then draw the birds' feathers along the surrounding outline.
Drawing a bird is a task that often confronts children and their parents, which is why it is very popular. Using visual lessons and acting step by step, step by step, you can make a high-quality and clear drawing. After several practices of drawing a bird, you will get better and better.
Next, we suggest looking at pencil drawings to sketch a bird in flight.
Source: https://BipBap.ru/kartinki-dlya-srisovki/risunki-karandashom-poetapno-ptitsa-v-polete-28-foto.html
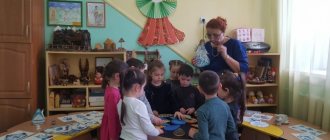
Preliminary work with children, discussion of the topic
Before moving on to the main part of the task, you should make sure that the children have a complete understanding of birds. To do this, you need to show them these animals live. If it is spring or summer at the time of the lesson, then you can go outside, because birds are especially active during this period. If it’s winter, when many birds go south, you have to be content with pictures or stuffed animals. You should also tell children about different types of birds, among which are:
- Migratory;
- wintering;
- domestic.
It is also necessary to talk about the diet of birds: mosquitoes and other insects, seeds and fruits. To captivate children even more, you can tell children fairy tales about these animals, ask them to guess riddles about birds, and also talk about interesting expressions like “small bird.”
Physical education minute
To prevent children from getting bored, physical education sessions must be held once an hour. If the room is large and spacious enough, then you can perform several dance moves to funny short songs.
Note! You can find songs about birds and invite children to perform flapping movements to the music, similar to flapping their wings. If the class is not very large, then you can do eye exercises.
Physical education for birds"
Practical part of the lesson, drawing
Before starting the lesson, the teacher needs to decide on the drawing technique and materials. There are several types that young children can quickly master:
- Drawing with pencils: using thick and thin lines, mixing colors, shading.
- Watercolor: painting in one or more layers, mixing colors, using brushes of different thicknesses, adjusting the transparency of layers.
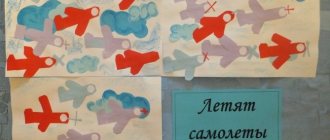
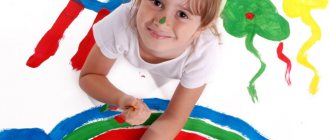
- Gouache: Layering different colors on top of each other.
Note! When using gouache, you can paint without brushes. To do this, you can ask the children to cover their hand with paint and apply it to a blank sheet, and then give free rein to their imagination. Such a drawing is not only faster, but also more interesting, because children will have to improvise and figure out how to make a bird out of their hand. For example, the bent thumb can be the head of a bird, and the other four can be wings or a tail.
Drawing with a handprint"
Musical accompaniment
To prevent children from getting bored, you can play music in the background. Since the topic of the lesson is “beautiful bird drawing in the middle group,” then choose the singing of birds. In this case, you can put different votes, asking you to guess who it belongs to.
The theme “Spring” in drawing classes in junior groups of preschool educational institutions
Step by step drawing process
Before you begin the creative process, you need to show the children a sample of the drawing that they have to complete. It is better if the teacher makes it with his own hands, so that the children can see the finished drawing and what it should look like.
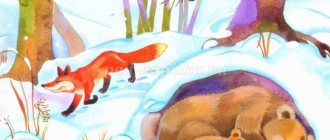
The bright bullfinch is familiar to every child."
A short summary of drawing with children:
- Schematically depict simple shapes that will be the head and body of the bird. These will be a circle and an oval, respectively.
- Connect the head and body using curved lines representing the neck. Draw legs and wings to the body.
- Go to the head: draw the beak, eyes, crest (optional). Children should be given freedom at this stage, let them choose for themselves what type of bird their bird will look like, be it a penguin or even a rooster.
- Trace the contours with the necessary materials, and then untwist everything else.
- Draw plumage and other decorations on the bird.
Important! You can offer to draw clothes or other elements typical of people on the bird. This will not only complement the drawing, but will also help the child develop thinking, because he does not just give the animal human traits, he wants to highlight something in its character, i.e. thinking about creating a complete image. For example, if a child draws luxurious decorations for a bird, then he wants to emphasize that this bird is beautiful, and if he gives it a book in its paws, then this means that it has remarkable intelligence.
How to draw a bird with a pencil: step by step for children
Drawing a bird is a task that often faces children and their parents. Sparrows, crows, jackdaws, nightingales, bullfinches, eagles, tits and other birds are common objects in children's albums. There is also room for unusual characters - firebirds and Angry Birds. However, everything is not as difficult as it sometimes seems for beginning artists. Using visual lessons and acting step by step, step by step, you can make a high-quality and clear drawing. After several trainings in drawing birds, the child will get better and better.
Step by step bird drawing lessons
Bird drawing lessons with step-by-step photos for beginners will help artists master the art of creating birds on paper.
Wintering bird: drawing a sparrow
Among wintering birds, the most popular are sparrows. Creating a drawing of such a bird is quite simple if you proceed in stages.
- You need to draw an elongated oval. This is the base of the bird's body.
- At the top of the workpiece you need to draw a figure with rounded contours. This will be the head. Several straight lines are drawn below. This is the tail of a wintering bird.
- Next, the beak is clearly drawn.
- Then you need to use smooth contours to create the outline of the breast, wings and make the eye.
- You need to draw the sparrow's legs with a pencil.
- All that remains is to color the drawing using colored pencils or felt-tip pens. If desired, you can use paints.
Bird in flight: drawing a seagull
- The process of drawing a bird in flight is much simpler than it seems. Even a child can cope with the task. First you need to draw a circle, which in the future will become the head, and the body of the bird. The bottom and top of the body should be a little sharp. There is no need for roundness here. Then the eye and beak are drawn, after which the contours of the circle must be erased with an eraser.
- Now we need to draw the span of the flying wings and the tail. The wing, which is located closer to the right edge of the paper sheet, should be much larger and longer than the second and the body. No need to grind!
- Next you need to finish drawing the paws and wings. The first ones need to be depicted folded tightly to each other.
- Then you need to draw lines that will make the thigh. To do this, the contour is drawn from the seagull's foot down. Next, the feathers on the tail and wings of the bird are depicted.
- It is necessary to remove all unnecessary contours.
- All that remains is to draw the shadows. The wings of the bird in flight should be made almost black and the underside of the seagull should be greatly darkened. Plus, a shadow also falls from the wing on the body. On the second wing, located closer to the left edge of the sheet, you should slightly outline the outlines of the feathers along the entire length. Similar contours need to be made on the body and around the head.
Questions for children based on their drawings
You should not finish the lesson immediately after drawing. Children should be encouraged to talk about what and why they drew. You can give the guys a little time to create a full-fledged history of their bird, give it a name, come up with a breed if one does not exist.
You can also ask the children whose bird is the most beautiful and why. But with this task you need to be very careful, because you cannot single out anyone, and you should not deprive them of attention. Some can be praised for their drawing technique and accuracy, some for their unusual story, and some for their successful combination of colors and realism.
This lesson will introduce children not only to a whole section of wildlife, but will also help develop their creative and social skills. For these reasons, art lessons should be taught as early as possible so that children from an early age are introduced to the broad concept of “beauty” and learn to work in a team.