Application "Umbrella" made of paper
The task is simple and exciting, suitable for younger preschoolers, great for developing thinking and creative abilities, and fine motor skills of the fingers. To work, prepare a landscape sheet, colored paper and any drawing media: felt-tip pens, watercolors.
Here's how to create the paper applique “Autumn Umbrella”:
- Fold the album paper in half to make a book.
- Cut a rectangle out of colored paper and make an “accordion” out of it.
- Squeeze the accordion with your fingers in the central part. You will get a “bow”.
- Bring the edges of the “bow” on one side towards each other and glue them together. You will get a “fan”.
- Glue this “fan” with its free edges to the book so that when it is closed it shrinks, and when it opens it unfolds. Glue just above the middle of the sheet.
- Next, realize your creative imagination: draw on the handle of the umbrella with felt-tip pens, depict a girl or boy walking under this umbrella. Use watercolors to draw autumn clouds, rain, puddles.
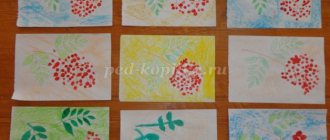
Application “Umbrella with autumn leaves”
This applique is so original and beautiful that it deserves to be hung on the wall in a frame. An older preschooler can handle most of the work on his own, but a toddler needs the help of an adult. To work, prepare a set of colored paper, decorative cardboard for the base of the composition, office glue, compass, a simple pencil, and scissors. Find patterns of maple or other leaves.
How to create a three-dimensional application “Umbrella” - detailed instructions:
- Draw a circle on a colored piece of paper with a compass. It can be any size, but not small. Using a pencil, divide the circle into 6 equal parts. Cut out 4 of them.
- Twist the resulting 4 triangles with an arched base into fairly narrow cones.
- Glue the cones to the base, bringing their tops together into a single point. And the bases should be directed upwards and slightly obliquely.
- Decorate the tip of the umbrella with a small triangle. Cut out colored paper and glue the remaining elements: rod, handle.
- Cut out leaves in autumn colors according to templates: red, yellow, red, burgundy.
- Insert the leaves into the cones and secure with glue. Glue only the middle of each leaf, let the edges remain protruding: this will add volume to the composition.
Progress of the lesson:
Educator: What time of year is it now? (Autumn)
-What happens in the fall?
(showing illustrations to help children)
- Let's go with you on an autumn walk.
What should we put on our feet so as not to get them wet? (Boots)
- Just imagine, you and I are walking and suddenly. - “drip-drip-drip”
)
– On the leaves drip-drip-drip, on the palms drip-drip-drip
The rain hits slowly at first, then harder and harder. (the teacher knocks at different tempos and volumes )
– What do we need to hide from the rain ? ( umbrella )
– And today we will learn to draw an umbrella , rain , raindrops .
– Look, I’ve already drawn an umbrella and rain .
What color is the rain ?
What color is the umbrella ? ( multi-colored : stripes of red, yellow, green, blue)
– What do you and I use to draw? (pencil, paints)
– Today we will draw with a pencil , brush and paints.
Let’s remember how to hold a brush, don’t forget to rinse it, and dry it on a cloth. We will draw carefully .
– So, to draw such a colorful umbrella , we first need to draw it with a pencil and only then paint it, bring it to life.
– What parts does an umbrella ?
Look, what shape is the umbrella ? (semicircle, straight line with a curve at the bottom.)
Listen to this riddle:
You will take it in your hands -
And you are not afraid of the rain !
The rain will pass - you will put it away
And you can walk in the sun.
If the horizon , What should we leave at home?
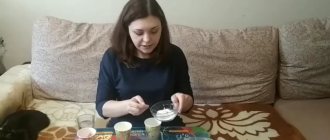
Photo report on the drawing lesson “Multi-colored umbrellas in the rain” in the middle group
Elena Timoshenko
Photo report on the drawing lesson “Multi-colored umbrellas in the rain” in the middle group
Summary of a drawing lesson in the middle group “ Multi-colored umbrellas in the rain ”
Goal: teach children to draw an umbrella , rain .
Tasks: to consolidate the techniques of painting with a brush , the ability to hold it correctly, rinse it in water, dry it on a napkin; do the work carefully. To consolidate and clarify children's knowledge about the characteristic signs of autumn and autumn phenomena. Teach beautifully, place the image on the entire sheet. Develop a sense of rhythm and aesthetic perception. Cultivate accuracy and interest in visual arts.
Material and equipment: illustrations selected on the topic: “Natural changes in autumn”
,
umbrella , paints, leaves, rags for brushes.
Drawing lessons for little ones
In kindergarten, you can also hold a lesson where you can show children how to draw an umbrella. It is recommended to use the best design for making signs for lockers in the locker room. The umbrella is simply glued onto a cardboard circle and covered with varnish or liquid glass - ordinary stationery glue.
Children can also use their skills to design a postcard. After all, you can congratulate your loved ones not only on their birthday or New Year, but also on the onset of autumn, on the mushroom rain, on the start of vacation. We need to teach kids to see the beauty in everything and give joy to loved ones even when there is no apparent reason for this.
Autumn craft “Umbrella”
An older preschooler can easily handle making a colorful umbrella. Prepare colored paper, a compass and ruler, a simple pencil and PVA glue.
To make a voluminous umbrella:
- Choose paper of your favorite color. You can take several sheets of different colors.
- Draw 12 circles with a compass. The diameter of all of them should be 6 cm.
- Cut out the circles. Fold each one in half, then in half again. You should end up with triangles with a rounded base.
- Glue the triangles into one design. Moreover, lubricate only the upper part of the triangles with glue, the lower half should remain free. The result is a paper “accordion”, which, when unfolded, resembles a hemisphere. There is no need to connect the starting and ending surfaces of the structure yet.
- To make an umbrella rod, cut out a square with sides of 9 cm from dark paper. Roll it into a narrow tube and secure it with glue. Trim the edges so they are even.
- To fix the rod on the umbrella dome, make a cap. Cut a rectangle 9 cm long and 1 cm wide. Wrap it around the upper end of the rod and secure it with glue.
- Glue the accordion to the rod under the cap. Glue the starting and ending triangles together so that the hemisphere is closed.
- Bend the opposite edge of the rod to create a handle.
