Crafts traffic rules: 3 options to choose from
To make a visual aid for children, take:
- carton boxes;
- glue;
- scissors;
- colored paper and cardboard.
To make it at home, cover the box with colored paper.
You will get a box. Help your child draw rectangles of the same size on paper of a different color using a ruler and pencil that will become windows. These parts need to be glued to the facade of the house. To make them more accurate, apply a ruler or outline with a felt-tip pen or bright pencil. Windows can be made flat rectangular or volumetric triangular. In the first case, the child will cut out this figure from paper and glue it to the top of the house. To implement the second idea, you need to cut out a rectangle, fold it into a three-dimensional triangle, and glue it so that the seam is at the top. Make some more buildings with your children. Let some of them become shops, others a school, others residential buildings. To highlight the functional purpose of these buildings, write and stick signs on them. It will be written on them that this is a children's educational institution, a supermarket, and on residential buildings write the street name and house number.
After that, make a zebra crossing, that is, a pedestrian crossing. To do this, white strips, 5 cm wide, are glued onto a sheet of black cardboard.
Then the roadway is made. To do this, you need to glue strips of white paper 1 cm wide onto gray cardboard. In the center there will be a dividing strip consisting of two segments. Short strips of the same width need to be glued to each side of the car.
If you are planning to create a large traffic rule craft, then glue as many marked sheets of cardboard as required for the job.
Place the road markings on a table or tape them to the upside-down flat lid of a large box, such as a table hockey game. Place houses, place cars on the roadway, place human figures next to the pedestrian crossing. Then you can play with the children, showing them how to cross the road.
But for this, one more important detail is missing - a traffic light. You will learn how to do it by reading the next paragraph. In the meantime, look at 2 more ideas that will tell you how to make children's crafts - traffic rules. After all, they may not be voluminous.
Let the child, under the guidance of adults, glue a house onto a sheet of blue cardboard and make a road, a pedestrian crossing, a car and a traffic light next to the building. In the process of creating this work, you can help children learn the basic rules of the road.
Create together a fairy-tale city, where figures and houses will be sculpted from plasticine. This material will help make the road. To do this, you need to knead the black plasticine well and spread it between the outlined contours. Thin sausages made of white plasticine are stuck on top to create a pedestrian crossing and a dividing strip for cars. Lawns, paths, people are created in the same way.
The house can be made from two blocks of plasticine of the same color connected together, or you can exchange this mass in your hands and coat a small box. The windows are made from plasticine of a different color.
You can take toy cars or make them out of plasticine. After you have familiarized yourself with three options for making crafts for kindergarten, look at how to make a traffic light. It can also be created from a variety of materials, depending on what you have available.
Summary of educational activities on modeling: “Traffic light” (with children of the younger group)
Summary of educational activities on modeling: “Traffic light”
(with children of the younger group)
Subject
Goal: familiarize children with traffic rules and traffic lights; strengthening the ability to work with plasticine.
Tasks:
-Educational: consolidate children’s knowledge about the operation of traffic lights, knowledge of the rules for crossing the street; help to navigate in space, be able to act on a signal;
— Developmental: develop children’s spoken language, develop fine motor skills, special labor skills when using waste material; develop creative imagination.
-Educational: cultivate a desire to work with plasticine using different techniques.
Methods and techniques: demonstration, literary expression, encouragement, praise, conversation, questions and answers.
Materials and equipment: traffic light model; "Pedestrian crossing" sign, Teddy Bear toy, Masha girl, plasticine, planks, stacks, waste material - wooden sticks.
Progress:
Motivation
Educator: Children! Mishka came to visit us today. He lives in the forest and asks us to teach him the rules of crossing the road to his girlfriend Mashenka. And her house is on the other side of the street.
striped horse,
Her name is "zebra"
But not the one at the zoo
People keep walking along it.
What is this poem about?
Children: About the pedestrian crossing
Educator: That's right, this is a pedestrian crossing. (children approach the pedestrian crossing).
Educator: Who is this standing? I’ll tell you a riddle now, it will be a hint:
Three colorful circles
Blinking one after another
They light up, blink -
They help people.
Children: This is a traffic light
Educator: That's right, children are a traffic light.
Educator: And now (child’s name) will remind us of a poem about a traffic light (reading “Traffic Light” by T. Goette)
Good job, well done, thank you. Now we will cross the road with Mishka. (crossing the road) Here we are. Let's say hello to Mashenka.
Children: Hello, Masha
Educator: Look, and here she is sculpting something from plasticine, well, guess what?
Children: Masha makes a traffic light
Educator: The traffic light is correct! Let us also try and make the same traffic lights for ourselves.
Children: Yes
Educator:
-Sit down in your seats. Let's take a closer look at our traffic light. What color is the body?
Children: Yes, black.
Educator: What about the uniform?
Children: Rectangular
Educator: Yes, it looks like a rectangle. What color are the lights? –
Children: Red, yellow, green
Educator: Of course, red, yellow and green. What about the shape of the lights? They look like mugs.
Now let’s prepare our fingers for modeling and play the game.
Finger game:
There are a lot of road rules:
Once - attention, road! (We bend our fingers, starting with the little finger.)
Two – traffic lights
Three - look, road sign,
And four is a transition. Here!
Everyone needs to know the rules (Use your index finger to make a circle around your bent fingers and shake your finger.)
And always fulfill them.
Educator: Well done! Let's start sculpting.
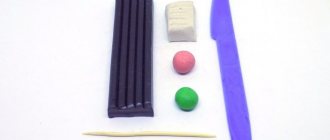
-First, take a black block, heat it in the right and left handles and, with straight movements, roll out a small sausage in the shape of a column.
We straighten one side with a stack and fingers and we get the body of a traffic light (showing to children).
-Now we take a smaller black or gray piece, roll out the ball with circular movements of our palms, put it on our stand, hug it with our fingers and press it to it. We insert a stick into it and connect it to the body of the traffic light (show to children)
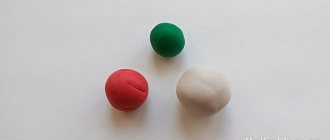
-Then we make lights from lumps of red, yellow and green using circular movements of our palms (show to children)
-First we attach a red ball at the top, then a yellow one, and below we attach a green ball.
— Next, the children make a traffic light. During the modeling process, the teacher helps the children with advice if difficulties arise.
Reflection
Educator: Well done, everyone did their best. Mishka and Mashenka liked your traffic lights. Now let's remember once again what red, yellow and green traffic lights mean? Well done everyone! Let's say goodbye to Mishka and Mashenka, let them still come to visit us for classes.
How to make a traffic light with your own hands?
If you have a plumbing pipe lying around at home, and you also have shoulder straps, a cap, and a policeman’s baton, then you can make a character like this.
If you do not have such traffic police officer items, then make them from colored paper and cardboard. So, to implement your plan, take:
- plumbing pipe;
- wooden stick;
- acrylic lacquer;
- whistle;
- acrylic paints;
- cap;
- shoulder straps;
- a rod, and in the absence of this, colored paper and cardboard.
To work, you need tools such as a jigsaw and drill.
Cut the pipe in half crosswise. Draw with a simple pencil where the traffic light will have facial features, red, yellow and green circles. Paint it all with paints of the appropriate colors. Make two holes with a drill at the level of the character’s shoulders, insert a wooden stick here, and glue the shoulder straps. Place a cap on top of the pipe.
Place a whistle on one hand of the character and a wand on the other. Here's how to make a traffic light. If there are no ready-made attributes, then glue black strips onto white cardboard, roll this blank into a tube, and glue the sides from the large edge. You will have a wand. Shoulder straps are also easy to create; we cut them out of blue cardboard.
If we talk about how to make a traffic light, the easiest way to do this is to cover a rectangular cardboard box with dark colored paper and glue a red, yellow and green circle on each side.
If you have a dairy box left over, this is just what you need. Cover it with black paper and attach circles of the corresponding colors to the sides. To make your child better understand that you should never cross the road at a red light, draw a sad smiley face on a circle of this color. The yellow one will have a straight mouth, while the green one will have a smiling mouth, which means an invitation to move. Hide the top of the box under a cap, which is cut out of colored paper, its parts are glued together. If there is no such container, you can make a traffic light from a sheet of cardboard. The next photo shows how it should be cut and what dimensions it should be. Straighten the cardboard box, cut it out, cut out the circles. Glue black paper onto cardboard and cut out red, yellow and green squares. Glue them onto a dark base. Roll it up. Cut and glue a handle from cardboard, attach it to this roll. Insert this blank inside the glued traffic light. By turning the handle, you will change the color, thereby checking whether the children have correctly mastered the lesson about the rules of the road. The next traffic light is made of very interesting materials, for this one take:
- three laser discs;
- three juice caps;
- glue;
- lace;
- scissors;
- paints and brushes.
Let your child paint the juice caps the right colors.
If you have yellow or green ones, you don’t need to paint them. Glue these blanks to the center of the disks and connect the elements. Attach a cord of the required length to the back at the top, after which you can hang the craft. If you want to make a traffic light so that its elements are voluminous, then use the origami technique for this.
To do this, cut squares of green, yellow and red paper with sides of 5 cm, from them you need to twist the parts that are glued together. The finished balls need to be attached to the stand, after which the work is finished. A traffic light made from plastic bags is very interesting. For this craft you will need:
- garbage bags in red, yellow and green colors;
- cardboard;
- scissors;
- colored paper.
How to make pompoms is shown in detail in the following master class.
- To do this, first cut off the handles from the bags.
- Then, starting from the outer corner, cut into a long strip, as shown in photo number 2.
- After this, you need to wrap this tape around your palm or around two identical cardboard circles, in the center of which there is a lace.
- Now the coils on the outside are cut through. If you wound the ribbon around your hand, then tie the resulting blank in the middle with a piece of plastic bag, tighten it, and tie it.
- To make a traffic light, you will tie these loose laces, thereby connecting the structure. You can glue pens and a staff from cardboard to the exhibit, eyes from colored paper, and make a cap from the same material.
If mothers know how to knit, they can make this traffic attribute from threads.
You need to knit a black rectangle with knitting needles, wrap it around a kefir or milk bag, sew it on the side, top and bottom. To fit the bottom and top, knit rectangles the same size as these sides and sew them to the main fabric.
Crochet the circles and attach them in place. Cardboard and tinsel will also make a wonderful traffic light.
Summary of a modeling lesson in the second junior group “Traffic Light”.
Municipal budgetary preschool educational institution
kindergarten No. 51
Modeling "Traffic light"»
Prepared by:
Educator
Pravdivtseva L.I.
2020
Summary of a modeling lesson in the second junior group “Traffic Light”.
Target:
teach children to apply plasticine in a thin layer on a surface limited by an outline.
Tasks:
learn to smear plasticine on cardboard using a pressing movement of the index finger;
develop attention;
develop an interest in working with plasticine;
clarify and consolidate knowledge of colors;
develop fine motor skills.
Materials:
sheets of A5 cardboard with a pre-drawn traffic light, plasticine in circles in black, green, yellow, red.
Progress
Educator.
Children, today we have an unusual friend visiting us, try to guess who it is.
His eyes are big
They look in all directions
They say to cars:
“Let the guys through”... (Traffic light)
Educator.
Right. We have a traffic light visiting us today. And the traffic light came to us today with an unusual request. There is a lot of transport on the roads: buses, trams, taxis, trolleybuses, and your parents drive cars, so our friend needs helpers. Will you help the traffic light? Will you mold him assistants? (children's answers)
Educator.
Then let's get started.
Educator.
Each of you has plasticine in black, red, yellow, green, and there are traffic lights in front of you.
Take the red color, press it to the red circle and start smearing the plasticine with your finger, without going beyond the outline of the circle. Educator.
Well done. Now we take the yellow plasticine, press it against the yellow circle and begin to smear the plasticine with our finger, without going beyond the outline of the circle.
Educator.
Next, take green plasticine and press it against the green circle, begin to smear the plasticine with your finger, without going beyond the outline of the circle.
Educator.
Now let's take a little rest and do some finger exercises.
Finger gymnastics.
It has been helping for a long time. Our faithful friend is the traffic light .
(Children say the word “traffic light”, clap their hands three times (clap the syllables).)
He has three big eyes, they don’t all light up at once. (Children say the word “traffic light”, clap their hands three times (clap the syllables).)
If red lights up, then you can’t cross,
We have to wait on the sidewalk
And let the cars pass. (Raise their hands up and “draw” a circle in the air. Shake their heads. “Turn the wheels.”)
If the yellow one lights up, it means we'll be leaving soon. (Raise their hands up and “draw” in
second round in the air.)
The green eye lit up - Stop, cars, we're coming! (Raise their hands up and “draw” in
Summary of PD on modeling for children of the second younger group
Summary of PD on modeling for children of the second junior group.
Topic: "Traffic light".
Purpose: to familiarize children with traffic rules and traffic lights; strengthening the ability to work with plasticine.
Objectives: -Educational: to consolidate children’s knowledge about the operation of traffic lights, knowledge of the rules for crossing the street; help to navigate in space, be able to act on a signal;
— Developmental: develop children’s spoken language, develop fine motor skills, special labor skills when using waste material; develop creative imagination.
-Educational: cultivate a desire to work with plasticine using different techniques.
Methods and techniques: demonstration, literary expression, encouragement, praise, conversation, questions and answers.
Materials and equipment: traffic light model; "Pedestrian crossing" sign, Teddy Bear toy, Masha girl, plasticine, planks, stacks, waste material - wooden sticks.
Progress:
Motivation
Educator: Children! Mishka came to visit us today. He lives in the forest and asks us to teach him the rules of crossing the road to his girlfriend Mashenka. And her house is on the other side of the street.
striped horse,
Her name is "zebra"
But not the one at the zoo
People keep walking along it.
What is this poem about?
Children: About the pedestrian crossing
Educator: That's right, this is a pedestrian crossing. (children approach the pedestrian crossing).
Educator: Who is this standing? I’ll tell you a riddle now, it will be a hint:
Three colorful circles
Blinking one after another
They light up, blink -
They help people.
Children: This is a traffic light
Educator: That's right, children are a traffic light.
Educator: And now Alena will remind us of a poem about a traffic light (reading “Traffic Light” by T. Goette)
Good job, well done, thank you. Now we will cross the road with Mishka. (crossing the road) Here we are. Let's say hello to Mashenka.
Children: Hello, Masha
Educator: Look, and here she is sculpting something from plasticine, well, guess what?
Children: Masha makes a traffic light
Educator: The traffic light is correct! Let us also try and make the same traffic lights for ourselves.
Children: Yes
Educator: -Sit down in your seats. Let's take a closer look at our traffic light. What color is the body?
Children: Yes, black.
Educator: What about the uniform?
Children: Rectangular
Educator: Yes, it looks like a rectangle. What color are the lights? –
Children: Red, yellow, green
Educator: Of course, red, yellow and green. What about the shape of the lights? They look like mugs.
Now let’s prepare our fingers for modeling and play the game.
Finger game:
There are a lot of road rules:
