How to draw the sky
The world around us is full of sources of inspiration for artists. One of them is a sky dome with clouds.
This is interesting!
The sky is the space above the surface of the Earth or any other astronomical object. In general, it is a panorama that opens when looking from this object in the direction of space. The brightness of the sky depends on the time of day, altitude, direction, position of the Sun, humidity, dust and aerosol content, and is subject to significant fluctuations. If the sky is covered with clouds, clouds, haze, fog and other phenomena, then with height the brightness as a whole decreases unevenly, in steps, and in certain areas it can increase, for example, at the exit from the cloud.
The sky can be so different - clear and cloudless, gloomy with thunderclouds, day and night, sunset and pre-dawn. Each state of the sky and clouds is attractive in its own way and can set the atmosphere and determine the mood of the depicted landscape.
To create a picture, they use the entire palette of colors, from white, yellow and red to dark purple and black. Learning to draw a sky with clouds means learning to convey the character of a celestial object, weather and mood.
The firmament can be depicted in different versions:
- in light shades with fluffy clouds illuminated by bright sunlight.
- evening with splashes of red and orange, conveying the sunset;
- before the rain with heavy cumulus clouds in dark colors;
- starry at night.
It is better for the child to start with an option that is easier and more familiar to him - the night or day sky with or without clouds.
On the topic: methodological developments, presentations and notes
Software Content: Teach children to lightly press a finger on a small ball of plasticine and smear it in different directions on the cardboard. Develop fine motor skills of the hands. Demonstration.
· Expansion of vocabulary · Introduce children to the symbolism of constellations accepted by astronomers, cultivate a love of nature.
Dear colleagues, educational psychologists working in sensory rooms! I would like to share with you an idea on how to make a “Starry Sky” sensory panel for a relaxation area using available materials.
Summary of a correctional lesson on orientation in space on the topic “Starry Sky”.
The presentation contains photographs of elements of the solar system.
Drawing using the wet technique.
Non-traditional technique: candle + watercolor. Purpose: to cultivate an aesthetic perception of nature and its images using non-traditional artistic techniques; develop color perception and visual movement.
Source
What is required for drawing
For this fascinating process, you need to prepare in advance the place and everything that is required to depict the sky and clouds. In the room where the child will draw, there must be natural lighting so that the young artist can comfortably depict small details and there is no distortion of the color scheme.
To create a drawing you will need:
- Paper - it is advisable to choose a special one - for watercolor, gouache or pencil drawing.
- Paints (gouache, watercolor), pencils. A child draws better with soft colored or simple pencils.
- Brushes - when choosing brushes, you should pay attention not only to the material they are made of, but also to the number - the thicker the tool, the larger the digital value printed on it. For gouache, thick (No. 18-20) brushes, flat or round, are more suitable. For watercolors, prepare flat, thick brushes for filling in the background, and thin brushes for drawing small elements.
- Palette - for mixing different colors and obtaining any shades.
It is also worth preparing a jar of water for washing brushes, rag or paper napkins to remove excess moisture from brushes. It would not be a bad idea to take care of a stand for tools so that the child can set them aside without staining the drawing and the table if he decides to postpone the process.
Drawing techniques and techniques
To depict the sky and clouds, you can use many techniques and techniques, depending on the paints used:
- Watercolor - most often this method is used on a wet sheet. The peculiarity of this technique is to quickly depict (no more than 3-4 minutes) all objects before the paper dries. The main tone is applied to a sheet moistened with water using wide flat brushes, then shades of the sky are added. On top of the tone, without waiting for the sheet to dry completely, clouds are drawn using the glazing method - applying several layers of paint. To blur the boundaries, use a clean brush moistened with water.
- Gouache - gouache is denser than watercolor, it allows you to quickly depict the night sky with stars. To do this, the sheet is thickly coated with paint of dark blue, purple and dark green colors and allowed to dry. After this, dip a flat, wide brush (flute) into white paint and, using your fingers, you need to make several movements along the bristles, splashing drops over the surface of the design. This technique is called “blotography” - small blots on paper turn into stars.
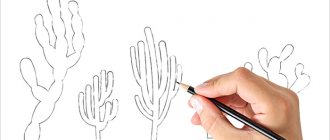
- With a pencil - the main method used when depicting the sky is shading, when graphite chips are smeared over the surface of the sheet. The technique of shading is also used - frequent and short parallel lines, due to the frequency and thickness of the stroke, are able to convey the volume and saturation of the cloud and the background of a celestial object. A simple pencil is also used for preliminary drawing of small details in a watercolor drawing.
They also use various techniques when depicting the sky - gradient stretching of the color gamut, mirror image, scratching dark-colored paper with a sharp object, etc. For clarity of each technique and various drawing techniques, it is recommended to watch the instructional video.
GOALS• Teach children to draw with colored wax crayons on a white sheet of paper and then cover the entire sheet with gouache
• Strengthen skills in working with gouache
• Teach children to depict the starry sky, its appearance in airless space
• Teach children to pretend to be a rocket in flight
• Teach children how to spray
• Teach children to think through the composition and content of the drawing
• Teach children to use foreground and background space
• Teach children to convey the characteristic features of a spaceship in a drawing
• Develop skills in working with a brush and paints, skills in toning paper, painting with a brush
MATERIALS FOR THE CLASS
Wax crayons, gouache or black ink, brushes, large format paper, brushes (this could be toothbrushes) and spatulas.
PRELIMINARY WORK
With the children, look at the structure of the rocket in the pictures - the spacecraft cabin, stages, fuel tanks, nozzles.
Course of the lesson
Introductory conversation
The teacher reminds the children that in previous lessons there was a conversation about outer space surrounding the Earth. Questions that the teacher can ask during the conversation:
• Let's remember what the night sky looks like?
• Do you know what the sky looks like outside the earth's atmosphere, in airless space?
• Why does the sky seem blue to us during the day?
• What do stars look like in vacuum? (Stars can be red, yellow, white, blue.)
STAGE 1
Stars, comets, planets, Moon
We draw with wax crayons of different colors. The teacher explains to the children how to use the property of wax crayons: wax-coated surfaces do not retain water. First we depict the Moon - it is larger in size than the stars because it is closer to the Earth. Yellow onions. Children should be reminded that spots on the surface of the Moon are lunar craters and lunar maria. Then we draw comets, followed by a trail of gases - a tail. Lastly, we depict stars with small circles and dots.
STAGE 2
Space
After the stars are drawn, children cover the entire sheet of paper with black gouache or ink using a brush. The liquid paint rolls off from the areas covered with wax, creating an image of a starry sky.
To depict the starry sky, you can use the scratch-and-splash technique. Place a brush over the dried sheet, dipping it in white or yellow paint. We run a spatula over the brush, sprinkling drops of paint onto the paper. This technique must be used very carefully to avoid splashes on clothing or other surfaces.
STAGE 3
The rocket flies to the stars
After the paint has dried a little, you can begin to depict the rocket, its stages, nose and nozzles.
While drawing, the teacher can turn on soft, light instrumental music.
When the drawing is finished, the children's work is placed on display. The teacher asks the children to talk about their drawings.
At what age can you start?
- From the age of 3-4 years, a child develops his first visual language, which is formed by the age of 5 years. Thanks to picture books and cartoons, children learn that all the figures depicted have a name.
- However, the visual perception system expands from 5 to 10 years. It is at this age that it is recommended to start showing your child how to gradually depict the sky with clouds. From 5 to 10 years old, the young artist consciously adds details to his drawings and understands the pattern of their arrangement. In the process, the child can tell what he is trying to portray, ask for help and respond correctly to it.
Progress of the lesson:
Educator: - Our familiar cartoon character came to visit us today (shows Luntik)
- Who is this, guys
(children's answers)
Q: - He brought us a little star. But Luntik is sad for some reason. Let's ask him why? (children ask)
(Tale from the teacher on behalf of Luntik)
Q: — Luntik told me that he found a star that had fallen from the sky and was very upset because he could not attach the star back to the
sky . When can we see stars in the sky? (children's answers)
B: - That's right, at night. What's the sky like at night ? (children's answers)
B: - Yes, black, dark blue. What do we do at night (answers: sleep)
Q: - There is one family that does not sleep at night, but walks, but not on the earth, but in the sky.
On clear nights, a mother and her daughters walk.
She doesn’t tell her daughters:
- Go to bed, it's late!
Because mother is the moon
Well, the daughters of the stars .
Q: — Sometimes instead of the mother moon and her daughters, a father called the moon walks across the night sky.
A month, a month, my friend,
You rise in deep darkness,
And, loving your custom,
The stars are looking at you.
(the teacher shows pictures of the starry sky with the moon and the month)
Q: — Guys, can we help Luntik return the star to the sky ? (children's answers)
Please come to the tables
(children sit down)
.
Q: - Before we start work, we will stretch our fingers.
fell asleep and suddenly
Lighted up everything around.
(sitting at the tables, raise your arms up with support on your elbows, clench your fingers into fists and unclench them, spreading them out like a fan and clench them again)
Q: - Now we will take black cardboard, this will be our night sky , and we will draw a round yellow moon on it, and put many dots around it with our fingers - these will be our stars. (After the demonstration by the teacher, the children begin to work. If necessary, the teacher helps the children)
Q: — So night came, the stars lit up in the sky. Now we can return the star that Luntik found to the sky (children attach a foil star to their sky )
Q: - Look how happy Luntik was! Now he will go out and admire her before going to bed!
The teacher praises the children for their work. Children, together with the teacher, look at drawings of the starry sky .
The teacher reads the poem:
The sky in the stars is beautiful!
There's no way to count it!
Tips for parents
The child’s drawings reflect the experience gained in this world.
By the kind of sky he wants to draw, you can understand what interests the child. The main thing is not to disturb his presentation and not to prevent him from expressing his thoughts on the sheet of paper. Therefore, parents should be patient and listen to some advice:
- Don't expect a masterpiece from him - often parents expect instant excellent results from their offspring. Lessons on drawing clouds are a long process during which you need to try various techniques and techniques for transferring an image on paper. Only in practice can parents determine which technique, paints and colors the child likes best. Too high demands can lead to rejection of fine art by a novice artist. Patience and sensitivity, on the contrary, will allow natural abilities to blossom into talent.
- Learn to listen and see through the eyes of a child - you need to look at the world only in a positive way. A child cannot draw in a bad mood, so it is the parents’ task to create a good creative mood in a young artist. It is necessary to interest the artist with interesting stories about the sky and clouds, about its different states. The main thing is to do this in a language understandable to the child. And for this you need to be able to listen and see the world through his eyes.
- Don't scold for failures - don't impose your own drawing rules. Perhaps what you consider a mistake is for a child an original, original way to express his thoughts on paper. Fine art for children is the territory of true freedom. Offer them opportunities and options rather than imposing rules. Learn to be guided by the child’s interests and abilities. Praise him for his perseverance and attempt (even if unsuccessful) to depict clouds and sky. Discuss the bad points and decide together what needs to be improved. Give the initiative to the little master.
During a lesson on drawing the sky, clouds and stars, the child develops spatial thinking, eye, and hand-eye coordination. Help him start a beautiful drawing correctly - to do this, watch a video tutorial with a novice artist, which tells you how to draw a sky with clouds step by step.
Wondering how to draw the sky or other objects? Our video lessons and video courses will help you with this!
Notes on drawing "Starry Sky" for the middle group
Natalia Kupriyanenko
Notes on drawing "Starry Sky" for the middle group
Unconventional technique: candle + watercolor.
Target. Nurturing an aesthetic perception of nature and its depiction using non-traditional artistic techniques; development of color perception and visual-motor coordination.
Equipment: white sheets of paper, candles, watercolors, a sponge for each child, illustrations of the starry sky , Fairy costume, crown.