Although every child knows what frogs look like, it can be difficult for him to depict them from memory (or even looking at a photo). The body of these amphibians has a unique shape that is difficult to immediately replicate. To figure out how to make a frog from plasticine, you can use step-by-step master classes that offer various ways to create these cute swamp inhabitants.
- Step-by-step instructions on how to make a frog from plasticine
- Rules for sculpting small parts and recommendations for working with plasticine
- What is the difference between light plasticine and regular plasticine?
- Options for which frogs can be molded from plasticine
- Application of plasticine frogs on cardboard for beginners and children
- Simple volumetric crafts of frogs from plasticine
- Princess Frog
- A simple frog for kids and beginners
- Realistic frog
- Combination with other materials
- Detailed crafts of the frog princess
- Photo examples of finished crafts and paintings of frogs molded from plasticine
Once you learn how to collect a frog, you shouldn’t stop there. You can fashion him a friend, a family, or create a whole large lake full of amphibians - the baby will get better at each new craft, and repeating the same actions is useful for the development of logic and fine motor skills.
Fairytale heroine
Just one small addition, and an ordinary animal will turn into a fairy-tale heroine. To do this, you simply need to build a royal crown from a yellow piece of plasticine. The simplest version of the crown is to roll 5 small droplets, pointed at the ends, from the working material. Connect these droplets together and press down so that they do not crumble. The crown should be attached to the toy's head.
A small cake is made from the same material, which is attached to the front of the body. The “Frog Princess” craft is ready for play, participation in a competition, even a talent show in kindergarten.
Modeling in the preparatory group “The Frog Princess”
Group: preparatory (age 6 to 7 years)
Program content:
Educational:
- To develop children’s ability to convey the proportional relationship of parts and details (torso, head, paws, eyes).
- Strengthen the ability to cut out a variety of objects using previously learned techniques.
Educational:
- Develop fine motor skills of the hands, coordinate the work of the eyes and hands.
- To develop children's creative abilities, attention, thinking, memory.
Educational:
- To cultivate perseverance and interest in artistic creativity and modeling.
- To cultivate a love for Russian folk art and fairy tales.
Preliminary work: reading the Russian folk tale “The Frog Princess”, looking at illustrations for the fairy tale.
Materials: plasticine for each child, a set of stacks, modeling boards, multimedia projector, DW disk for each child.
Progress of the lesson
(children enter the art studio and stand in a semicircle towards the multimedia projector screen)
Teacher: Good afternoon, guys, look at the screen. Today we will start our lesson with a journey through a fairy tale.
Try to guess what this fairy tale is called? Several objects appeared here (arrow, bow, needle).
Children: (list fairy tales).
Teacher: That's right, these objects are from the Russian folk tale “The Frog Princess.” Today we will sculpt one of the main characters of a fairy tale, or rather one heroine of this fairy tale. Who do you think we will sculpt?
Children: The Frog Princess.
Teacher: Now let’s remember the fairy tale a little.
- What words does the fairy tale begin with? (In some kingdom, in some state)
- Where did Ivan Tsarevich's arrow hit? into the swamp)
- What is the real name of the frog? (Vasilisa the Wise.)
- Why did Vasilisa the Wise become a frog? (She was a princess who was bewitched by Koschey the Immortal.)
- Where and when did Ivan Tsarevich first see the frog in the guise of Vasilisa the Wise? (When the king invited everyone to the feast)
Teacher: You know the fairy tale very well. Now I invite you to a fairy-tale workshop, where I will first tell you how to make a frog (children stand at their convenience in front of a multimedia projector and perform movements to the music that are projected on the screen)
Teacher: Go to the board and carefully look at the picture. Who is in this picture? What does the frog hold in its paws, what is on its head?
Children: (they list the arrow, and a crown shines on its head)
Teacher: Let's look at the sequence of sculpting a frog (the teacher shows how to sculpt a frog)
- First we’ll make the body: roll it into an oval. Don't forget about proportions (the head is smaller than the body)
- Now let's roll up the future head of the frog princess - a small ball, make a mouth out of red plasticine with a crescent, and make two nostril points with the tip of the stack. For the eyes we will need to roll two small green balls, which we attach to the head. We attach a small white ball to each eye and a small black pupil in the middle. Now the frog looks at us and smiles.
- Now we need to connect two main parts - the body and the head. Attach the two hind legs to the sides of the body. Now our frog can sit comfortably on the water lily. Also mold two front legs with membranes at the tips, which we make using a stack, and connect them to the finished craft.
- The frog itself is already ready, but we still need to sculpt a few additional details. For example, a crown, because without it she would not be a princess. Make an accessory from yellow plasticine. Plant the swamp princess on a green leaf - a water lily.
- The habitat for our future frog is ready - it will be a pond (the discs are coated with blue).
Teacher: Come in and take a seat in our fabulous workshop.
First, heat the plasticine in your palms until it becomes soft. Pay attention to the sculpting sequence. Those who sculpt quickly can sculpt Ivan Tsarevich if they wish (pupils sculpt on their own to calm music)
Reflection.
Teacher: Look what a wonderful pond we have, and what frog princesses live in it.
- Which frog did you like best? Why?
- What was the hardest thing to put together?
Teacher: Funny little frogs invite you to dance their playful dance with them.
Musical physical school
How to make a frog from plasticine with your own hands step by step
Print Thank you, great lesson +15
If you ask a child what color a frog should be, he will certainly answer green. Although in fact these amphibians are gray, brown, yellow and even red. But all the same, children always depict frogs - they draw them or paint them - as green. In this sculpting lesson we will provide a detailed guide to creating a green frog. Study the step-by-step guide, repeat it, and you will definitely get an unusual marsh warbler.
Other lessons on the topic of reptiles:
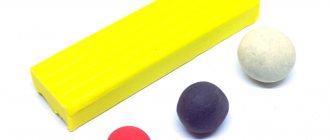
In this case, we propose to combine two color plates to create an animal figurine - green and yellow. Small flecks of white and black will also be used for the eyes.
First, divide the green block into one large portion (for the body) and four small portions (for the legs).
Also prepare a yellow mass; it should be slightly smaller in size than the largest green ball. Pull out both pieces, then attach them along the entire length to each other and press down.
Using your finger, carefully spread the yellow plasticine along the edge at the joint to get the body of a frog with a yellow belly. Using a stack, pierce the plasticine in the front part and slightly lift it up, highlighting the tubercles of the eyebrows.
In front, leave a gap between the green and yellow clay to indicate the mouth.
Attach two symmetrical oblong parts to the lower part of the body - the upper part of the legs.
Make the front legs and flippers for the back legs.
Attach the limbs to the main workpiece.
Place white eye balls into the holes.
The plasticine frog is ready. The yellow abdomen (quite voluminous) gives the impression that the animal is swelling and making sounds characteristic of frogs.
Print Thank you, great lesson +15
Rules for sculpting small parts and recommendations for working with plasticine
Subtleties of working with plasticine and useful tips:
- It is best to sculpt crafts on a special mat, but you can replace it with a sheet of plastic or linoleum.
- The plasticine should be cut in small portions, and the remaining pieces should be immediately glued onto a block of the desired color.
- The mouth, nostrils, fingers and other small details are cut out using stacks or toothpicks.
- To prevent the plasticine from sticking to your fingers, they are periodically moistened with water (to do this, you need to place a convenient container on your work table).
- It is better to assemble crafts starting with large parts and gradually adding smaller ones to them.
- By mixing pieces of different colors you can get new shades.
When working, you must ensure that the plasticine does not fall on the floor and does not get tangled in your hair.
What is the difference between light plasticine and regular plasticine?
Light plasticine (also called air plasticine) is a colored self-hardening mass that does not stick to your hands and does not have an unpleasant odor. The material hardens completely in the open air within several hours (this depends on the size of the finished product). After this, crafts made from light plasticine cannot be deformed or stick together, and they can be played with like plastic figures (or put on a shelf and admired).
If a child is interested in modeling, then the Frog Princess made of light plasticine can become the first figurine in a collection of fairy-tale characters that he will gradually collect.
The habitat of the frog
Marsh leaves and water lilies are the best habitat for the green frog.
1. Cut out a circle or oval from cardboard with a diameter of 8-12 centimeters. The surface is completely covered with a layer of blue plasticine. We've got a pond.
2. Roll a ball of smaller diameter from green plasticine. Flatten it into an oval cake. Place it on the blue pond and use a plastic knife to make 5 small veins. We have a water lily leaf.
3. To create the water lily itself, we will need white and yellow plasticine. Roll 5-7 small white balls and 1 yellow circle, which is placed in the center. We flatten the resulting flower and lift the petals up.
The habitat of the green frog is ready.
Development of fine motor skills
When palpating plasticine, children develop fine motor skills. 1/3 of the area of the motor projection of the brain is occupied by the projection of the hands. It is located very close to the speech zone. That is why the ideal development of a baby’s speech is inextricably linked with the development of fine motor skills. The more parents spend time with their children, playing exciting games or modeling with plasticine, the more developed their child will be. The frog princess made of plasticine will be an excellent reason to start developing fine motor skills.
At one and a half years old, children are able to do:
1. Plucking plasticine.
2. Flattening.
3. Kneading, rolling.
4. Spreading glue on cardboard.
5. Working with the stack.
MBDOU "Kindergarten No. 185 "Yubileiny"
Municipal budgetary preschool educational institution
“Kindergarten No. 185 “Yubileiny”
(MBDOU “D/s No. 185”)
Date of establishment of the educational organization – 1980.
Let's decide together
Can't enroll your child in kindergarten? Would you like to tell us about the teachers? Do you know how to improve your diet and exercise?
About the founder(s) of the educational organization
The founder of the Institution and the owner of its property is the urban district - the city of Barnaul, Altai Territory. Address: Barnaul, st. Union of Republics, 36-a Email address:
Website: https://barnaul-obr.ru/ Chairman of the Education Committee of Barnaul Mul Andrey Genrikhovich - tel. (8-3852) 56-90-45
The functions and powers of the founder of the Institution on behalf of the urban district - the city of Barnaul of the Altai Territory are performed by the Education Committee of the city of Barnaul. The functions and powers of the owner of the property of the Institution on behalf of the urban district - the city of Barnaul of the Altai Territory are performed by the committee for the management of municipal property of the city of Barnaul.
On the names of representative offices and branches of the educational organization (if any) (including those located outside the Russian Federation)
There are no representative offices or branches of the educational organization. There are no representative offices or branches of the educational organization located outside the Russian Federation.
About the location of the educational organization
Legal address: 656062, Barnaul, st. Shukshina, 17
Actual address: 656062, Barnaul, st. Shukshina, 17
About the mode and work schedule of the educational organization
Working hours: five-day work week. The kindergarten is closed on Saturday, Sunday and holidays.
Working hours: Monday from 7.00 to 19.00 Tuesday from 7.00 to 19.00 Wednesday from 7.00 to 19.00 Thursday from 7.00 to 19.00 Friday from 7.00 to 19.00
About the contact numbers of the educational organization
Telephone:
8 (3852)
567-911
About educational organization email addresses
About the addresses of official websites or pages on the Internet information and telecommunications network
,
[email protected]
Address of the official website of the educational organization
185-kindergarten.rf
The organization does not have official pages on the Internet information and telecommunications network.
On places of educational activities, including those not specified in the annex to the license (register of licenses) for educational activities
- places of educational activities for basic training programs: 656062, Barnaul, st. Shukshina, 17 ;
- places of educational activities for additional educational programs: 656062, Barnaul, st. Shukshina, 17 ;
- places of implementation of educational activities when using the network form of implementation of educational programs: no ;
- Places of practice: no ;
- Places for practical training of students: no ;
- Places for state final certification: no .
There are no places for carrying out educational activities not specified in the annex to the license (register of licenses) .
