Cooking is an ancient profession, for which Ancient Egypt is considered the birthplace. The active development of the profession contributed to the creation of cooking schools. For the first time such a school appeared in Ancient Rome (400 BC). Modern cooking began its development in England and then spread to France.
The first culinary school in Russia opened only in 1888. It is quite difficult to draw a chef, since the image contains a large number of complex details. This work is suitable for older children.
Pencil drawing
A cook (a pencil drawing for children is given below in the text) is a difficult profession.
It is believed that due to the high level of stress, heavy schedule and many external stimuli, this specialty is only suitable for men. These, as well as other opinions, lead to a constant battle between women and men for the right to be considered the best chefs.
Pencils, paper and supplies
To complete the work you will need:
- a simple pencil;
- eraser;
- sharpener;
- paper.
It is best to use several pencils with different leads.
Step-by-step execution process
The step-by-step process of completing the work can be divided into 5 stages:
| Stage | Description of the stage | Image |
| Creating the big picture | 1. On a blank sheet of paper, draw an oval head. It should follow the curves of a person. 2. It is important to make small depressions in the places where the eyes will be located, indicate the cheekbones and slightly sharpen the chin. 3. Divide the head area with a vertical arcuate line into 2 parts, different in width. 4. Use a small line to indicate the level of the eyes, nose, mouth, eyebrows and hair growth. Schematically indicate the location of the ear and draw its outline. 5. To draw the chest, you will need to draw a rectangle, and then add a triangle and a small rectangle for the shoulders. 6. Using tubular elements, draw the hands. On the mannequin's left hand, draw a finger in the form of a curved tube. 7. Draw a large oval in the hands of the mannequin. Add a thin border at the bottom to show the volume of the element. | |
| Essential elements | 1. Visually mark a point located just above the ear. From this point, draw an arced line across the entire surface of the head to mark the bottom edge of the chef's hat. 2. Place the halves of the ovals on the lines drawn for the eyes. Sharpen the ends of the figures. 3. Use arched lines to mark the lower part of the nose and lips. Using curved lines, draw the shape of the cook. Add pleats at the fold of the sleeve. 4. On a plate, by connecting several semi-ovals and curves, depict a chicken. Oval shapes with lines inside - baked sweet potatoes. Triangles with smooth corners - carrots. | |
| Drawing of the face and clothes | 1. Draw an uneven rectangle above the chef’s head and add a slightly curved line in the middle. On the face, draw the nose, nasolabial folds, eyelids and eyebrows. 2. Add creases to the sleeves of the suit - small lines of different sizes in a chaotic order. On the chest - draw 2 columns of buttons in 3 rows. 3. Using arc-shaped short lines, draw cuffs on the chef’s wrist. On the right side of the suit, draw a pocket - a thin rectangle. | |
| Additional elements of face, clothing | 1. Using an eraser, remove unnecessary elements of the picture. You can also correct some shapes. 2. At the temples draw hair coming out from under the cap. Use uneven vertical lines to depict folds on the cap. 3. Using short thin lines, draw the cook’s thick mustache, add small lines under the eyes and in the direction “from the ear” - the lower eyelids and cheekbones. 4. Using lines of various shapes and lengths, add folds to the chef's clothes. 5. On the lower part of the chicken carcass, draw small dots located close to each other - the texture of the element. On potatoes, the dots should be larger but sparse. You can draw a small rectangle on top - a piece of butter. To convey the texture of carrots, you will need horizontal small lines. | |
| Applying shadow | 1. Using a simple pencil, shade the left side of the cap and the area of the head under it. 2. Add an active shadow to the lower part of the sleeves, as well as the suit where several elements touch. 3. Using a thin pencil, lightly darken the bottom of the chicken. Apply a more active shadow to the bottom edge of the potato. |
To complete the work you will need pencils with soft and hard leads.
Soft pencils can be used to draw the first lines, as they create a light drawing that can later be removed or corrected. The hard lead makes a clear line and also leaves a characteristic mark. When doing work, it is important to use well-sharpened pencils.
Colored pencils
The cook (drawing for children from 4 to 6 years old) looks quite comical in most cartoons. Most often, the character is overweight, has pronounced facial features (large nose), and sometimes a mustache. This image is easy to remember and repeat.
Pencils, paper and supplies
To complete the work you will need:
- a sheet of paper with a rough surface;
- pencils (simple and colored);
To draw, your child will need an album, pencils, and an eraser.
- eraser;
- sharpener.
Since the drawing does not use perfectly even geometric shapes, there is no need for compasses and rulers.
Step-by-step execution process
Step-by-step process for completing the work:
- Draw a small oval on a piece of paper. It should be slightly narrowed at the top and wide at the bottom.
- Visually divide the figure into 3 equal parts (vertically). Separate the upper part from the rest with an arcuate line.
- Divide the figure horizontally into 2 parts so that the left part is slightly larger than the right.
- Under the drawn element, draw a larger shape, similar to an almond.
- Use arched lines to create a protruding, wide chin for the chef. Using an oval figure located below the horizontally outlined line, draw the location of the ear.
Cook - drawing for children step by step
- Visually draw a vertical line from the ear to the other side of the figure. Draw a massive nose in the form of an unfinished oval and add several arched lines - as shown in the picture.
- Draw oval eyes above the nose. Use smaller ovals to depict the pupils. Also add arched, high raised eyebrows.
- Use a small oval to show part of the ear on the right side of the drawing. On the left side add a strand of hair and also show the folds inside the ear.
- Under the nose, draw a line for the mouth, and also add an arched element - a protruding chin.
- “Cut off” the top of the head with an inclined line – the lower edge of the cap.
- Draw the figure as shown in the figure.
- At the bottom of the image, draw several rectangles of different sizes that overlap each other to create a chef's costume.
- Add tubular elements with bends - the chef's hands.
- At shoulder level, add small thin lines - fold points.
- Separate the part of the sleeve on the left side of the design with a thin arched line to create a cuff.
- Divide the chef's suit into elements - as shown in the figure, add a border and buttons.
- Draw a brush on the cook's body using thin unfinished ovals.
- Draw 2 tubular elements at the bottom, gradually tapering downwards. Connect with a small line. Draw additional elements on the chef's pants - seams, stitching and pockets.
- Add shapes that resemble the outline of a seed. Draw the sole on the shoe.
- Using an eraser, remove unnecessary elements in the drawing.
When the base is ready, you can start adding color to the design. The chef's uniform is mainly made in white. This option is recognized as a classic; it is used in cartoons for children and films. Nowadays, black and crimson fabrics are gradually being used to create work clothes.
Stages of coloring a picture:
- Use a blue pencil to paint over the pants, upper part of the clothes and the chef's hat. At the same time, press lightly on the lead to get a light shade.
- To complete the work you will need a white pencil. Use a white pencil to smooth out the previously drawn blue lines.
- Use a red pencil to secure the result.
- Using a black pencil, duplicate the buttons of the suit and also paint over the shoes. When drawing the sole you will need to make the color more intense.
- Use a green pencil to color the eyes, and also add pupils using a black pencil.
- Using a red pencil, barely touching the lead to the paper, paint over the cook's face and hand.
- Add a light shade of yellow on top.
- With the same care, secure the result with a brown pencil.
- This way you can get the skin tone. In the process, it is important to maintain proportions in applying color.
The finished drawing can be colored along the outline with a black felt-tip pen.
Using a paper chef's hat
It is a great pleasure for any child to help their parents with household chores. Mom prepares a variety of dishes every day and the baby wants to participate in all processes. To give this activity a more playful mood, the baby is dressed up in a chef's costume. To do this, just put an apron on him and give him a ladle or rolling pin. However, the image will remain uncompleted. You will need a chef's hat. This costume is also suitable for other events and activities, such as:
- children's party;
- classes in a circle;
- themed birthday;
- competitions at adult parties;
- parties;
- games at home;
- children's holiday.
Making paper crafts is simple. To do this, you will need available materials that can easily be found in every home.
It is not necessary to make a white hat; if your baby loves yellow and blue, then use the material of your favorite shade.
Necessary materials
The usual color for a chef's hat is white. But you can get a little creative and make it pink or blue. This option will help separate the boys and girls at the party. To create crafts use:
- white A4 paper;
- a simple pencil;
- scissors;
- ruler;
- measuring tape;
- glue stick;
- scotch;
- adhesive tape;
- decorative elements.
Making a chef's hat will take a little time. There are several master classes for creating a similar look.
Gouache
The cook (drawing for children from 2 to 4 years old) is a complex character. It can be depicted using geometric shapes. Even a child can handle this kind of work, and you can color the finished image with gouache.
Pencils, paper and supplies
To complete the work you will need:
- ruler;
- a simple pencil;
- set of paints;
- palette;
- eraser.
You will also need brushes to work with paint. It is best to use brushes of different sizes.
Step-by-step execution process
When performing work, you need to focus on the presented image:
Cook - drawing for children step by step
Stages:
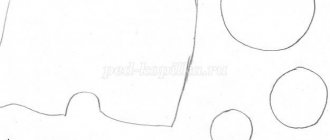
- Draw a flattened oval at the top of the sheet. Using a ruler, add 2 rectangles of different sizes. Arrange the shapes as shown in the picture.
- Using trapezoids and rectangles, assemble the outline of the fell.
- Add 2 trapezoids to the bottom figure - as shown in the figure. Pre-smooth the corners to get the boots.
- From the top of the tall rectangle (the character's body), draw 2 tubular elements. Attach a palm and 4 fingers to the end of each.
- From the previously formed oval in the upper part of the drawing, create the top of the cap. To do this, divide the oval into 3 parts and draw arcuate lines. Connect the resulting shape with the lower figures.
- On the next figure, draw a face, and also add an ear on each side around the circumference.
- Divide the body with a vertical line, add a triangle at the top on each side, and then draw buttons.
- Fill the area of the chef's cap and body with white paint.
- Paint the boots with brown paint.
- Fill the character's pants with black paint, and also draw the buttons using a thin brush.
- Mix some brown and white paint on the palette. Use the resulting shade to paint the cook’s face, ears and hands.
To be neat, draw out the elements of the face using a felt-tip pen or marker. Dry the paint first.
Where to begin
First of all, you need to prepare your workplace. A beginning artist will need the following materials and tools:
- a sheet of white paper, but not smooth (glossy), but slightly rough;
- a set of simple pencils of various markings (hardness) - T, M and TM;
- soft eraser.
Now you have everything you need to draw a chef step by step.