How to make a clown out of paper and cardboard
You can make this craft in 20-30 minutes. The main thing is to immediately prepare the tools and materials that will be needed during the work, so as not to be distracted from creating the product in the future. You will need:
- Tennis ball.
- Springs.
- Glue.
- Small pieces of cardboard
- Corrugated paper.
- Cigarette paper.
Now you can proceed to the next steps.
1. First, let’s draw the cheerful face of the future clown on a tennis ball. Now let’s add a red potato nose and a wide smile, which will lift your spirits.
In order not to worry about the toxicity of the toy, you can replace permanent markers with paints of more natural origin.
2. In order to get the body, you need to fold the corrugated cardboard into a cylinder shape.
For everything to work out, it is necessary to maintain some proportions: the diameter of the ball with the muzzle should be slightly larger than the cylinder body.
The edges of the cylinder must be glued together with glue, or carefully secured with a stapler so that the staples are not visible.
3. Now you need to draw arms and legs on colored cardboard. Cut it out. We immediately glue the legs to the bottom of the cardboard cylinder. But with the handles it will be a little more difficult: first we put springs on the wire. Then we attach a cardboard palm from either edge. You can use tissue paper to make a hairstyle for a clown. To do this, take a strip folded twice. Now you need to cut the edges.
It is best to make cuts on paper using a utility knife or sharp scissors.
4. Now you need to put all the parts together. To do this, glue the head to the workpiece and make the arms slightly raised.
Step-by-step assembly of the jerky clown
Twitch clowns are interesting paper toys that move their legs and arms. Such movements occur due to the fact that their arms and legs are connected by a thread to the main body of the toy.
Some time ago, toys of this kind were found quite often. Then such products were unreasonably forgotten.
And recently they remembered again. Moreover, now crafts with such a mechanism are in special demand.
Children will simply be delighted with such clowns, and an adult will probably remember his childhood.
So, first you need to decide on a picture (which can be found below). And print it out.
After you have decided on your choice, you need to print out the shape and carefully cut it out.
Now we find the holes. It is through them that the thread connection will be made.
Next to each picture there is a diagram that shows the principle of connecting the parts.
And now everything is simple - we thread a strong thread through the holes. We fix it according to the diagram.
The twitching clown toy is ready. You can surprise your children and enjoy yourself. After all, how many pleasant memories do “hello” from childhood give?
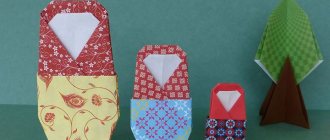
Origami
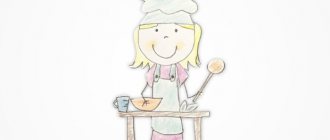
To get a funny face you only need a sheet of paper and markers. Even a beginner can make such a product, since there is nothing difficult here!
This craft does not have complex folds. All the folds that are used here are called the simplest ones - that is, those that need to be folded and that’s it. And you don't need to straighten them.
A more detailed master class can be found in the video below:
Here's a video for a more complex craft:
The main thing is that the performer is not afraid of the abundance of details.
You need to make elements of various sizes with your own hands. It is from these elements that figured products are assembled, according to the principle of nesting dolls.
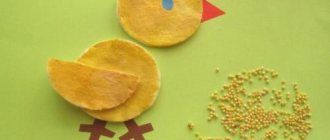
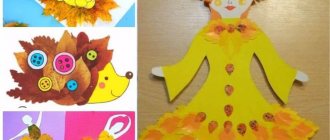
Applications for children
All children have a love for the circus. After all, this is where you can meet clowns, magicians, and jugglers. It's like a small world filled with wonders and magic. Of course, the child will want at least something to remind him of such an unusual place as the circus.
Kids have a special love for clowns. They not only do wonders, but also give a good mood, making children laugh more and more.
You can make funny clowns with your children. The main thing is to choose the right basic idea, based on the child’s age and perseverance.
The simplest application is to draw a clown on a piece of paper or cardboard. Then you can glue the hair from red or orange yarn. And to get a beautiful nose, you can choose a soft pompom.
The resulting application can be hung on the wall, on the door or in any place you like.
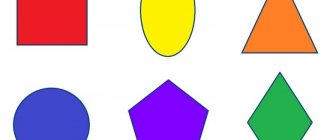
Cutting templates
Children will not only be happy to play with the figures of their favorite hero. But they will be happy to cut it out themselves.
Therefore, templates with images of clowns are perfect for children's games.
Children will not only cut out the figures, but also paint them. And then let your imagination run wild.
Even the most finicky fidget will certainly enjoy these games. And leaves with funny clowns can lift your spirits in no time.
DIY applique for children 6-8 years old Elephant in the circus. Templates. Master class with photos
Application "Circus Elephant".
Templates. Master class with step-by-step photos. Author: Tatyana Anatolyevna Shilkina, teacher at the Meshchovsky Social Rehabilitation Center for Minors, Meshchovsk, Kaluga Region. Description: this master class is intended for children from 7 years old, teachers, parents. Purpose: interior design of a children's room, an original gift.
Goal: making an applique from colored paper using templates. Objectives: - improve the ability to cut in different directions; — develop practical skills in working with paper; - develop the eye, fantasy, imagination, thinking; — cultivate accuracy in work and patience. Materials and tools needed for work: colored paper for children's creativity, colored cardboard, PVA glue, scissors, a simple pencil, black felt-tip pen.
Safety precautions when working with scissors. 1. Scissors must be well adjusted and sharpened. 2. Store scissors in a specific place (box or stand). 3. When using scissors, you must not be distracted, be as attentive and disciplined as possible. 4. When passing the scissors, hold them by the closed blades. 5. Place scissors on the right with closed blades directed away from you. Rules for working with PVA glue. 1. Do not open the glue with your teeth. 2. When working with glue, use a brush. 3. Take the amount of glue that is required when performing the work at this stage. 4. Remove excess glue with a soft cloth or napkin, gently pressing it. 5. Wash your brush and hands well with soap after work. 6. Avoid getting glue on clothes, hands and face; In case of contact, rinse thoroughly with water. Templates
It is the largest on land.
He has a big ears. With a wonderful hose-nose, he can pluck coconuts from palm trees. He makes a trumpet sound. You have met him more than once at the circus or zoo. And he lives in hot countries and on the island of Ceylon. Did you guess it? This is an elephant). Our little elephant is very dexterous and performs in the circus.
Progress:
Take colored paper, trace the templates and cut out the applique details
Take a sheet of cardboard of any color and place it vertically
Glue a piece of grass onto the bottom of the cardboard
Glue on the blank body of the baby elephant and the sleeveless vest
Now glue on the head, legs, tail
Let's design the face
Let's stick colorful balls
Take a black felt-tip pen, outline the eyes, draw an ear, legs
Closer
Our application “Circus Elephant” is ready. Insert the work into a frame.
Thank you for your attention!
We recommend watching:
DIY Birch applique for children 6-7 years old. DIY application made of colored paper for children 6-7 years old. Templates. Parrot DIY applique from office paper for children 5-10 years old with templates. Chicken Do-it-yourself applique made of colored paper for children 5-7 years old Teddy bear with templates. Master class with phot
Similar articles:
Paper contour mosaic
Paper application for March 8th in the preparatory group
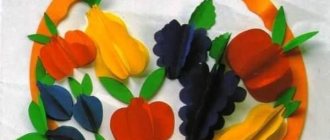
Application for children “Fruit Basket”. Master Class
Theme of the week: “Defender of the Fatherland Day”
Lesson 23. Flying planes (Magazine pages. Collective plot application from prepared silhouettes of objects)
Program content. Teach children to compose a collective plot composition. Strengthen the ability to accompany the words of a poem with movements. Develop precision and coordination of movements.
Handout. Half a sheet of whatman paper, on which silhouettes of houses are drawn or pasted below, and clouds and the sun above; an airplane cut out of a magazine page, glue, a glue brush, a rag, an oilcloth lining.
Progress of the lesson
Start the lesson with a physical education session:
The planes began to hum (Rotate your arms in front of your chest with your arms bent at the elbows.)
The planes flew (Arms to the sides, alternately lean left and right.)
They sat quietly in the clearing (Sit down, hands to knees.)
And they flew again. (Go for a run.)
Show the children a piece of whatman paper on which silhouettes of houses are drawn or pasted below, and clouds and the sun above. Give each child an airplane cut out of a magazine page and ask them to glue the flying airplanes onto a large piece of paper.