Zoo
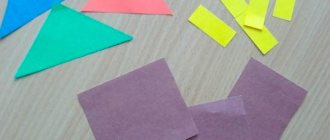
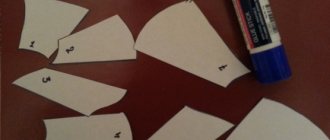
You can develop your child’s logic with an interesting task: cut out silhouettes of animals from colored paper, and the children will have to assemble the whole animal. It will be fun for them to select the appropriate parts and use glue to create an animal applique. Next, fill in the missing details: eyes, mustache, etc.
Then, place the collected characters on a board or paper sheet, forming a fun zoo.
Some of the most beloved characters include the following:
Panda
You can make a cute little panda from white and black paper. First you need to glue the hind legs onto a suitable background. On top of them is a white oval (belly). Even higher, towards the belly, there are black paws in the form of arcs. On top of everything is a white circle (head). Finish the applique with the missing details (ears, eyes on black circles, etc.).
You can make an excellent template for a panda from a solid white pear-shaped piece, this will be the belly combined with the head. Paws, in the form of a black horseshoe, are glued under the head.
Horse
For children, you can prepare many entertaining templates for making horses. Cardboard stencils for appliques are a fairly solid basis for practice. There is one wonderful feature: if you lengthen the neck of a horse, you automatically get a giraffe pattern.
Elephant
It is advisable to always have a template of such an animal available, since it is very difficult to quickly draw the silhouette of an elephant. The problem is created by the proportionality of the legs and torso, and the trunk often looks like a hose. When making a template, it is better to cut out the ears separately.
You can create an elephant with a raised trunk, so you can create applications as follows:
- by drawing notes coming out of the trunk, you get an elephant that sings;
- blowing soap bubbles by gluing colorful circles on top;
- place a bouquet of flowers, dried or made from colored paper, into the trunk;
- doused with water, painting on the splashes;
- reaching out to someone, you can depict the person to whom he is reaching out next to him.
Turtle
Turtle crafts are interesting because of the presence of their shell. It allows you to apply different design techniques based on one template.
In addition, you can choose a task for any age group of children. You can also use any materials here:
- paint;
- textile;
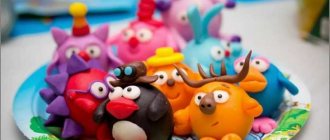
- plasticine;
- colored paper, etc.
Winter plasticineography
Santa Claus's house
Do you know where Santa Claus lives? We fantasized about this topic and decided that grandfather lives in a very nice red house with a huge snowdrift on the roof. And always with a round window from which he waves to all the kids! We made Santa Claus from plasticine using the reverse plasticine technique in a sour cream lid.
In this master class we combined plasticineography classes and watercolor painting. It will be interesting and will keep the child busy for a long time!
We really love it when the city is covered in snow. We invite you to depict a beautiful country house using plasticine. Let's learn how to sculpt patterns from plasticine and draw a monochrome background.
How to make plasticine cards
For the New Year we often make plasticine cards. To make them last longer, you can fix them on top with varnish. Look at the postcards we made with the children using the plasticine technique.
- Christmas tree made of flagella and circles;
- making a snowflake from flagella (a rather difficult and painstaking task);
- New Year's balls using the smearing technique (a simple and easy master class for children over 3 years old).
See plasticine New Year here
Winter plasticineography for children from 3 years old
Make an applique with a warmed dachshund. We will learn how to make flagella and make a sweater out of them.
A penguin with a warm heart, he really wants to please your loved ones. Great idea for a card. You will need black paper, a white pen (can be replaced with gouache) and plasticine. Remember that if you do not have some material or tool, you can always replace it with an alternative (white pen for gouache, plastic eyes for plasticine eyes, black paper can be drawn with gouache on white).
We sculpt from plasticine on a winter theme
If your child loves to sculpt with plasticine, see what we can offer for creative inspiration. With the help of detailed step-by-step visual diagrams, you can sculpt winter animals and learn how to sculpt different textures.
How to make a Christmas tree from plasticine: 7 detailed instructions
7 detailed diagrams for sculpting a Christmas tree from plasticine are waiting for you. Look how bright and beautiful they are! This is a very useful master class for developing fine motor skills and more. Plasticine has a calming and positive effect on children.
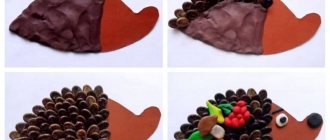
You can make funny hedgehogs from plasticine, which are insulated: put on hats, scarves and mittens. See detailed instructions for modeling in the diagrams. Recommended for children over 5 years old.
Or this New Year's pig. Children will practice making clothing items and learn how to make textures from plasticine using stacks.
Face templates
It is recommended that children be allowed to make an applique on the image of an animal’s head, i.e. the child only has to assemble the face of the animal from suitable parts (cheeks, nose, eyes, eyebrows, mustache, color details, etc.).
The face of the beast is unique for each animal, so in order for the child to clearly understand the difference, it is advisable to give tasks with portrait applique of animals more often.
Older children can be given the task of giving the animal’s face a voluminous, interesting look.
Templates can be prepared for crafts on any topic. This is especially necessary for kindergartens to make the work easier for children. A teacher who has entire sets of templates quickly develops the desire for creativity in his students. Therefore, it is advisable to gradually replenish the collection with a variety of specimens: birds, domestic animals, natural details (clouds, sun, tree, flowers), etc.
Basic Rule
It is not difficult to assemble a whole picture from the details; the same scheme is used for any work - step-by-step overlay of elements. The larger the back of the object in the image, the sooner it needs to be glued. You should always start from the rear parts of the animal’s body (croup, hind legs, etc.). Next, stick on the remaining layers, according to their level of approximation to the manufacturer. Internet users can find good examples by watching master classes or simply photos of making templates and ready-made applications.
Fairy tale characters
It is impossible to imagine the New Year without Santa Claus. He is the symbol of the New Year, which occupies the minds of all boys and girls. Let's figure out how to make Santa Claus out of paper. And so that you can play with it, let’s glue it to a skewer (or twig). You can make other New Year's characters and stage a real home performance!
Pattern applique “Snowmen”
In the master class “Applique - Snowmen Pattern” we will learn how to cut out even circles, form a uniform composition and learn the basics of creating patterns. This application is suitable for children aged 3 years and older and will be interesting for older children who can add additional elements to it. Take the idea and repeat it with other fairy-tale characters or make a magical forest.
Application “Snowman with a gift”
Or you can make a snowman who will give candy to friends and family. An excellent option for a DIY gift for the New Year for which the only materials you need are paper.
Papier-mâché snowman
I really like this “Snowman” craft, but it can’t be done in one go. The napkin base should dry thoroughly. This will take a couple of days. Children will love the papier-mâché technique, which can be used to form three-dimensional shapes.
New Year's applications for children
Christmas tree applications
The winter beauty of the Christmas tree can come in a variety of designs. In addition to crafts, children will also love the “Paper Christmas Tree” applique, especially since you can choose any desired option from the ten presented below. This is some kind of collection of all the works together, with links to detailed reviews with photos and instructions.
More details: paper Christmas tree applique
Funny deer
The New Year's applique "Deer" is suitable for children of all ages. It is very easy to make, and then show your creative talents and decorate it festively and brightly.
Read more: New Year applique with deer
Volumetric snowman
A postcard with a snowman is a wonderful three-dimensional applique that a child can make for his loved ones on the eve of the New Year holidays.
More details: applique with a snowman
Toy on a branch
A New Year's card with a three-dimensional branch and a toy is an excellent holiday applique, a gift to loved ones that a child can make with his own hands.
More details: applique with a toy on a branch
This is not all applications for children; the selection will be supplemented with new and interesting ideas, voluminous, using different materials and techniques.
To be continued…
Winter clothes
We associate winter with snow, New Year and, of course, cold. To avoid freezing, we wear warm clothes and winter accessories. Look at the crafts we made on the theme of winter clothes.
Application “Winter hat”
What does your head get cold without in winter?
Of course, without a warm winter hat. Let's make a beautiful head pattern with a pompom from paper and plasticine. In this master class, your child will learn how to make beautiful patterns from plasticine and an interesting technique for folding paper patterns. Children from 5 years old can handle this craft. Watch a detailed master class here
Application “Mittens” made of paper and plasticine
To keep our hands from freezing, we wear warm mittens! Ours will have very beautiful patterns, which we will draw with markers and felt-tip pens. And we will definitely make decorations from plasticine: flagella and circles. This applique can be made for a New Year’s card or hung in a frame on the wall to create a festive mood.
Detailed master class here
DIY New Year decorations for the home
Sometimes the preparation for the holiday is much more interesting than the holiday itself! Does this happen to you? When we prepare for the New Year, we decorate the house, put up a Christmas tree and hang garlands. We will tell you what crafts you can make with your children from scrap materials.
New Year's wreath made of paper and pompoms
How beautiful New Year's wreaths look on the doors of the apartment. And we will make one from paper and pom-poms. To do this, we will cut out fir branches from paper, draw patterns on them and decorate them with multi-colored pom-poms. What kind of wreath will you make?
Craft “New Year's boot”
Or you can make a personalized boot from cardboard. Look how hard Varya tried and decorated her felt boots with stickers. This is a very simple and easy craft that children from 3 years old can handle.
Do you remember how they used to sew elastic bands to mittens? And we decided to make a pendant from cardboard and white paper mittens. It turned out great!
Pendant “Winter City”
Another pendant is a winter city, which we decorated with snow wool and sparkles. As a basis, we took a piece of cardboard, of which so much remains after the goods are delivered. Cardboard from boxes makes very strong crafts.
We not only decorated the house, but also came up with a winter crown! Download a ready-made template or make a sample with us. Sequins are suitable for decorations, you can take nail polish with sparkles or simply paint with felt-tip pens.
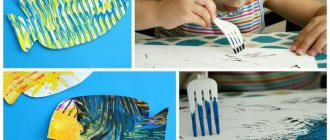
Application of geometric shapes “Fish”
Picture, black and white background and templates for work:
The principle of operation for all applications is the same: we cut out the colored templates-details and glue them onto a black and white blank.
To work you will need tools such as:
- scissors;
- PVA glue.
It is important for children to choose comfortable scissors so that they do not have any difficulties during the cutting process. Scissors should be safe, with rounded ends.
