How to make a hedgehog from plasticine and toothpicks
Children can handle this craft on their own, however, it requires careful supervision. In our work we will need toothpicks and colored plasticine. For hedgehogs, you can choose material of any color. Let's prepare a workplace and a ball of plasticine. By pressing with your fingers on both sides, we form an elongated muzzle. When the droplet-shaped body is ready, take toothpicks. One at a time, stick the sticks into the figure. It is important not to stick them too deeply - 5-7 millimeters will be enough. The number of toothpicks can be adjusted at your discretion. The best option is 10-15 pieces. If desired, you can mold a muzzle and make a decoration. Making such an animal is exciting and also develops children's fine motor skills.
Hedgehog made of plasticine and matches
A child can make a hedgehog from matches without the help of adults. Cut each match in half. We form a body from a piece of plasticine. To do this, we pull out one of the edges into a narrow muzzle. After the body is ready, insert the matches with the colored side down. Evenly cover the entire body, except the muzzle, with halves of matches. At the end, we roll two yellow balls and attach them as eyes. The nose will be red plasticine. The result is such a wonderful hedgehog, which is not at all difficult to make. You can experiment with the color of the plasticine or paint the matches in the color you like. You can add fruits, mushrooms and leaves to the hedgehog.
Hedgehogs made of cones and plasticine
For this idea you need to prepare cones and nuts of different shapes. Let's take a big long cone. We mold the necessary parts from plasticine. We will need an elongated muzzle, two white and two black balls, one large ball for the nose and a red tongue. We collect all the details of the muzzle and fasten them together. We glue chestnut shells on top as spines. We sculpt long legs and attach them to the pine cone. We attach nuts to two pieces of orange mass. This will allow the figure to remain stable. If desired, you can fashion different delicacies and decorate the hedgehog with them.
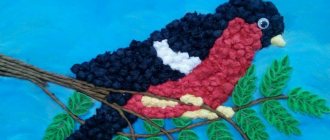
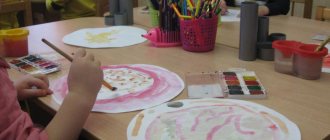
Craft hedgehog from seeds and plasticine
For the next idea we will need sunflower seeds and brown plasticine. Finding these materials is not at all difficult, and making such a hedgehog is suitable even for the smallest. Cut a piece of plasticine and roll it into a ball. Give it a droplet shape. It is not necessary to perfectly smooth the entire surface, as it will be deformed by the seeds. We attach eyes consisting of black and white balls. Don't forget about the big brown nose. Now, let's move on to the most interesting moment. Insert the seeds in rows with the wide end down. The first row will consist of 4-5 seeds, depending on the size. Next, we increase the number of needles in one row. Cover the entire surface of the hedgehog with seeds. An original, and most importantly, interesting children's craft is ready!
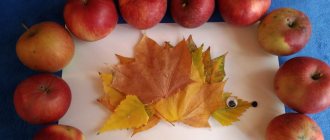
Hedgehog made of plasticine and seeds on cardboard
This craft, like the previous one, requires seeds, only not sunflower ones, but watermelon ones. The hedgehog will turn out flat, so you need to prepare cardboard. Draw the silhouette of a hedgehog on cardboard of the desired color. Carefully cut it out. We will cover the base with brown plasticine, so we will prepare it in advance. Knead the mass thoroughly until it becomes soft and pliable. This will make working with the material easier. We tear off small pieces and press them onto the cardboard. The layer should be thick enough for the bones to stick. We draw a clear boundary between the head and the body. We cover only the body with plasticine. We begin to insert the seeds at a slight angle, starting from the top. We continue to insert the seeds in rows until the entire back is covered. Glue on an eye consisting of a white and black circle. Add a nose, mouth and eyebrow. To make the hedgehog look brighter and more interesting, we add various details in the form of leaves, mushrooms and berries. In this way you can make animals of different sizes and you will get a whole hedgehog family!
How to make a big hedgehog from plasticine, pine cones and a bottle
This craft is based on a small bottle. It is better to prepare a bottle that is not too long with a wide bottom and a narrow neck. To prevent the bottle from showing through, we paint it dark brown and beige. We place it in a black nylon sock. We tuck the edges in and screw on the lid. Now, glue the cones, starting from the wide part of the container. Pine cones will do. They can be planted with super glue. Cover the entire surface of the bottle with cones, with the exception of the muzzle. Glue on eyes and mustaches from ribbons. We decorate the hedgehog's spines with plasticine fruits, dried berries and flowers. We place the animal on a plate with pine branches and dried mushrooms. This autumn composition looks beautiful and original.
We showed different ways to make hedgehogs from plasticine. Such crafts are suitable for school and kindergarten. You can experiment with colors, materials and textures. For example, we replace seeds with pasta and add unusual colors. You will get the brightest and most fun crafts!
Craft hedgehog made from chestnut and plasticine
Chestnut has a very interesting shell that can be used for crafts. Its shape resembles the spines of hedgehogs, so we will use it for the animal’s fur coat. The basis of the hedgehog will be the fruit itself - the nut. We sculpt an elongated sharp muzzle and glue it to the nut. We attach ready-made eyes on top, or we sculpt them ourselves. We sculpt a mouth from a small piece of red plasticine. Glue chestnut shells on top. You can create a composition from a hedgehog and dried autumn leaves.
How to make a hedgehog's face from plasticine
Making this animal is very simple using nail scissors. Roll the brown oval and lightly press the front part. We form a cone from yellow plasticine, then make a slight bend and stretch out the pointed nose. We attach the resulting muzzle to the body. We roll four identical balls. On each of them we make two cuts to form fingers. We attach them to the hedgehog. The next step is to make the spines on the hedgehog’s coat. Starting from the head, we make cuts along the entire border. Bend each needle slightly. We continue to cover the back with spines, gradually moving towards the back of the back. We make eyes from two black and two white balls. Don't forget about the nose. A bright and creative hedgehog figurine is ready.
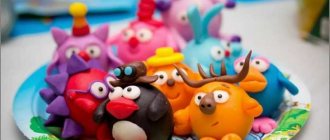
Smeshariki hedgehog made of plasticine
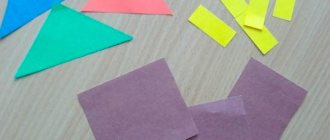
Any child will love this beloved famous character. It turns out bright and unusual, and its production is not difficult at all. We will need plastic material in pink, purple, blue, white and black. Let's roll the ball. Carefully press the ball on the sides and form an elongated nose. Press down two blue balls to make glasses. Attach the fasteners. Adding eyes. The next step is to make parts from pink plasticine. We roll the small nose and ears. We push through the mouth. From purple triangles we form the hair of a cartoon character. All that remains is to add the paws and the figurine is ready.