The role of using non-traditional drawing techniques in the artistic development of preschool children
As mentioned above, the use of non-traditional drawing in kindergarten is beneficial for children.
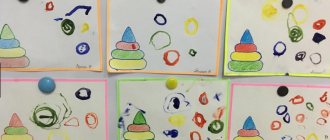
Due to the fact that completely atypical objects can be used in drawing, preschool children are given the opportunity to think outside the box. It turns out that they are having fun and usefully spending their time. They experiment with different painting techniques and try different ways of expressing themselves. Classes develop observation skills, creativity, and artistic taste. The educational process turns into a fun game. Therefore, modern methods of creative activities are increasingly being used in kindergartens. Diagnostics of the use of non-traditional drawing methods in kindergartens shows good results. Unconventional spray painting technique
Non-standard methods of drawing are always fun, emotional and creative. The result of such creativity is beautiful and unusual, even if the child has no artistic skills.
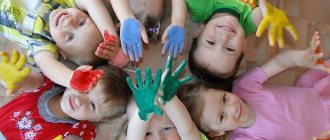
Parents learn with their children
✆ from 8:30 to 20:00
Every child, learning about the world around him, tries to reflect it in his activities: in play, in stories, in drawing, in modeling, etc. Fine creative activities provide excellent opportunities in this regard. The more diverse the conditions conducive to the formation of a creative environment, the brighter the child’s artistic abilities will manifest themselves.
Drawing with non-traditional techniques opens up wide scope for children's imagination, gives the child the opportunity to get carried away by creativity, develop imagination, show independence and initiative, and express his individuality.
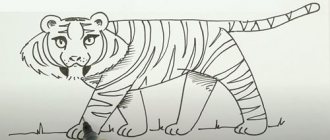
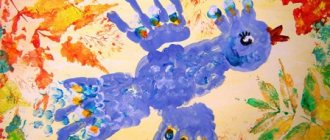
Unconventional painting techniques are a wonderful way to create small masterpieces. It turns out that you can create a salty picture, and your palm can turn into a blue elephant. A gray blot can become a tree, and carrots and potatoes can surprise you with unusual patterns.
For example, with children of primary preschool age you can use:
— finger painting — palm painting — thread printing — potato or carrot printing.
With children of middle preschool age you can try:
— picture prints — plasticine printing — oil pastels + watercolors — leaf prints — palm drawings — drawing with cotton swabs — magic threads — monotype.
And with children of older preschool age, you can master more complex techniques:
- drawing with soap bubbles - drawing with crumpled paper - drawing with salt - blotography - plasticineography - grattage - frottage.
Each of these unconventional techniques is a little game for a child. Using these techniques allows children to feel more relaxed, bolder, and more spontaneous. These techniques develop imagination and give complete freedom for self-expression.
DRAWING WITH FUN PRINTS
1. Plasticine stamps
It is very simple and convenient to make stamps from plasticine. It is enough to give a piece of plasticine the desired shape, decorate it with patterns (lines, spots) and paint it in the required color. For painting, you can use a sponge moistened with paint, or a brush that can be used to apply paint to the surface of the stamp. It is better to use thick paint.
Materials: 1. Plasticine 2. Pencil 3. Paint 4. Sponge 5. Brush 6. Paper 7. Water jar
2. Thread stamps
To create “striped stamps” you can use threads tightly wound around an object. Using a thick layer of paint, the threads are painted in the required color. Then, using imagination, the “striped pattern” is applied to the surface to be decorated.
Materials: 1.Wool thread 2.Base 3.Paint 4.Brush 5.Paper 6.Jar for water
3. Picture-prints You can make prints using foam forms, on which it is convenient to create a drawing with a pointed object, leaving indentations in this form. Then you need to apply paint to the form. A sheet of paper is immediately placed on top of the form and ironed. After some time, you need to carefully remove the sheet of paper. A beautiful design will appear on its reverse side.
Materials: 1. Foam mold 2. Pencil 3. Paint 4. Brush 5. Paper 6. Water jar
4. Leaf prints This technique is familiar to many. To print a sheet, you can use any ink. Paint should be applied to the side with veins. Then the painted side of the sheet is applied to the paper and ironed. After a few seconds, you need to carefully lift the sheet. An imprint of the leaf will remain on the sheet of paper.
Materials: 1.Leaf 2.Paint 3.Brush 4.Paper 5.Jar for water
Features of unusual technology
Non-traditional drawing techniques in kindergarten and at home help develop spatial thinking, eye, and coordination. After all, the baby needs to connect the ratio of the sizes of the parts into a single composition and arrange them harmoniously on the sheet. When working on a complex decorative composition, the child learns to plan his actions and choose the appropriate material. It is very important for him to understand that he can create something with his own hands.
Everyone knows that drawing is one of our children’s favorite activities. With great pleasure they draw with colored pencils, felt-tip pens, paints, dipping a brush into a bright substance. Why not dip your finger there or smear paint all over your palm? Fine art cannot have boundaries; it is necessary to destroy all boundaries of the familiar and traditional!
Unconventional drawing techniques attract our fidgets much more, because they do not require perseverance, allow them to more clearly reveal their potential during creativity, and introduce the child to the opportunity to unusually use the things around us as materials for creativity. If the most unusual colors and bright pencils no longer arouse the child’s former interest, then you can dilute your fidget’s creativity with other drawing methods. Why is drawing in unconventional ways useful in kindergarten and at home?
- The baby uses a variety of materials, recognizes differences in textures, which allows him to improve fine motor skills.
- There is an acquaintance with volume, shape and space, which develops imagination.
- The ability to combine and mix shades develops aesthetic taste.
- The use of unusual materials develops thinking and teaches one to make non-standard decisions.
- Drawings using such techniques come out much faster, which pleases the little ones who lack perseverance.
- It adds self-confidence and faith in your abilities, because even without outstanding skills you can create a unique “masterpiece”!
All the most interesting techniques and methods were collected and systematized by G.N. Davydov in the book “Non-traditional drawing techniques in kindergarten.” This book is an excellent assistant both for the teacher and for the mother who wants to diversify her leisure time with her baby.
Album “Options for non-traditional drawing techniques with children 4-5 years old
State budgetary preschool educational institution kindergarten No. 43, Kolpinsky district of St. Petersburg
Options for non-traditional drawing techniques with children 4-5 years old
Prepared by the teacher:
Gurina. A.A.
St. Petersburg, Kolpino
2020
Finger painting (fingergraphy)
Tactile sensations are, along with visual impressions, the leading way of understanding objects and phenomena around us. Therefore, special attention is paid to fingergraphy in kindergarten. But if in the younger groups children made dotted strokes, for example, painted peas on an umbrella, then in the middle group the children learn to draw lines, spots of different sizes, strokes, and also paint over certain elements of the drawing.
At the beginning of the year, children in the middle group repeat making dots with their fingers and train the skill of making round elements
In the middle group, the practice of finger drawing according to a pattern is introduced. The teacher tells, shows and hangs up an algorithm of actions on the board, how to draw an animal or a person using prints and dots-squiggles made with a pencil.
Schemes of step-by-step finger painting are presented in the book by I. Molnar “Imprint, dot, stroke. We paint with our fingers."
For fingerprinting, gouache is usually used, since it does not require dilution with water, is thick and produces bright shades. However, you can also use special hypoallergenic paints for finger painting, as well as watercolors. When working with the latter, before dipping your finger into the paint, you need to moisten it with water or drop some water into a container with watercolors.
Finger painting technique
The sequence of work in the fingergraphy technique is as follows:
- Dip your finger into the paint can.
- Using each finger we pick up paints of different shades. Remove excess with a damp cloth.
- Using your fingertips, apply the design to the sheet.
- After finishing work, wash your hands with soap.
In addition to berries and leaves, kids can also use their fingers to draw lines to depict branches.
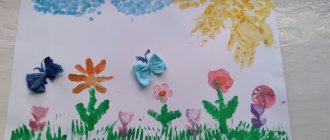
Palm painting
As with finger painting, palm painting involves creating an imprint and adding to it using brushes. In the middle group, the imprint becomes the basis for creating various objects: birds, foliage, fish, etc. In addition, with your palms you can create elements such as leaves on trees, flowers in a vase, hedgehog needles, etc.
Palm drawing technique
For palm painting, the drawing algorithm will be as follows:
1. Place your palm in the saucer with paint. In the second semester, children learn to create multi-colored prints with one hand, so the paint will be applied with a brush held in their free hand. The skill of such multi-colored prints is developed in lessons on the topic “Bullfinch”, “Butterfly”, etc.
2. Press your palm firmly against the sheet, if necessary, slightly turn it in a circle, horizontally or vertically.
3.After finishing work, wash your hands with soap.
Drawing birds with their palms, the children add details made with a brush - beak, legs
Poking drawing
This technique is indispensable when creating “fluffy” or “spiky” images. Needles on a hedgehog, fur on a kitten, Christmas trees, dandelions - all these images acquire a special flavor thanks to the poking technique.
Poking technique
To create a poke:
- Place a dry brush with stiff bristles into a jar of gouache.
- Holding the brush vertically, we make a sharp blow to the paper.
- Rinse the brush and blot with a napkin.
The poke can only be done with a dry or semi-dry brush.
Toothbrush painting technique
To obtain voluminous, multi-layered designs, a toothbrush is used. Having collected the paint, we brush it across the sheet, focusing on the design.
In the middle group, drawing with a toothbrush is usually combined with the use of the poking method, appliqué or drawing with cotton swabs.
Toothbrush drawings in the middle group are usually made on a colored background
Monotype
This unconventional technique involves creating a picture by imprinting part of the design on the blank half of a folded sheet. At the age of 4–5, through monotype, children begin to master landscapes, which they will work with in older groups, train the ability to find the middle of an object, and develop the skill of seeing symmetry.
At the same time, not only symmetrical, but also paired objects are created in this way. To do this, a whole image is drawn on one half of the sheet, which is also completely printed on the second side.
Monotype technique
To create a monotype image:
- We bend the sheet in the middle - vertically or horizontally, depending on the location of the depicted object.
- Unbend and draw a picture on one half.
- We bend the sheet again and iron it with our hands.
- We expand and supplement the resulting image with the necessary elements. For example, let’s make a blue background for a river in which a forest is displayed.
In the drawing of a forest reflected in a lake, after unfolding the sheet, children draw a green strip of grass.
Spray
The essence of the technique is that kids pick up paint with a brush or comb, and, pointing it at the sheet, run a pencil along the bristles, thus painting the space of the drawing.
To create a one-color image from several elements, stencils are applied simultaneously
In the middle group, children become familiar with the concepts of foreground and background. For this, the multilayer spray method, which involves the use of stencils, will be an indispensable assistant.
Methodology for working with multi-layer spraying
To make a multi-layer spray:
- We attach the stencil to the sheet using paper clips.
- Take the paint with a brush.
- Let's spray.
- Apply another stencil.
- Spray a different color.
- We remove the stencils - the image turned out to be voluminous and multifaceted.
For multi-layer spraying, you can use stencils of the same image, but of different sizes, then you will get a flickering effect
Scratch
The technique involves scratching image lines on a paper substrate coated with paint according to a pattern previously applied with wax crayons.
Grattage technique
The procedure for creating a grattage drawing will be as follows:
- Color the drawing with wax crayons.
- Fill the surface of the sheet with black paint or ink.
- Leave to dry.
- Using a stick with a sharp end (for example, a wooden kebab skewer), we scratch the lines to reveal the design.
Drawing through gauze
Drawing through wet gauze does not require the use of unusual tools; the picture is created with a brush and paints.
Technique for drawing through gauze
To create a drawing using the original technique:
- We moisten the sheet with pieces of wet cotton wool or cotton pads.
- Place gauze on the paper and straighten it well.
- We create the drawing as usual.
- Let it dry, remove the gauze - the image becomes textured.
When painting through gauze, you need to apply the paint generously, as some of the “color” will disappear after removing the fabric.
Drawing with glue and semolina
We mark the indicated contours of the drawing with glue, pour in semolina and press it on top with a clean sheet. Remove the top sheet and shake off the remaining cereal. The elements are filled in one by one.
In the middle group, with this type of drawing, kids practice the ability to outline a stencil and apply glue exactly within the boundaries of the image.
The substrate for drawing semolina should be colored, since the grain will be invisible against a white background.
Wax painting
In the middle group, kids draw lines, spots and simple geometric shapes with a candle.
Wax painting technique
To create a candle design:
- We draw the outlines of the design on a white sheet with a candle.
- Paint the sheet with any colors.
- The wax lines remain unpainted and appear on the substrate.
Drawing with a wax candle is usually used in winter-themed lessons.
A variation of this technique is drawing with wax crayons. The process technology will be the same, but the wax pencils are multi-colored, so the drawings after filling with paint will be brighter.
For painting with wax, it is better to take watercolor paper, since children may not calculate the degree of moisture in the brush, and the sheet may break through.
Blotography
The essence of the technique is to obtain pictures based on spots and blots. Spots can either be used to decorate a design as intended, or can be used as a basis for an image in a traditional style.
Blotography technique
To create blots:
- Dip the wet brush into the paint.
- Make a stain or place a drop.
- Blow from a cocktail straw onto the paint, blowing it in the desired direction.
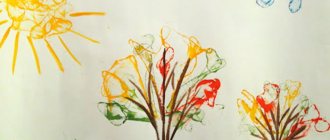
In the middle group, kids learn to inflate thin elements from a spot, for example, tree branches
Drawing with foam rubber
To highlight the texture of the depicted object - clusters of flowers, curly clouds - the method of applying paint with foam rubber (or a piece of sponge) is used. To prevent the sponge from getting your hands dirty, it is clamped with a clothespin that acts as a handle.
Stamping technique using natural materials
A whole vegetable (onion, corn, potato, cucumber, etc.) or fruit, berry (apple, lemon, feijoa, etc.), cut in half, flowers (daisies), shells, is painted and an imprint is created on paper. This technique is convenient for drawing cross-sections of fruits and vegetables. For example, to create the composition “Grandma’s Compote,” kids draw the outlines of a pan with a pencil, and depict fruits with stamps.
Topics for drawing in kindergarten
The topics of drawing in preschool classes can be very diverse. Typically, educators rely on seasonality. Therefore, for example, in autumn it would be relevant to paint a yellow-red landscape or use fallen leaves in the process itself.
For younger children, it is better to choose well-known objects: animals, flowers, trees. These topics are always relevant, and they can be done with almost any drawing technique.
Note! If you don’t have enough ideas for drawing, you can always use thematic literature with examples of work. Or you can get advice on unconventional drawing methods from more experienced teachers.
Traditional painting techniques
The foundation for the overall comprehensive development of a child is laid in early preschool age. Drawing is one of the most important means of child development, during which the child learns about the world and forms an aesthetic attitude towards it.
When drawing, a child develops a wide variety of skills and abilities, namely:
- the child learns to visually evaluate the shape of an object, navigate in space, distinguish and feel colors
- trains eyes and hands
- develops the hand.
“Did you know that drawing is one of the main ways to develop a child’s comprehensive development, his senses, fine motor skills, sense of shape and color? With the help of this simple and exciting activity, children convey their attitude to reality.”
The success of upbringing and learning depends on what forms and methods a teacher or parent uses in creative activities with a child.
Thus, the main technique for children of primary preschool age is to demonstrate how to use a pencil and paints. At the same age, passive drawing is effective: when an adult guides the baby’s hand. When the baby grows a little, visual arts are taught using the information-receptive method: children study the shape of an object, tracing it with their hand, feeling its outlines. Such exploration of the subject helps the child create a more complete understanding of the subject. The next stage is the choice of drawing technique.
Traditional children's drawing techniques:
- Drawing with a simple pencil.
- Drawing with colored pencils.
- Drawing with felt-tip pens.
- Painting with a brush - watercolor, gouache.
- Drawing with wax crayons.
When starting to choose a drawing technique for your baby, you need to pay attention to his age and interest. To be useful and educational, drawing must first of all be fun.
Drawing with paints and pencils
Children enjoy drawing, especially if they are good at it. Even drawing using traditional techniques such as painting with paints and pencils requires certain skills. If the skills are missing, then the drawing may not turn out the way the little artist intended, as a result of which the child may become upset and no longer want to draw. Younger preschoolers are not yet skilled enough in drawing.
Let's see how you can teach your child to draw with paints and pencils.
Learn to paint with paints
Today, a child’s first use of paints is finger painting. As soon as your baby has learned to hold a brush in his hand, invite him to paint with it. For the first lessons, it is better to use gouache: it does not need to be diluted with water and it leaves a bright mark. Show your child this painting technique as “dipping”: a brush with paint should be applied to the paper with all its bristles. This will create an imprint - a leaf, a light, a trace of an animal, a flower, etc. Children can use this simple technique when depicting natural phenomena that are familiar to them. It will be interesting to draw on dark-colored paper (for example, blue) with white gouache. This is how you can depict, say, snowfall. The next stage of painting with paints is the image of straight and wavy lines.
Typically, a child masters working with paints and brushes by the age of 3.5–4 years. From this age, the baby can be given paints at his disposal: let him paint what he wants. And parents just need to suggest topics for drawing and show the correct techniques.
Let's start drawing with a pencil
At first, it is better to give the baby not a pencil in his hand, but a felt-tip pen: they leave a bright mark even when the child’s hand presses lightly. When your hand gets stronger, put a pencil in his hand. Draw different shapes together by moving your child's hand. This way he will gradually understand how to move the pencil to get the desired drawing. Repeat the movements many times, strengthening them.
"Advice. Support your child’s interest in drawing by providing good conditions for creativity: quality supplies, a separate table and chair in a bright place, appropriate for the child’s height.”
From a very early age, children try to reflect their impressions of the world around them in their visual arts. Drawing in unconventional ways is a fun, mesmerizing activity that surprises and delights children. Unconventional drawing is used at an early age so that the child draws quickly, because it is still difficult for him to show perseverance. And for older children, unconventional drawing is a way to express creativity. Since for an older child the result is already important, so that the drawing is bright, beautiful and reflects all the events. This is a huge opportunity for children to think, try, search, experiment, and most importantly, express themselves. Conducting classes using non-traditional techniques
- Helps relieve children's fears;
- Develops self-confidence;
- Develops spatial thinking;
- Teaches children to freely express their ideas;
- Encourages children to creative searches and solutions;
- Teaches children to work with a variety of materials;
- Develops a sense of composition, rhythm, color, color perception; a sense of texture and volume;
- Develops fine motor skills of the hands;
- Develops creativity, imagination and flight of fancy.
- While working, children receive aesthetic pleasure.
There are many non-traditional drawing techniques; their unusualness lies in the fact that they allow children to quickly achieve the desired result. For example, what child would not be interested in drawing with his fingers, making a drawing with his own palm, putting blots on paper and getting a funny drawing. The child loves to quickly achieve results in his work.
With children of primary preschool age it is recommended to use:
- finger painting;
- stamped with potato stamps;
- palm painting;
- tamping.
Children of middle preschool age can be introduced to more complex techniques:
- poke with a hard semi-dry brush.
- foam printing;
- cork printing;
- wax crayons + watercolor;
- candle + watercolor;
- leaf prints;
- palm drawings;
- drawing with cotton swabs;
- magic ropes.
And in older preschool age, children can master even more difficult methods and techniques:
- sand painting;
- drawing with soap bubbles;
- drawing with crumpled paper;
- blotography with a tube;
- landscape monotype;
- stencil printing;
- subject monotype;
- ordinary blotography;
- plasticineography.
Each of these techniques is a little game. Their use allows children to feel more relaxed, bolder, more spontaneous, develops imagination, and gives complete freedom for self-expression.
Finger painting – happening.
It is better to introduce children to non-traditional drawing techniques with finger painting - this is the easiest way to obtain an image. At an early age, many children are just learning to use artistic instruments, and therefore it is easier for children to control the movements of their own fingers than a pencil or brush. Each finger-brush has its own paint. You can draw with dots, spots, streaks - and it will snow on the street, and smoke will come out of the chimneys, and what a bunch of grapes, just a sight for sore eyes.
Children really enjoy drawing with their hands. We dip the child’s palm in paint, and the child makes an imprint on the paper with it, then we complement the drawing with fingerprints, and we get a giraffe; we press our palm to the post and draw dots with our fingers - we get an autumn forest. And if you decorate your palm in different colors, you can get funny octopuses, or a cheerful sun and a beautiful butterfly.
Printed with potato stamps.
This technique allows you to repeatedly depict the same object, making a wide variety of compositions from its prints. The child presses the signet onto a pad of paint and makes an impression on a sheet of paper. You can use half an apple.
“Tamping” technique
We use this technique from an early age. We give a foam rubber swab and, dipping it in paint, the children create images. The results are light, airy clouds, fluffy dandelions.
Stenciling with a tampon.
The child applies the stencil to the paper, dips the foam rubber in the paint and dab the foam rubber over the stencil, then carefully removes the stencil, if necessary, repeating the procedure after the paint has dried.
Foam drawings.
For some reason, we all tend to think that if we paint with paints, then we must also use a brush. Not always, foam rubber can come to the rescue. We advise you to make a variety of small geometric figures out of it, and then attach them with thin wire to a stick or pencil (not sharpened). The tool is already ready. Now you can dip it in paint and use stamps to draw red triangles, yellow circles, green squares (all foam rubber, unlike cotton wool, washes well). At first, children will draw geometric shapes chaotically. And then offer to make simple ornaments out of them - first from one type of figure, then from two, three.
Poking with a hard, semi-dry brush.
Means of expression: texture of color, color. Materials: hard brush, gouache, paper of any color and format, or a cut out silhouette of a furry or prickly animal. Method of obtaining an image: the child dips a brush into the gouache and hits the paper with it, holding it vertically. When working, the brush does not fall into the water. In this way, the entire sheet, outline or template is filled. The result is an imitation of the texture of a fluffy or prickly surface.
Wax crayons + watercolor.
Means of expression: color, line, spot, texture. Materials: wax crayons, thick white paper, watercolor, brushes. Method of obtaining an image: the child draws with wax crayons on white paper. Then he paints the sheet with watercolors in one or more colors. The chalk drawing remains unpainted.
Drawing with a candle.
Children really like to draw with a candle. By drawing invisible strokes or putting dots, and then applying paint to the sheet, you can see rain or waves on the sheet, patterns on the window.
“Monodrinking” technique
This technique is the most common. Having folded a sheet of paper in half, apply a few drops of liquid paint to one part of the sheet, cover with the other half of the sheet, unfold it, you will see unusual patterns. You can see flowers, clouds, and a fox in them. If you draw a butterfly with folded wings on one side and cover the image with the other half, you can see that the butterfly spread its wings and flew. Using these techniques, it is easy to explain the law of symmetry to children.
Diapitiya technique
Using a swab or paint, apply a light coat of paint to the smooth surface of the cardboard. Place a sheet of paper on top and invite the child to draw something with a pencil, trying not to press too hard on the paper. On the side that was pressed to the cardboard, a print is obtained - a mirror image of the design with an interesting texture and colored background.
Technique of drawing on a wet sheet
How to properly wet a drawing sheet
This is the most important thing in the technique of drawing on a wet sheet. You need to find a middle ground: a sheet that is too dry will not allow the paint to flow beautifully. If there is too much water, the paint will spread all over the sheet and the drawing will not work out.
Paint on a wet sheet with light touches with the tip of a brush. When you touch a wet sheet with a paint brush, the paint should spread approximately 1-2 centimeters in diameter around the brush.
If the paint doesn't flow, it means you haven't wetted the sheet enough. If the paint spreads very shapelessly, it means there is too much water. Excess water can be removed with a dry brush or sponge.
Drawings whose theme is somehow related to water are very plausible: fish in a pond or aquarium, the sea, clouds with rain. The flowers look very alive.
You can only draw a background for a future drawing on a wet sheet. Or you can use a stencil to draw a figure (for example, an animal) and make the background wet only around this figure.
Learning to make a background. Usually children draw on white paper. This way you can see it more clearly. It's faster that way. But some subjects require a background. And, I must say, all children’s works look better against a background made in advance. Many children make the background with a brush, and an ordinary, small one. Although there is a simple and reliable way: to make a background with cotton wool or a piece of foam rubber dipped in water and paint. You can make a background at the end of the work with wax crayons.
“Blotography” technique
Games with blots (blotography) develop the imagination well. The child scoops up the gouache with a plastic spoon and pours it onto the paper. The result is spots in a random order. The sheet is then covered with another sheet and pressed. Children look at the image and determine: “What does this look like? "
Technique "Thread writing"
This technique causes great delight in children. You will need cotton threads, a set of diluted gouache or watercolor paints that need to be stirred from time to time, and paper. Cut the threads so that it is convenient for children to work with them, 10-15 cm, dip the thread in the paint so that it is saturated. Holding it by the tip, carefully place it on a sheet of paper and cover it with another sheet so that the tip of the thread protrudes. Hold the top sheet and pull the thread. It turned out to be a very beautiful image.
Nitography method.
This method exists mainly for girls. But this does not mean that it is not suitable for children of a different gender. And it consists in the following. First, a screen measuring 25x25 cm is made from cardboard. Either velvet paper or plain flannel is glued onto the cardboard. It would be nice to prepare a cute bag with a set of woolen or half-woolen threads of various colors for the screen. This method is based on the following feature: threads with a certain percentage of wool are attracted to flannel or velvet paper. You just need to attach them with light movements of your index finger. From such threads you can prepare interesting stories. Imagination and sense of taste develop. Girls especially learn to skillfully select colors. Some thread colors suit light flannel, and completely different ones suit dark flannel. Thus begins the gradual path to women’s craft, a very necessary handicraft for them.
Drawing with postcards.
In fact, almost every home has a ton of old postcards. Go through old postcards with your children, teach them to cut out the necessary images and paste them into place, into the plot. A bright factory image of objects and phenomena will give even the simplest unpretentious drawing a completely artistic design. Can a three-, four-, or even five-year-old child draw a dog and a beetle? No. But he will add sun and rain to the dog and the bug and will be very happy. Or if, together with the children, you cut out a fairy-tale house with a grandmother in the window from a postcard and paste it on, then the preschooler, relying on his imagination, knowledge of fairy tales and visual skills, will undoubtedly add something to it
Technique for drawing with semolina.
A drawing is drawn on a sheet of paper with a pencil (or ready-made coloring pages are taken). Then, one by one, the elements of the pattern are coated with glue and covered with semolina. Let it dry, shake off excess grains. When the drawing is dry, paint it with gouache.
Spray technique -
The “spray” technique is the spraying of drops, which in kindergarten can be done with a toothbrush, a ruler, and a comb. Use a toothbrush to pick up paint and draw a ruler along the surface of the brush towards you. Themes for drawing can be absolutely anything. For example, on a sheet of paper we place a composition of dry plants. We attach a vase stencil and a butterfly stencil. Turn the toothbrush away from you (bristles up) and start “combing” it with a ruler, moving from bottom to top. Don’t be afraid to get splashed; if you perform all the steps correctly, splashes of paint and water will fly onto your work. Splash the created composition along the contour, choose darker and more saturated colors for this (burgundy, red, dark green).
You can draw snow like this.
Finger painting using sand.
Very interesting work that children do with pleasure! The lesson takes place in two stages: - at the first stage, we prepare a sheet of paper (preferably large format) for further drawing - apply glue to the entire surface and sprinkle evenly with sand (prepared and well sifted) After this, let the glue dry! After the glue has dried, you need to remove excess sand - just carefully blow it off). After completing the first stage, we proceed to the second - directly to drawing! Invite the children to use their fingers to draw an autumn tree using a variety of colors on the sandy surface of a leaf.
Sawdust painting technique.
This method is simple and accessible to almost every child. . A drawing is applied to the surface of the product with a pencil (or ready-made coloring books are taken).
Then, one by one, the elements of the design are coated with glue and covered with colored sawdust. The best wood is birch and aspen, the sawdust should be white. If it is not possible to prepare birch or aspen sawdust, then softwood sawdust will do. The harvested sawdust is dried and sifted through a fine sieve. Raw sawdust sifts very poorly. After this, the prepared material is painted over. We use gouache paints. The paints are diluted with water in the required concentration. The amount of water is determined experimentally. The more water, the paler the coloring material will be, therefore, the color saturation of the sawdust itself will change. The prepared sawdust is poured into gauze, tied (not tightly) and filled with coloring solutions (stir thoroughly). For better impregnation, leave the sawdust in the solution for a day (stirring occasionally, then untie the gauze, put it on film and dry it near the radiator. Store the painted and dried sawdust in plastic containers.
Frottage technique
Another interesting technique for creating small masterpieces. The word "frottage" comes from the French frotter - "to rub, rub". As children, we all transferred coins onto paper, placing it under a piece of notebook paper and coloring it on top with a pencil! This, it turns out, is frotage.
The frotage technique consists of placing some kind of relief object under a piece of paper and painting it over with pastels, a couple of minutes - and the DIY craft is ready! The main task is to find a relief that will look interesting on paper. And choose the colors, of course.
Drawing technique - drawing with a rope
For the second year now, I have been using an unconventional technique in my work—drawing with a rope. Children learn to draw not only with pencils and paints, but also with colored strings. First, simple patterns and loops are laid out with rope, and then they move on to more complex objects. Each lesson is accompanied by a fairy tale corresponding to the topic. These classes use: poems, riddles, finger gymnastics, physical education minutes. Children really enjoy these activities, they feel joy and are proud of their work. They develop fine motor skills, prepare their hands for writing, develop their imagination, and strengthen their drawing skills.
Drawing with an eraser
Use a simple pencil to shade the entire sheet. Then we take an eraser, mark the center of the flower and erase the petals with the eraser and so we draw the whole bouquet. When you have finished “drawing” with the eraser, you can paint the yellow center and green leaves of the chamomile with paints.
“We draw with little balls.”
To work, you need to prepare album sheets, HONEY watercolor paints, brush No. 5-6, water and cellophane bags, previously cut lengthwise and crosswise.
The only thing you must never tire of asking your children to do is to work quickly with the brush and not let the paints dry on the paper. If, nevertheless, the paints applied first have had time to dry, help moisten them with water.
Quickly apply watercolor to the sheet. Apply cellophane to the center of the design, moisten your fingertips with water and GENTLE rotating movements create bag wrinkles on the paper. We direct the rotation of the fingers in any direction. The bag sticks to the paper with paint, and water and watercolor collect in the wrinkles. The paper will lighten in these places. Let the paper dry, do not rush to remove the bag. after a while we remove the bag and see what happens. You have a set of sheets with fancy patterns. This is an excellent background for drawings, an exclusive material for applique, for snowflakes, autumn leaves, letters, etc.
Imprint technique
Imprint with leaf prints.
It is very interesting to paint with leaf prints. We cover the leaves with gouache, then place the painted side on a sheet of paper, press and remove, resulting in a neat colored imprint of the plant.
“Scratching” technique
The “scratch” technique is also called “tsap-scratch”!
The drawing is highlighted by scratching with a pen or sharp instrument on paper or cardboard filled with ink (to prevent it from spreading, you need to add a little detergent or shampoo, just a few drops). The word comes from the French gratter - to scrape, scratch, so another name for the technique is scratching technique . We usually take thick paper and shade it with a thick layer of colored wax crayons. You can take colorful cardboard with a ready-made variegated pattern, then you can limit yourself to an ordinary wax candle (not colored). Then, using a wide brush or sponge, apply a layer of mascara to the surface. You can, of course, use gouache, but it gets dirty after drying. You can also use black acrylic paints. When it dries, use a sharp object - a scraper, a knife, a knitting needle, a plastic fork, a toothpick - to scratch the design. A pattern of thin white or colored strokes is formed on a black background.
Children usually really like this kind of drawing. Scratching is an entertaining and unusual technique; a child is captivated by the process of “developing” an engraving on cardboard. Drawings at the beginning of learning can be quite simple: outlines of objects, a cobweb, a balloon, etc. Gradually the tasks can be made more difficult.
The scope for imagination here is simply enormous: for example, you can draw an engraving on cardboard with a plastic fork: whole - waves on the sea, breaking off the "extra" teeth - road, rails, etc. You can think of a use for a fork handle, a disposable plastic knife, and even a spoon!
Option 1.
1) Thick cardboard, sketch with colored wax crayons - you can use one color, you can use multi-colored spots and stripes (in a thick layer). Leaving no white spots.
2) On top, using a wide brush or even a small sponge, cover with a layer of thick (the consistency of sour cream) black gouache (or black mascara + a drop of shampoo - it does not stain your hands when working, or acrylic paint), let it dry.
3) Take a non-writing ballpoint pen (or a sharpened wooden sushi stick, or a toothpick, or even a plastic fork, or another convenient pointed object, or all objects at once) - and when you scratch, clear contrasting multi-colored lines appear. You can draw with lines, strokes - anything: the underwater world, a bright autumn forest, space...
Helpful Tips:
If gouache (ink) rolls off a layer treated with wax pencils (crayons) , then you can degrease the base with talcum powder (sprinkle on top and rub with cotton wool). To prevent gouache from staining your hands when scratching the drawing , you need to add a little PVA glue to it before applying it and stir well. Or, when drawing, place a piece of clean paper under your hand, which rests on the sheet.
Option 2.
1) For the base, you can take colored or white cardboard, or cardboard with a ready-made bright pattern (even the same cardboard cover from colored cardboard will do). Rub the base with a simple wax candle.
2) Second and third steps – see option 1.
Option 3.
1) For the base, you can take white cardboard and paint the background with any colors, and in any way you like. Dry. Next are the second and third steps of option 1.
Drawing with a piece of textile
We take a piece of fabric measuring 10 x 5 cm, crumple it, and make something like a tampon. Dip a fabric swab into gouache paint. You can paint with black gouache on white cardboard. You can also paint on a colored background, for example blue, with white paint, then we will get a “Winter Landscape”.
Painting small stones . Of course, most often the child draws large stone tiles on a plane, on paper, or less often on asphalt. A flat image of a house, trees, cars, animals on paper is not as attractive as creating three-dimensional creations of your own. In this regard, sea pebbles are ideally used. They are smooth, small and have different shapes. The very shape of the pebble will sometimes tell the child what image to create in this case (and sometimes adults will help the kids). It’s better to paint one pebble as a frog, another as a bug, and the third will make a wonderful fungus. Bright, thick paint is applied to the pebble - and the image is ready. It’s better to finish it like this: after the pebble has dried, cover it with colorless varnish. In this case, a voluminous beetle or frog made by children’s hands shines and shimmers brightly. This toy will take part in independent children's games more than once and bring considerable benefit to its owner.
Let's draw with plasticine!
Plasticine painting on glass.
From plasticine you can sculpt not only three-dimensional figures, but also create beautiful creations on a plane. This technique has its own name - drawing with plasticine. This is a very entertaining activity for both toddlers and older children.
So, what did we need to create a plasticine drawing?
1. High-quality plasticine that kneads well and mixes together. The less it sticks to your hands, the better.
2. The basis of the picture: glass, cardboard, wooden frame. (Frame)
3. A board for modeling, a glass of water, napkins for hands, stacks, various improvised devices for creating the desired texture.
We use glass as a base to create a picture using the reverse appliqué technique and be sure to protect the edge of the glass with electrical tape so that children do not get hurt. But it should be noted that this work is done under the close supervision of adults.
Features of the technology:
Drawing (you can put the coloring book in a photo frame instead of a photograph. And let’s start creating) Before you start sculpting, you need to think about the color combination and select the right shades by mixing. We begin to apply the selected color to the desired details of the drawing from the side that the drawing from the frame is looking at). Spread the plasticine evenly with your finger, without going beyond the lines of the sketch. The layer thickness is no more than 2-3 mm.
At the end of the work, carefully wipe the glass from greasy fingerprints and remove the second protective film. Select a suitable sheet of cardboard for the background. We insert the drawing with the reverse side back into the frame.
Drawing technique "Pointillism"
The name of the movement in painting, pointillism, comes from the French word pointiller, which means “to write with dots.” Pointillism is drawing using dots of different colors (dot strokes). And, therefore, this technique is quite within the capabilities of preschool children.
We draw using the pointillism technique, using different visual materials: just our fingers, swabs, cotton swabs, brushes, felt-tip pens, markers.
Painting with salt.
First we draw with a simple pencil. Paint a small area of the drawing with watercolors. Sprinkle with salt. The salt absorbs excess water and sticks to the leaf. Shake off excess salt. We continue to work in the same spirit until the end. The use of salt gives an unusual effect. Try it and you'll see.
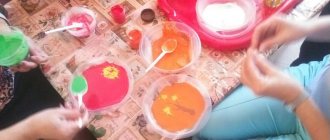
Drawing with colored salt.
Salt can be dyed in different colors.
Salt color:
First, dilute the gouache in a container with a small amount of water (the more water, the lighter the color. The less water, the more intense the color). Then pour salt into a plate and pour out the colored water. Gently mix the salt with a fork so that all the salt is colored. You can dry it in the oven, heat the oven to a temperature of 100 degrees and put our molds with salt there for an hour. You can use a microwave oven, place the molds there for 5-10 minutes at maximum temperature. After you take out the salt, you will see that you get dry lumps. Take a plastic bag and pour salt into it. Then roll out the salt on a cutting board until it becomes crumbly. For each color we take a separate jar.
Draw a picture with a simple pencil, then with PVA glue, sprinkle salt on the glue.
Drawing with a toothbrush.
Let me make a reservation right away that not everyone likes this technique. But when drawing some objects, it is simply not replaceable. Therefore, we will also talk about her. When painting with a toothbrush, dipping it, like a brush, into paint, you get a really fluffy Christmas tree, waves on the sea, a shaggy animal. It will be very difficult to achieve such an effect with a brush.
Technique of drawing with oil pastels on velvet paper.
The pencil moves easily on the paper and is shaded with your finger, creating softer shades, and children are simply delighted with this technique! The drawings are bright and cheerful.
Collage.
The concept itself explains the meaning of this method: it combines several of those described above. In general, we ideally think the following is important: it is good when a preschooler is not only familiar with various image techniques, but also does not forget about them, but uses them appropriately, fulfilling a given goal. For example, one of the 5-6 year old children decided to draw summer, and for this he uses a dotted pattern (flowers), and the child will draw the sun with his finger, he will cut out fruits and vegetables from postcards, he will depict the sky and clouds with fabrics, etc. There is no limit to improvement and creativity in visual arts. English teacher-researcher Anna Rogovin recommends using everything that is at hand for drawing exercises: drawing with a rag, a paper napkin (folded many times); draw with dirty water, old tea leaves, coffee grounds, berry juice. It is also useful to color cans and bottles, spools and boxes, etc.
Imprint with crumpled paper. Means of expression: stain, texture, color. Materials: saucer or plastic box containing a stamp pad made of thin foam rubber impregnated with gouache, thick paper of any color and size, crumpled paper. Method of obtaining an image: a child presses crumpled paper onto a stamp pad with paint and makes an impression on the paper. To get a different color, both the saucer and the crumpled paper are changed.
Stained glass technique - glue pictures
The outline of the future design is made with PVA glue from a bottle with a dosed spout. You can first draw a sketch with a simple pencil. Then the boundaries of the contour must dry. After this, the space between the contours is painted with bright colors. Adhesive borders prevent the paint from spreading and mixing.
Stained glass example:
- Using a simple pencil without pressure, divide the sheet with intersecting lines in different directions, always from edge to edge (snowflake design).
- Draw lines from the ends of the resulting snowflake to the middle of each ray to create windows - “pieces of glass.”
- Trace the outline with PVA glue and let dry.
- Paint the space between the adhesive borders with bright colors.
Unconventional drawing techniques as a means of mental correction allow you to overcome feelings of fear. One might say, it allows the little artist to move away from the subject image, express his feelings and emotions in the drawing, give him freedom, and instill confidence in his abilities. Modern research proves that non-traditional image techniques help reduce the arousal of emotionally disinhibited children. At the same time, as a rule, overly active people need ample space to develop their activities. The bottom line is that attention is scattered and extremely unstable. In the process of “playing the artist,” the area of activity narrows and the amplitude of movements decreases. By acquiring appropriate experience in drawing in an unconventional technique, the child thereby overcomes fear. Further creativity will only bring him pleasure, even from working only with a brush and paints.
Let's start creating: fingers or palms
Non-traditional drawing techniques involve depicting images using various materials, including “non-artistic” ones: crumpled paper, foam rubber, threads, paraffin candle or wax crayons, dried leaves; drawing without using a tool - with your palms or fingers and much more. Such methods are successfully used both in kindergarten and at home.
For different ages, you can offer your own technique, for example, the little ones will find it interesting to paint with their fingers, because it is still difficult for a baby to hold a brush, but the baby already has excellent control of his own hands. Dip your little one's palm into the paint and ask her to leave a mark on the paper, just as cats and dogs leave marks. Look at the print with your baby, who does it look like? It looks like an elephant or a turtle, and if we add an eye, there will be a fish! The whole action is guided only by your baby’s imagination, and if suddenly he is confused, then help him, conduct a master class - paint your palm and leave a print. “Look, the mother turned out to be an elephant, but where is the baby elephant?” - the child will be happy to join in such a funny game.
You can dip your entire palm in the paint, but only your fingers, and leave tiny prints. The more multi-colored prints, the more interesting the drawing - let the child fantasize for his own pleasure. Adults should be prepared for the fact that the paint will be not only on the piece of paper, but also on the baby, or rather, the baby will be covered in it and the surrounding objects too. Therefore, take care of cleanliness in advance: cover the table where you plan to set up a creative workshop with oilcloth, and put on an apron and sleeves on your baby, otherwise, what kind of flight of fancy can we talk about if you constantly tell your baby: “Be careful, you’ll get dirty!”
Pencil drawings for beginners
LiveInternetLiveInternet
https://podg-kursy.ru/index.php/2012-06-28-06-00-25
History of the creation of monotype printing technology
Monotype is a unique printing technique that combines the qualities of printmaking and painting. Giovanni Benedetto Castiglione (1609-1664) Giovanni Benedetto Castiglione (Italian: Giovanni Benedetto Castiglione; 1607, Genoa - 1665, Mantua) - Italian artist and engraver, representative of the Genoese school. [edit] Studied with Van Dyck, Rubens, Bernardo Strozzi and Domenico Fetti. For the first time he used the monotype technique. The engraver's skill earned Castiglione the fame of the second Rembrandt. The main themes of the artist’s paintings are biblical scenes.[/td]
Monotype (from mono... and Greek - imprint) is a type of printed graphics, the invention of which is attributed to the Italian artist and engraver Giovanni Castiglione (1607-1665) .
The monotype technique consists of applying paints with a brush onto a perfectly smooth surface of a printing form (glass, plexiglass, plastic, metal plate), followed by printing on a machine or by hand under hand pressure or a roller; The print obtained on paper is always unique, unique and inimitable. Although there are often situations when working on creating a print from a plate, it is possible to achieve an even greater effect of beauty in the drawing than from the first print.
In psychology and pedagogy, the monotype technique is used to develop imagination in children of senior preschool age.
Monotype - Technique of freedom and Divine intervention!
| Monotype: Two words: “mono” and “type”. Monotype (from “mono” - one and Greek - imprint, imprint, touch, image...) - a type of printed graphics. If you just say: one touch, touch, pressure...... you can probably find many more verbal analogues. But, most importantly, this is a work of art completed in one step! The first monotypists were probably the ancient people, who left traces of their handprints on the walls of their caves... The face of Christ on the shroud is also a kind of monotype! You can find many different variants of monotype in nature... Works made using the Monotype technique are characterized by subtlety of color relationships, smoothness and softness of the outlines of forms, which outwardly brings monotype closer to watercolor. The monotype technique has been known since the 17th century, but became widespread only from the end of the 19th century. |
When creating a monotype print (print), paint is applied to the surface. Place a sheet of paper on top and press it to the surface. An impression is formed on the paper with unusual patterns that cannot be repeated by the artist. The image on the print is random and spontaneous. After printing, the artist selects those prints that he liked or that satisfy him in terms of aesthetic appeal and subject matter. Of the many prints, only a very few are selected. Therefore, artists rarely use the monotype technique: it is quite labor-intensive and requires a large amount of materials and patience.
Materials and tools.
Materials: Glass or plastic, rubber roller or rolling pin, newspapers, paper, oil paint, spatula, sketch of a drawing, turpentine (thinner No. 4), clean rag.
Paints . This technique is omnivorous in relation to paints! Watercolor, gouache, tempera, acrylic, oil paints, etching, typographic, for complete tearing you can also use construction types of paints. Paints are used both with thinners and in pure form - depending on the task. The choice of surfaces from which impressions can be made is also wide and varied: paper, various types of cardboard, plastic of different thicknesses, plates of different metals - zinc-copper-steel-brass. Glass, hardboard and plywood! Canvas and wood, stone!!! The main thing is that the surface texture matches your tasks and goals. But the question of an internal feeling of what the surface should be like comes with your personal experience.
Paint is also applied to the surface using various tools: a roller, the artist’s hand and fingers, brushes, palette knives, various spatulas, including curly ones. Rollers with different textures are also used. And finally, whatever comes to your creative mind. 
| Etching press | Lithographic printing press |
Etching machines are used to make prints from sheets of plastic and metal sheets. To make a print from a lithographic stone, a lithographic printing press is used.
To remove paint from the printed surface, they use everything from simple fabric to all sorts of specific materials: matches, steel sponge for cleaning dishes, ear sticks...
And finally, the types of surfaces on which the imprint is made: paper, various types - from plain to etched, colored papers, plastic, plywood, stone, glass, metal, artistic canvas and various fabrics. In general, there is reason for imagination.
Stylistic directions in monotype
(printed graphics)
The first method, one of the simplest, is also called “fractal monotype”
Take the hard surface of your choice, in a creative trance, apply paint with the tool you need, lay paper on top, press it on top with your hands or a rubber roller. Smoothly remove the sheet. Examine the resulting impression. As a rule, this method is quite difficult to manage. Especially if you use water-based paints: watercolor, gouache, acrylic, tempera. Then many artists, peering at the resulting print, try to see some image, landscape, composition and slightly modify the print, trying to enhance and reveal what they saw in the monotype.
There are several other ways or techniques for creating fractal monotypes.
| First stage | Second phase | Third stage | Fourth stage | Fifth stage |
| Sixth stage | Seventh stage | Eighth stage | Color monotype | Black and white monotype |
First stage:
For work we will need the following materials: - white or tinted paper, you can use different types of paper - paints: gouache, watercolor, tempera, acrylic - bath for soap solution - soap solution - watercolor brushes (squirrel brush) or gouache (bristles) ) - a cloth for wiping paint from brushes and from the surface - plexiglass or regular glass - a jar of clean water - a palette for mixing colors
Second stage:
Next, we prepare a linear or tone sketch (drawing) for work. We place the drawing under the plexiglass. And you and I can start working in color.
Third stage:
The work is carried out in the same way as you paint from life or imagine, come up with your own color combinations. Try to take the color clean, bright, saturated. The shades of color are noble and pleasant to the eye. Change the water in your water jar often. The most important thing in your work is not to forget that when you take a mixed color, put it in a jar with a soap solution, since the soap solution does not allow the paint that you applied to the surface of the plexiglass to dry quickly.
It is important to know and take into account their features (properties) when working with paints. If you work with gouache, then try to do the work faster, since the paint dries quickly and it may turn out that you painted with paints, but the work has already dried. If you work with watercolors, then watercolor loves a lot of water, then in our case the watercolor solution should contain rich colors and have a little water in its composition. Excessive amount of water in the color can have a negative effect on the print (it will look like a big puddle when printing).
Fourth stage:
After we have completed the sketch in color, we take a sheet of paper. I would like to draw your attention to the fact that you need to grasp the sheet of paper with both hands by the corners of the sheet. Why do we do this, you ask? To ensure that the sheet does not wrinkle, break, or get dirty with your hands, place it evenly on the surface of the plexiglass, connecting the sheet format with the sketch of the drawing.
Fifth stage:
The next stage is that you need to gently press down the sheet with the palms of your hands, stroking it a little, pressing down where we have drawn the drawing. Try not to press, you need to do this with all your might, easily feeling on your palms that your drawing is gradually being transferred to a sheet of paper.
Sixth stage:
Next, you carefully remove the sheet of paper from the plexiglass (surface). Please note that the drawing must be removed by holding a corner of the sheet and slowly lifting the second corner of the sheet so that the sheet does not move when removed from the surface.
Seventh stage:
Then the resulting print must be hung to dry so that it does not get stained with paint and spoil the work. The dried print can be improved by clarifying the details of the drawing.
Second way.
When paint is applied to plates of metal or plastic, paper is placed on top and an impression is made using an etching or lithographic press. In this technique, as a rule, oil and etching paints are more often used. This method allows you to accurately control the creative process and accurately predict the desired creative result. Here you can create almost picturesque realistic works. To prevent ink oil from sticking to the paper, it is moistened with water before printing!
| First stage: You need to prepare your workplace so that nothing interferes with your work. Using a spatula, we apply black printing ink to the surface of the metal plate (if you don’t have printing ink, you can use ordinary oil paint “gas soot”). Then we apply the paint so as to roll it out with a roller over the entire surface of the plane. | Second stage: Roll out the printing ink with a roller so that the entire surface of the plate is covered with an even layer. Make sure you don't have too much paint on your plate. The paint layer should be thin and even. If you put a lot of paint on the plate, the paint will stick on the drawing and paper, and this is not desirable in our case. | Third stage: After you have covered the plate with an even layer of paint, you need to put clean paper (newspaper) under the plate. Why are we doing this? When we rolled out the paint on the plate, we stained the paper around the work, therefore, so as not to stain our clothes and hands while working on the drawing, we brought the work area clean again. Remember, the quality of work and accuracy of execution depend on how your workplace is organized. | Fourth stage: Printing paper is being prepared. Use thick paper, or use regular Whatman paper, a watercolor sheet or cardboard that is not too thick. We moisten thick paper under water so that it is wet on both sides and place it under a press to dry. Place a sheet of damp paper on both sides, either with the paper you use or in a cardboard folder, and press it down with something heavy. The printing paper should be prepared correctly and be slightly damp. Then such paper will not stick to the paint and shape. | Fifth stage: You need to take a sheet of paper so that it does not break or bend. Take a sheet of paper correctly, carefully by the corners or with special tweezers. Then carefully bring it to the mold and place it so as to fit the size of the plate. Under no circumstances should you adjust a piece of paper if you have not placed it correctly on the form. Better take it off and put it back on. |
| Sixth stage: We pick up a pencil and begin to draw the image we have in mind. Or you can prepare a drawing in advance, draw it on paper and only then apply it to the form. By form I mean the plate on which the paint is applied. You can use various devices when drawing a picture, such as a compass, fingers (applying penumbra), a needle, a nail, a ballpoint pen (helium), a nail and other materials. | Seventh stage: As you work, you can spy and monitor the process. You just need to do this carefully, bending the corner of the sheet so that your drawing does not shift or get dirty. We looked, if something is missing in the drawing, then you can easily correct it, clarify it, set the necessary effects and contrasts. | Eighth stage: Before removing the drawing from the form, look again at the clarifications in the drawing, maybe you forgot to draw something. If you are ready to see what you finally got, then we carefully take the corner of the sheet and slowly remove it from the plate with a hand movement and admire the result. Next, the print obtained during printing must be hung to dry, since printing or oil paint dries within 24 hours. | Ninth stage: Do not rush to part with the form on which you drew. There are two ways to go: the first is when you can re-roll the plate with paint, or maybe you want to change the black color to a colored one, please. Or the second option is to make a negative version with your resulting drawing on a plate, for this we need an etching printing press (I agree that not everyone has one at home - author's note). We take a mold with our pressed pattern, place it on the surface of the machine, cover it with paper, and then with felt and roll it once. Before this, you need to check the pressure in the machine - tighten some nuts. | Tenth stage: The resulting print from the form should be immediately hung up to dry, since the paint has not dried on the paper, you can stain the drawing by showing it, and then your work will be branded. Hang the print so that it does not interfere with anyone during further work. Good luck with your work! |
Third way.
This method requires the artist to draw with firm confidence, since corrections are impossible.
Take plastic or glass. Using a roller, apply an even layer of paint to the desired area or the entire surface of the sheet, having previously removed excess oil from the paint and placed it on newspaper for a while. All this is acquired through experience. If you are unsure that you can immediately draw and arrange your work on a sheet of paper, then before you put it on the paint, with light movements of a simple pencil you can outline the main composition and after that, without pressing, lower the sheet onto the paint-rolled surface . And then, you begin to draw what you have outlined, working with a pencil, a simple pen, a brush handle - it all depends on the thickness of the line you want to get.
It is advisable not to rest your hands on the paper. After completing your exercises on paper, carefully remove the sheet. Like any type of monotype, it can be modified and completed, already seeing what happens to it
Fourth way.
Pour water into the photo tray. Take printing inks, dilute them in different jars until liquid with gasoline or a special solvent. Then you take your brushes and, depending on your inner painterly state, splash paint onto the water, adjusting which color you need more or less of. And then the fun begins: mix the paints with a brush handle and see that unique pattern that you think is necessary. You need to work quickly, but carefully: place a sheet of paper on the water, and then only, as if in an arc, the second edge. And it must be removed in the same way: first one, and then the second one in an arc. Mixing paints in water creates amazing picturesque combinations, like in a kaleidoscope.
| First stage: For work we will need the following material: - white paper (whatman paper or watercolor sheet of paper) tinted paper, you can use different types of paper - printing or oil paints, - water bath — paint solvents: turpentine or gasoline - bristle brush - a cloth for wiping paint from brushes - palette for mixing colors | Second phase: Before starting work, make sure that you have prepared all the material for work. Squeeze the colors onto the palette where you will mix them. Use whatever colors you need to create a colorful effect on the water. It is enough to take a few colors, for example, the main ones. At this stage, you should have paper for impressions prepared. | Third stage: Next we get to work. We mix the desired color on the palette and use turpentine as water (solvents for oil paints), we try to take more solvent onto the brush so that all the paint flows from the brush onto the water and you will see an amazing effect on the water. A drop of paint spread on the surface of the water. We mix more color and lower it into the water and see another blur of color and continue until we achieve the desired effect. | We continue to be amazed by the play of color and watch the changes on the water. You can also use water splashes, but you need to do them carefully so as not to splash the table and clothes. | All work on creating colorful monotype masterpieces must take place in special rooms (workshops). Since solvents are not acceptable at home (smell and no ventilation), you can get poisoned. |
| Fourth stage: I draw your attention to how the colorful effect is created on a sheet of paper. You see in front of you a colorful play of colors on the water, take the paper and smoothly apply it to the surface of the water and make the following movements, starting with one corner clockwise and then counterclockwise and smoothly remove the sheet of paper from the surface and observe and admire the resulting effect. | Amazing images are created, unique, like in a kaleidoscope. | This photo shows the process of applying paper to the surface of the water and you see how the paper is painted into an amazing pattern (sometimes texture). It is noteworthy that this monotype technique allows you to make many prints and all of them will be unique and inimitable. | Fifth stage: Place the resulting print to dry, preferably under a press, so that the paper does not curl. | Sixth stage: When your work has dried, you can leave the resulting effect, or you can draw something additional, combining the resulting texture with your drawing. |
Fifth method Methods for extracting monotypes from space.
You paint a work of art with oil paints on canvas or cardboard. Then you apply paper, fabric or the same canvas - carefully, but maybe not very carefully. It all depends on your temperament. You press the paper, also using various pressing techniques. As experience shows, you can make up to three prints, and none of them will repeat the previous one. The result is very subtle picturesque things. Which can be completed on top of the monotype. But this will be a mixed technique.
| First stage: For work we will need the following material: - white paper (whatman paper or a watercolor sheet of paper) tinted paper, you can use different types of paper - oil paints, gouache or watercolor, - a jar for water - a bristle brush - a rag for wiping paint from brushes - palette for mixing colors | What is the next technique of the monotype technique? When we take a form as a base, for example: cardboard, plate, canvas, corrugated paper and other surfaces from which we can get an amazing effect (surface textures). What is the working principle? We paint a drawing in color onto the surface of rough cardboard or canvas and place a sheet of wet paper on top of the colorful drawing and press it slightly to the surface and get a delicate watercolor print, which can be finished on top with various art materials. | Here is a print made first on cardboard and then printed onto a wet sheet of watercolor sheet. What is the advantage of this monotype technique is that the print obtained in this way turns out to be delicate, watercolor, magical, mysterious and unpredictable, as if nature itself were working with the drawing. | This photo shows the process of applying a colorful design to the surface of cardboard. The material used is gouache paints. You can also use oil paints diluted with linseed oil. | It is important to use pure, open colors in your work. Work quickly and carefully. There should be nothing around you that interferes with your work. Upon completion of work, you need to clean up your work area and dry the resulting print. I wish you creative experiments! |
The sixth method is mixed technique.
When the created monotype is taken as a base and then modified with various other materials: oil pastel, dry pastel, acrylic, oil, tempera, textured pastes and so on……… Methods of extracting a monotype from space.
Well, once again I would like to say that the very beauty of monotype is that there is Divine unpredictability in it, which brings into the monotype this amazing feeling of expectation of a miracle! Albeit a small one, but still a miracle that makes the artist’s heart tremble with joy. The monotype process is probably the most exciting of all the activities!
Monotype will forever enter your creative life and bring many pleasant creative moments!
Good luck and new discoveries!
Mineev Ivan Alexandrovich.
right-brain drawing, intuitive painting, drawing and painting courses for everyone, drawing courses for adults, courses for artists, oil painting training, pastel drawing lessons, basics of drawing clothing models, pencil drawing portraits for beginners
Home
ll About us ll Services and prices ll Educational institutions ll News ll Reviews ll Contacts ll Interesting ll Artist’s advice
_____________________________________________________________________
Preparatory courses in drawing and painting invite everyone who wants to receive an artistic education or simply
learn to draw!
Painting training, painting courses, painting lessons, painting teachers, drawing, art school, artists training, art education, artist courses, drawing courses, drawing courses, drawing training, drawing training, drawing lessons, drawing lessons.
Drawing is your calling too!
Address: Index 192289, St. Petersburg, Nearest metro station “Spasskaya”, “Sennaya Square”, “Sadovaya” Voznesensky Prospekt, 36 (entrance in the arch)
Tel
Let's continue to fantasize. Stamps, impressions
Children of all ages like to use stamps when drawing. This unique technique of non-traditional drawing in kindergarten is so easy to perform and diverse in manifestation that it is perfect for work both in kindergarten and at home. Ready-made stamps can be purchased at an art supply store. But it’s much more interesting to make a stamp yourself, or even better with your baby.
Almost anything that can be dipped in paint and then left an imprint on a piece of paper will work as a stamp. You can cut an apple or a potato - this is the simplest stamp. You can cut out some kind of shape on half a potato: a heart or a flower. Another stamp is made from ordinary threads, wound around any base. You don’t have to wind the threads, but simply immerse them in paint. After thorough impregnation, they are laid out on one sheet, covered with another, pressed lightly, and the intricate pattern is admired.
It is easy to make a stamp from ordinary plasticine. Come up with an interesting shape and decorate a small piece of plasticine. It is better to choose thick paint for classic stamps. You can give the background an unusual texture by using a crumpled napkin or paper, and then follow the proven scheme: dip it in paint and stamp it. Very beautiful stamps are made from dried leaves: paint the leaf on one side, place it on paper and press. After the painted leaf was removed, the picture “Golden Autumn” was created – the baby was absolutely delighted.
Non-traditional drawing techniques for children in kindergarten and school
Children and creativity are inseparable concepts. The child learns about the world around him, trying to reflect it in play, modeling and drawing. After all, at heart, every child is a singer and musician, artist and sculptor. Creative impulses in children are often associated with artistic activity, and a child’s visual creativity is an ideal opportunity for the manifestation of his imagination. This is an important condition for the normal development of the baby.
Non-traditional drawing techniques for children in kindergarten and school - this does not mean something complicated. Quite the opposite - this kind of drawing turns art classes into fun. Here it is not at all necessary to have complex pencil and brush skills. With simple unconventional drawing techniques, a child is able to create beautiful drawings and paintings, and this will give him an amazing creative experience with an excellent final result. He himself will be drawn to art when he feels that he can create beauty with his own hands.
The content of the article:
Unconventional drawing methods
For children, non-traditional drawing techniques are a wonderful way to create small masterpieces. It turns out that your palm can turn into a pink elephant, a simple blot can become a tree, and a carrot and potato can surprise you with unusual patterns.
For example, children 3-4 years old can be offered:
- finger painting
- palm painting
- thread prints
- prints made from potatoes or carrots.
With children 5-6 years old you can try:
- prints-pictures
- plasticine printing
- leaf prints
- palm drawings
- painting with cotton swabs
- magic strings
- monotype.
And with children 7-8 years old you can master more complex techniques:
- drawing with crumpled paper
- drawing with soap bubbles
- painting with salt
- blotography
- plasticineography
- grattage
- frottage.
For children, modeling from plasticine is a whole world full of variety and experiments! Under your strict guidance, your child can make all kinds of crafts from plasticine. Step-by-step modeling for children will be the best guide for creating various fairy-tale characters, animals and plants.
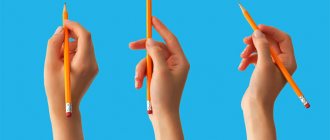
Hand drawing
Drawing with pens is the first technique that little children can master very early. The drawing comes out quickly - this is extremely important, because kids cannot do one thing for a long time. Dip a child's hand in paint and let the child make an imprint on the surface of the paper. See what it's like. Ask your little one what needs to be completed to make an animal or bird. The missing details can be drawn with your fingers.
Interesting! How to make a crown for a little princess for the New Year 2020
Finger painting
A little artist will have a lot of fun finger painting, leaving colorful prints on paper.
In creativity classes or for a school autumn exhibition, the most popular materials for creating crafts are cardboard and colored paper. Therefore, we hasten to present you paper fantasies or ideas for autumn paper crafts for school.
Techniques for painting with watercolors on wet paper
To create small masterpieces you will need a sheet of thick paper, watercolor paints and a brush. Help your child wet the sheet evenly, but make sure there are no puddles. Let him put some paint on his brush and start creating. Each stroke spreads across the paper in a new tone, beautifully transitioning into a different shade. Now is the time to show your child how colors are mixed and explain what shades are.
Tell your child that all movements should be done easily and smoothly; there is no need to press the brush into the paper, as many children like to do. A light touch is enough. This technique works well for drawing backgrounds. And after drying, you can continue to draw the rest of the drawing.
Drawing using the Glue Pictures technique
To draw in this style you will need a glue gun. Help your child draw outlines on paper with hot glue and fill in the image with paint. Thanks to the glue, the paint does not flow beyond these contours. It turns out something like a stained glass image. Using this technique, you and your child can create a real stained glass window on glass, but then instead of simple watercolors you will need to buy water-based acrylic paints.
Traditionally, on New Year's Eve, kindergartens hold exhibitions of bright crafts and creative works by children, which decorate the kindergarten on the most magical days of the New Year holiday. We offer you a variety of ideas for DIY kindergarten crafts for the New Year 2021 .
Watercolor drawings with wax crayons
To draw a picture using this technique, you need: a landscape sheet, wax crayons, watercolor paints, a squirrel brush, leaf templates.
Let your child, with your help, draw several different leaves on the sheet. The drawing must be arranged according to the size of the leaves - first large, then smaller. Let the leaves overlap each other - because that’s how nature does it.
Now take wax crayons and trace the outlines of the leaves; for this you will need crayons in warm colors: yellow, red, orange, brown, burgundy. You can use several colors in one sheet. Don't forget to draw veins on each leaf, except rowan ones
Interesting! Unusual sweet gifts made from candies for the New Year 2020
And now it’s time to use watercolors - start painting not the leaves, but the album sheet from the upper left corner. Show your child how to add other colors so that one shade flows smoothly into another without clear boundaries. In this way we gradually fill our sheet with autumn colors.
Drawing with fun prints
Plasticine stamps
It is very simple and convenient to make stamps from plasticine - just give a piece of plasticine the desired shape, decorate it with patterns (lines, dots) and paint it in the desired color.
Thread stamps
To create interesting “striped stamps” you can use threads that need to be tightly wound around an object. Then the threads are painted with thick paint in the required color. Now only imagination will tell you how to apply a “striped pattern” to the surface of the paper.
Rolled cardboard stamps
By rolling a piece of cardboard into a roll, you can get an original stamp for “roses”. And if you cut a “round piece” from a toilet paper roll and give it the shape of a leaf, then your child can create a beautiful composition on his own.
4. Leaf prints
This technique is familiar to many. To stamp a leaf, you can take any pretty leaf and apply ink to the side with the veins. Then apply the painted side of the sheet to the paper and iron it. After a few seconds, you can carefully lift the leaf - its imprint will remain on the paper.
Imprints of potatoes, carrots, apples
This is a fairly popular technique for young children. You will need any vegetable or fruit and gouache. Then everything is simple - dip the object in paint and make an imprint on paper.
Stamps can be made from apples, potatoes, carrots, peppers and other vegetables or fruits. The easiest way is to make a stamp from potatoes. If you have metal cookie cutters, simply press the cookie cutter into the potatoes and use a knife to carefully trim off any excess pieces around the edges.
Drawing with soap bubbles
It will be very interesting for the child to draw a picture with soap bubbles. To do this, add any soap solution and paint to a glass of water and use a straw to make a strong foam. Carefully place a sheet of paper on the bubbles and wait for the first patterns to appear. You can lift the paper - the bubble patterns are ready.
Painting with salt
To add a whimsical texture to the background of your painting, you can use salt when depicting any landscape. While the paint has not yet dried, the background must be sprinkled with salt. It absorbs excess water, sticks and creates a very interesting effect. Excess salt should be carefully shaken off after drying. Unusual light spots will remain in its place.
There is another incredibly interesting option for painting with salt. To do this, you need to draw a picture with a pencil, and then circle it with PVA glue. It can be a simple flower, patterns or geometric shapes. We don't regret glue. Sprinkle the design generously with salt, and then carefully shake off the excess onto the tray. Now let's add colors - you can paint with a brush, or you can take a pipette and apply colored water drop by drop onto the drawing. You will be able to see how the drops spread and create bright patterns and shapes.
Drawing with crumpled paper.
Using a crumpled napkin or paper you can create an unusual texture. There are two ways to do this technique:
- Liquid paint is applied to the paper, and after some time, while the sheet is still wet, a crumpled napkin is applied to it. It will absorb excess moisture, and a characteristic mark will remain on the sheet.
- You need to apply paint to a crumpled lump of paper or napkin, and then apply prints with the painted side.
Monotype
This unusual drawing technique is based on a unique print that can only be produced in a single copy. Therefore, it is impossible to create two absolutely identical drawings.
Interesting! Paper fantasies or ideas for autumn paper crafts for school
It is necessary to bend a sheet of paper in half, and close to the fold on one half, draw some shape with paints. Then fold the sheet and iron it with your hand - you get a symmetrical print. Now only the imagination of the young artist will tell you what happened.
Nitcography
This drawing technique is like real magic. The thread needs to be dipped into the paint so that it is well saturated with it. Then lay out this thread on the paper in “curls”, and bring one end beyond the sheet by 5-10 cm. On top of the sheet with the thread is covered with another sheet of paper, on top of which you need to put some kind of weight, for example, a book. All that remains is to pull the protruding tip of the thread and lift the top sheet. The unusual picture is ready.
Drawing with cotton swabs
The principle of this technique is that the child paints over the picture with dots. To do this, you need to dip a cotton swab in paint and apply dots to the drawing, the outline of which has already been drawn.
Drawings using scratch technique
The word “grattage” comes from the French “gutter” (scrape, scratch). To start working in this technique, you need to prepare cardboard, which is covered with a thick layer of wax or multi-colored oil pastels. Then apply a layer of dark paint to the surface of the cardboard with a wide brush or sponge. When the paint dries, use a sharp object - a toothpick or a knitting needle - to scratch the design. Thin monochromatic or multi-colored strokes appear on a dark background.
Each of the non-traditional drawing techniques is a little game for a child. Their use gives children a sense of relaxation, develops imagination and gives complete freedom for self-expression.
Simple but beautiful pictures for sketching
The hare holds a carrot and smiles. Nothing complicated about drawing! A checkered background will help you calculate the proportions correctly.
Admit it to us, you want a plant pot like this, don’t you?
The simplest thing you can draw is a ghost. These mystical creatures do not require symmetry, volume, or skill. Just draw them! But don't forget the hearts
Who's beautiful? You are beautiful! You will succeed
Tea bags are having fun in a white cup with a mustache. First learn how to draw a cup, then draw the face. When it starts to work, add the tea bags.
Cute ice cream consisting of three colorful cats. The main thing in this drawing is the mood of the cats. This is a simple and beautiful drawing
All young artists painted such flowers. If you haven't done this yet, now is the time!
Anime girl with cat ears in a dress the color of the universe
Pencil drawing of a wounded heart with many wires connected to it
Lollipop and ice cream are friends forever
Two bear cubs in the rain. The main difficulty of this image is the reflection of the bears in the water. But you can start without it
Hello Kitty Colored Cat Drawing for Girls
A beautiful fly agaric with hearts instead of round spots. A yellow butterfly sits on his hat
A glass of milk and a chocolate cookie are friends forever. This is a simple and cute drawing for a boy or a girl.
The woman bites her lips to get your attention. If you add highlights, your lips will look more dewy. You also need to add a shadow from the upper lip on the teeth
Front view of beautiful giraffe with three pink balloons
It will be easy for you to draw such an apple. Things get tricky when you want to add color and shadows. But only those who move can overcome the path
Little bear holding a heart-shaped balloon
Funny cat inside a giant donut. A beautiful drawing that you can easily reproduce
Little mouse with a piece of cheese. Notice how the pink becomes more saturated towards the base of the ears and tail
You can easily draw such a cat, but the beauty of this drawing lies in outer space and planets. Simple geometric shapes and a little color
Robot with three balloons. Nothing complicated for a beginning artist
For those who love dark characters. Here's a soul reaper with a war scythe for you. Watermarks can't stop you from drawing it, can they?
If Pikachu is your favorite Pokemon, then recreate this drawing
Red-haired fox looks at a shooting star
A sad hare sits and looks up. If you don’t like this mood, then you can draw the same hare in joy
Little cute whale with a horn. He's as magical as a unicorn! Checkered background to make your drawing task easier
The cloud spills a rainbow onto the earth. Pay attention to the glare. It is this small detail that will make your drawing voluminous and beautiful.
Simon's cat wants food in his bowl. This cat is distinguished by its extreme simplicity in drawing and special charisma.
Various types of clouds and planets. They are all fairly easy to draw. Who's the odd one out here?
The little white hare tries to reach the stars using books and acquired knowledge. A beautiful drawing with meaning, and also quite simple.
Heart shaped lollipop on a stick
The little leopard wants you to grow to the required level of skill
Winnie the Pooh lies next to a barrel of honey
This magical fairy cannot make you a great artist overnight, but if you draw her, you will get closer to this goal
Look there! This is the artist who can draw Simon the cat!
Two cherries are very easy to draw. You can give them any mood and emotion of your choice.
The hare hid, waiting for his artist. This is a basic drawing even for a beginner. Draw the body and ears. Everything else is a matter of a few lines
Pink ice cream with lime in a box with a pattern of hearts. Very beautiful and easy to draw
One of the simplest anime girl drawings we've found.
The yellow kitten looks at you, placing high hopes on your fine art
Living bottle with milk for children. This is the perfect nanny
Panda cub, careless sketch. You can easily draw it
A cat consisting of simple lines. Don't forget to draw a bow on her head
An owl sits on a pole. Giant eyes require high-quality highlights. Feathers can be drawn schematically
White bunny in a pink dress
Sketch of Spider-Man's head. Try to repeat the shape of the drawing with careless pencil movements
Funny pug inside a loaf of bread. You should first practice drawing these two objects separately from each other
Women's feet in high heel shoes. A small heart tattoo adds personality to this picture.
Cute little giraffe wants to be drawn. His spots are heart shaped
The big man brings his soft heart to you. If you can recreate the same realistic folds on the heart, you will succeed. Another important detail is glare
Cute pink ice cream in a waffle cup
A beautiful hare, easy to draw. It consists of three circles: head, body, tail. Add paws, ears and a face and the drawing will come to life
Giraffe in a purple scarf. Don't forget to draw the spots
Rippling sea at sunset, pencil drawing. You can practice shading and drawing the sea
Joyful white kitten in a yellow scarf
A rare type of white cherry, characterized by ease of drawing
Cute soft toys. Black and white and color drawings
Add a piece of your own imagination to your drawings
Cute little white squirrel on a round background. The lines are quite careless, so you can easily draw this animal. The most difficult thing is the eyes and glare
Beautiful crystals, diamonds, gold and mushrooms. This is not the easiest drawing, but you can do it if you have a ruler.
Black and white silhouette of a dolphin, mirrored. If you have drawn one dolphin, then fold a piece of paper in half and trace the silhouette
Surely there is your favorite food here that you will want to draw
The face of a cat with eyes of different colors. You can choose any colors, for example those that you have in a set of pencils or felt-tip pens
First you need to draw the silhouette of a deer. Then circle it and start improvising with the background
Blue-eyed cat with gray fur and pink ears. Notice how the thickness of the lines changes in different parts of the drawing
How about one jar of Nutella? Easy to draw, nice to look at. But you might get hungry
Bowl with various fruits. Still lifes like this are classic activities for developing drawing skills.
The drawing was made with black pen on checkered paper. Two cats look at the moon and starry sky
Just look at this cute kitten! Draw it in every position, it will be easy and fun
Little girl on a swing. Colored elements and lace on the dress give this design a special charm.
Black and white pencil drawing. A simple man listens to music with his eyes closed. Shadows play a huge role in this drawing. Notice how they change due to the reduction in the number of lines
Two glasses with a red drink. Glare, sparkle from glasses and splashes of drink will help your drawing look amazing
Pensive cat with a wreath of green roses
A sweet girl of unknown origin. A simple picture to draw for girls
A paper plane flies along a heart-shaped trajectory. There is nothing simpler than this drawing, all you need is a ruler
Uncontrollable hot air balloon with basket
Polar bear learns to draw
Cute sleeping kitten. The hardest thing is to draw a beautiful blanket and a protruding cheek
Black and white drawing of a fish. Simple and casual sketch
White kitten winks at you
Compact dog with big eyes smiles waiting for your drawing
This dove is drawn in pencil
The polar bear shares his love with you
A small ship anchored in deep ocean waters
Scheme for drawing a simple, angular cat. Geometric style!
Cute hare with pink ears, paws and nose. The highlights on the eyes are as simple as possible, these are just two white circles
The puppy sticks his tongue out at you, challenging you to reproduce the pattern.
Do you think this kitten is eating sweet candy or a piece of bacon?
Baby Panda welcomes you, oh budding artist
This is the Pokemon Marill. It is easy to draw, and then you can color the resulting drawing
Draw any fruit from those suggested in this picture
3D drawing of the English inscription "love"
The tea bag wants to sleep and get into your drawing
Two kittens hug and rejoice. They will be even happier if you draw them
Three melted scoops of ice cream, each of them has its own character and mood
Surprised cat, color drawing. A large volume of wool will forgive the anatomical mistakes of a novice artist
Black and white bat
Unicorn in the form of a soft toy and a small butterfly
A piece of watermelon shares its love
Hello Kitty! This little cat is quite easy to draw and is recognizable all over the world.
How to draw a squirrel in three steps
A cute whale swims on the surface of the ocean and emits a fountain of water
Live bowl with any substance of your choice
A snowman in a hat and scarf holds a broom in his hands
A simple cat to develop your artistic abilities
Cheerful baby elephant sits and smiles
The most simplified deer
Gray kitten during extreme heat
Nine varieties of cacti. Each of them is easy to draw. If you love these plants, then you have found your perfect image.
This hamster has large reserves of food in its cheeks. But you can change their volume in your version of this image
How to Draw a Bunny on a Skateboard in Four Steps
Pikachu sits and waits for your drawing abilities to grow to the required level
How to draw a colored minion in five steps
How to Draw a Cute Wolf Cub in Seven Steps
Head of a hare with very long ears
Three cute little cakes
A beautiful white hare enjoys life. This is a pretty simple drawing, but you need to pay attention to the shadows
Spotted yellow cat wants to cuddle
Flirty mouse with a curly tail
The white kitten wants to kiss you this winter
Adult black cat and her kitten
The domestic cat looks forward proudly. Disney drawing style
A woman's hand with black nails holds a smoking stick
A hare rides an elephant and holds balloons. First learn to draw these characters from this angle separately from each other. The easiest part is the balloons
High mountains with snow-capped peaks and shabby pine trees
A smartly dressed girl stands next to a black bird
Little cat plays with a ball of thread in the shape of a heart
Draw the shape of the cat, then draw the face, limbs and stripes on the cat's fur. This drawing can be completed in a couple of minutes
Puppy with beautiful eyes
Drawing of a cute cactus that begins to bloom
Pencil drawing of human lips
Sloth, turtle, raccoon and squirrel. Choose any animal and start drawing
Simple black and white drawing of a sleepy cat
This rag doll has been through a lot in its existence.
Beautiful little elephant drawn with a pencil
Small green toothy frog with big eyes
If you are really interested in drawing, try to study the theory
An extremely simplified fox that's perfect for your first drawing
Simon's cat looks somewhere with curiosity
Pikachu tries to scare you, but only evokes positive emotions
Red-haired hare flies on a pink umbrella
Octopus with big eyes. His tentacles are easy to draw
One cute little fox in four different poses
Two birds holding a rope with tied hearts
The giant penguin looks at you with its wet eyes
Tabby cat gives you his heart
Yawning kitten, classic drawing. You've probably seen it somewhere in children's magazines.
Porky Pig, colorless pencil drawing
Try drawing SpongeBob, it's much easier than you think
Magic cat unicorn floats in the air
Baby panda sits in a giant cup. Pencil drawing
This girl's hair is covered in a magical rainbow glow
Gift box in the shape of a heart with the inscription "I love you"
Penguin boy and girl looking at a heart composed of pink and light blue
A loving cup of coffee. You can draw your favorite drink
Curious puppy, great pencil drawing to practice shading and 3D
Pikachu expresses his affection for you
Sketch of a bear cub. You can color this image or draw your own from scratch
The rag doll of a hare is a little sad, but that's only until you draw this baby in a different mood
A fairly simple drawing from a cartoon called Gravity Falls. Mable hugs her favorite pig
A pair of doves sits on a branch against the backdrop of a large beautiful heart
Pencil drawing of a sad puppy with a bone in its teeth
This cactus wants a hug, but it would be nice to be in your drawing too
Four little pigs are trying to change a light bulb. As always, you should first practice drawing each individual pig and light bulb
A cat named Pusheen with a unicorn horn, rainbow mane and tail
Still very simple flowers to draw
A round owl with big eyes looks up
Many different cats. You can choose anyone and draw this animal
How to draw a mouse in five steps
Strawberries are a great berry to practice painting with.
How to draw a puppy in 4 steps
All three suns are reflected in the eyes of this kitten
You can't draw this girl's face because she's holding a lot of balloons.
That red angry bird
Light blue creature named Stitch holding a heart
A little green dinosaur is waiting for your pencil and markers.
Adult squirrel, side view, pencil drawing
Friendship between a cat and a puppy
This funny little bear decided to water the flowers, but the only plant growing on his head
Hare and baby elephant holding blue heart-shaped balloons
Drawing with a black pen on a checkered sheet. The cat blows soap bubbles while sitting on the ground
Beautiful pencil drawing of a cat with a white chest and paws
Rainbow, heart-shaped cookies, cute cat, all together this is a great drawing for beginners
The peacock fluffed his feathers. You can draw an outline then color this bird
The fox is depicted as an animal of autumn in this image
Quick drawing of a shiny black bomb with a fuse
You can pay attention to how the direction the pencil moves while drawing affects the perception of the finished drawing
Card index of methods of unconventional drawing in preschool educational institutions
Advanced training course for 340 rubles!
Emotional burnout of teachers. Prevention and ways to overcome
Card index of non-traditional drawing techniques
The material was prepared by the teacher of MBDOU “Kindergarten No. 95” Valentina Sergeevna Karyagina
(painting with a hard semi-dry brush)
Sometimes, when drawing animals, we paint over their fur with one solid color. The coat is smooth and sleek. How can you convey the fluffiness of an animal’s fur or the volume of a surface? There are several ways to do this. One of them is using pokes with a hard brush. Particular fluffiness or prickliness is achieved only when using a completely dry brush with a small amount of paint. Therefore, it is very important that the child applies gouache only to the tip of the pile and begins to draw from left to right, leaving no gaps.
Materials: Landscape sheet of paper, simple pencil, gouache, hard and soft brushes, a jar of water, a rag.
1.Draw a contour image of the animal with a simple pencil (for older children, you don’t need to outline the contours of the animals).
2.On a dry, hard brush, pick up just a little gouache of the desired color and, holding the brush vertically (the brush taps with the “heel”), make “poke” marks on top, placing them inside and along the edges of the animal’s silhouette.
3. When the paint dries, use the tip of a soft brush to paint the animal’s eyes, nose, mouth, mustache and other characteristic details.
Options for work: with a poke of a hard semi-dry brush you can paint a kitten, a dog, a sheep, a goat, a hedgehog, a lion's mane, a snowman, snow, a Christmas tree, a pine tree, a forest, the sun, flowers (dandelions, sunflowers) and much more.
One of the very first tools with which you can create bright and original masterpieces is children's palms. Slap, and the print is ready! Now let’s look at what the trace left on the paper reminds us of? Add a few strokes and the handprint becomes an octopus, polar bear or hedgehog. Children love such exciting transformations. After all, palms familiar to a child can be transformed into completely recognizable objects.
For this lesson you will need: a landscape sheet or colored paper of any color; wide bowls (you can use disposable plates) with gouache or finger paints diluted with water; gouache; thin and wide brush; a bowl of water to wash your hands; cloth
1. At the beginning of the lesson, train your child to make a print with a dry palm.
2. There are two ways to put paint on your palm: a child dips his entire palm into a bowl of gouache, or an adult applies a layer of paint directly to the baby’s palm with a wide brush.
3. The child makes a print with the inside of his outstretched palm on the paper. If according to the plan you need your fingers to look down, turn the sheet of paper with the finished print upside down.
4. When the palm print on the paper is dry, we bring it to the desired image.
Little tricks: From palm prints you can get a swan, goose, dove, bird, hedgehog, elephant, pig, lamb, polar bear, octopus, tree, flower, maple leaf, etc. If you put your thumbs together and make an imprint of two palms at once, you get a crab or a butterfly. You can make prints with the back of your fingers (a seahorse), your thumb (the body of a fish, crab, or spider), or the side of your fist (a human footprint).
Required materials and tools:
Drawing paper, palette, watercolor paints, hand rag, brush, black pencil, newspaper.
“Rainbow Fish”. Dip the pad of your thumb into paint of different colors prepared on the palette. Let's make a print. Use the tip of your finger to draw a ponytail. We print the eye with the blunt end of a pencil, dipping it into black paint.
" Flower". We print the petals with our index finger and the middle with our little finger.
Imprint with crumpled paper
Means of expression: stain, texture, color.
Materials: saucer or plastic box containing a stamp pad made of thin foam rubber impregnated with gouache, thick paper of any color and size, crumpled paper.
Method of obtaining an image: a child presses crumpled paper onto a stamp pad with paint and makes an impression on the paper. To get a different color, both the saucer and the crumpled paper are changed.
Work options: fireworks, hedgehog, bear
Means of expression: color, line, spot, texture.
Materials: candle, thick paper, watercolor, brushes.
Method of obtaining an image: a child draws on paper with a candle. Then he paints the sheet with watercolors in one or more colors. The candle pattern remains white.
Options for work: snowman, footprints in the snow, clearing the path to the house, snowfall.
Means of expression: texture, color.
Materials: paper, gouache, leaves of various trees (preferably fallen ones), brushes.
Method of obtaining an image: the child covers a piece of wood with paints of different colors, then applies it with the painted side to the paper to make a print. Each time a new leaf is taken. The petioles of the leaves can be painted on with a brush.
Conducting a series of classes using a variety of techniques to identify children’s abilities over the course of time, it is clear that children have the ability to work with paints using non-traditional techniques. In children with poorly developed artistic and creative abilities, the indicators are slightly higher than at the beginning of the school year, but due to the use of non-traditional materials, the level of enthusiasm for the topic and technique and the ability to perceive color have improved.
Imprint with foam rubber (foam plastic
)
Means of expression: stain, texture, color.
Materials: a bowl or plastic box containing a stamp pad made of thin foam rubber impregnated with gouache, thick paper of any color and size, pieces of foam rubber.
Method of obtaining an image: the child presses the foam rubber onto a stamp pad with paint and makes an impression on the paper. To change the color, use another bowl and foam rubber.
Drawing with signets made from raw vegetables.
Material for work. Paper of any color and size, gouache, stamps made from raw vegetables, palette, napkin, brush, water.
Method of obtaining an image. Cut the vegetables lengthwise or crosswise, cover them with gouache, then place the painted side on a sheet of paper, press and remove, resulting in a neat color print.
This is a simple but amazing technique of painting with paints (watercolor, gouache, etc.). It consists in the fact that a design is drawn on one side of the surface and imprinted on the other. 1. Fold a sheet of paper in half and unfold it.
2. On one half of the sheet, draw half of the depicted object and again fold the sheet of paper to make a print.
3. Add details to the resulting image, if necessary.
The method is to teach children how to make blots (black and multi-colored). Then the child can look at them and see images, objects or individual details. “What does your or my blot look like?”, “Who or what does it remind you of?” – these questions are very useful, because... develop thinking and imagination. After this, without forcing the child, but by showing him, you can move on to the next stage - tracing or finishing the blots. The result can be a whole plot.
Drawings for those who are hungry
Easy and beautiful pictures for a sketchbook
A sketchbook is an album for sketches and sketches. Every self-respecting artist should have such an album. But even if you are just interested in drawing, then such an album is also a must.
In this album you can not only sketch something you like, but also make your own sketches under the influence of emotions.
Portraits are popular in such albums.
A simple drawing, for example, dandelions.
You can practice by drawing various talismans.
In addition to drawings, you can make logo pictures or sketches with text.
The sketchbook is thus a kind of artist’s portfolio.
Making beautiful drawings about autumn
Autumn. It's quite a romantic time. You can draw many wonderful compositions here.
Leaf fall.
Set of leaves and acorns for autumn design.
And this is a step-by-step drawing of the autumn landscape
And another beautiful portrait in the leaves.