Middle group. Junior preschool age. Children 4 - 5 years old
Summary of experimental activities in the middle group “Wonderful Water” Developed by: Dubentsova Marina Sergeevna, teacher of MBDOU DS No. 68 “Chamomile”
Stary Oskol urban district, Belgorod region.
Goal: expanding children's understanding of the properties of water through experimental activities .
Objectives: Educational: deepen, generalize and... Experimenting with water in the middle group
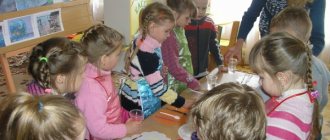
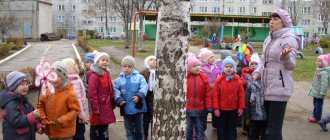
When a child is born, he constantly studies, explores, experiments , and thereby learns about the world around him. This is very important for the development of all processes and the smallest researcher. I would like to present to your attention a photo report on experimenting with water...
MAGAZINE Preschooler.RF
Card index of experiences and experiments in the middle group.Sand and clay
Experiment No. 1. “Sand cone” .
Purpose: To introduce the property of sand - flowability.
Procedure: Take a handful of dry sand and release it in a stream so that it falls in one place. Gradually, at the place where the sand falls, a cone is formed, growing in height and occupying an increasingly larger area at the base. If you pour sand for a long time in one place, then in another, drifts occur; the movement of sand is similar to a current. Is it possible to build a permanent road in the sand?
Conclusion: Sand is a bulk material.
Experiment 2. What are sand and clay made of?
Examining grains of sand and clay with a magnifying glass.
— What is sand made of? /Sand consists of very small grains - grains of sand.
- How do they look? /They are very small, round/.
-What does clay consist of? Are the same particles visible in the clay?
In sand, each grain of sand lies separately, it does not stick to its “neighbors ,” and clay consists of very small particles stuck together. Clay dust grains are much smaller than sand grains.
Conclusion: sand consists of grains of sand that do not stick to each other, and clay is made of small particles that seem to hold hands tightly and press against each other. This is why sand figurines crumble so easily, but clay figurines do not crumble.
Experiment No. 3. Does water pass through sand and clay?
Sand and clay are placed in glasses. Pour water on them and see which of them allows water to pass through well. Why do you think water passes through sand but not through clay?
Conclusion: sand allows water to pass through well, because the grains of sand are not fastened together, they scatter, and there is free space between them. Clay does not allow water to pass through.
Substance. Stones
Experiment No. 4. What types of stones are there?
Determine the color of the stone (gray, brown, white, red, blue, etc.).
Conclusion: stones vary in color and shape
Experiment No. 5 Determining the size.
Are your stones the same size?
Conclusion: stones come in different sizes.
Experiment No. 6 Determination of the nature of the surface.
We will now stroke each pebble in turn. Are the surfaces of the stones the same or different? Which? (Children share their discoveries.) The teacher asks the children to show the smoothest stone and the roughest one.
Conclusion: a stone can be smooth or rough.
Experiment No. 7 Compare the density of stone and plasticine.
The teacher invites everyone to take a stone in one hand and plasticine in the other. Squeeze both palms together. What happened to the stone and what happened to the plasticine? Why?
Conclusion: rocks are hard.
Experiment No. 8. Examining stones through a magnifying glass.
Educator: What interesting things did you guys see?
(Specks, paths, depressions, dimples, patterns, etc.).
Experiment No. 9. Determination of weight.
Children take turns holding stones in their palms and determine the heaviest and lightest stone.
Conclusion: stones vary in weight: light, heavy.
Experiment No. 10 Determination of temperature.
Among your stones you need to find the warmest and coldest stone. Guys, how and what will you do? (The teacher asks to show a warm stone, then a cold stone, and offers to warm the cold stone.)
Conclusion: stones can be warm or cold.
Experiment No. 11. Do stones sink in water?
Children take a jar of water and carefully place one stone in the water. They are watching. Share the results of the experience. The teacher draws attention to additional phenomena - circles appeared in the water, the color of the stone changed and became brighter.
Conclusion: stones sink in water because they are heavy and dense.
Experiment No. 12 Compare stones with wood.
Take a wooden cube and try to lower it into the water. What will happen to him? (The tree floats.) Now lower the pebble into the water. What happened to him? (The stone sinks.) Why? (It is heavier than water.) Why does a tree float? (It is lighter than water.)
Conclusion: Wood is lighter than water, but stone is heavier.
Living stones
Goal: To introduce stones, the origin of which is associated with living organisms, with ancient fossils.
Material: Chalk, limestone, pearls, coal, various shells, corals. Drawings of ferns, horsetails, ancient forest, magnifying glass, thick glass, amber.
Check what happens if you squeeze lemon juice onto a stone. Place the pebble in the buzzing glass and listen. Tell us about the result.
Conclusion: Some stones “hiss” (chalk - limestone).
Scientific experience “Growing stalactites”
— clarify knowledge based on experience.
-cause the joy of discoveries gained from experiences. (soda, hot water, food coloring, two glass jars, thick woolen thread).
First of all, prepare a supersaturated soda solution. So, we have a solution prepared in two identical jars. We place the jars in a quiet, warm place, because growing stalactites and stalagmites requires peace and quiet. We move the jars apart and place a plate between them. We release the ends of the woolen thread into the jars so that the thread hangs over the plate. The ends of the thread should reach the middle of the cans. You will get such a suspended bridge made of woolen thread, a road from jar to jar. At first, nothing interesting will happen. The thread should be saturated with water. But after a few days, the solution will gradually begin to drip from the thread onto the plate. Drop by drop, slowly, just as it happens in mysterious caves. First a small bump will appear. It will grow into a small icicle, then the icicle will become bigger and bigger. And below, on the plate, a tubercle will appear that will grow upward. If you have ever built sand castles, you will understand how this happens. Stalactites will grow from top to bottom, and stalagmites will grow from bottom to top.
Experiment No. 13. Can stones change color?
Place one stone in the water and pay attention to it. Remove the stone from the water. What is he like? (Wet.) Compare with a stone that lies on a napkin. What is the difference? (Color.)
Conclusion: Wet stone is darker.
Experiment No. 14.
Immerse the stone in water and see how many circles it goes. Then add a second, third, fourth stone and observe how many circles each stone makes and write down the results. Compare results. See how these waves interact.
Conclusion: The circles from a large stone are wider than those from a small one.
Air and its properties
Experience No. 15 “Acquaintance with the properties of air”
Air, guys, is gas. Children are invited to look at the group room. What do you see? (toys, tables, etc.) There is also a lot of air in the room, you can’t see it because it is transparent, colorless. To see the air, you need to catch it. The teacher offers to look into the plastic bag. What's there? (it is empty). It can be folded several times. Look how thin he is. Now we fill the bag with air and tie it. Our package is full of air and looks like a pillow. Now let's untie the bag and let the air out of it. The package became thin again. Why? (There is no air in it.) Again, fill the bag with air and release it again (2-3 times)
Air, guys, is gas. It is invisible, transparent, colorless and odorless.
Let's take a rubber toy and squeeze it. What will you hear? (Whistling). This is air coming out of the toy. Close the hole with your finger and try to squeeze the toy again. She doesn't shrink. What's stopping her?
We conclude: the air in the toy prevents it from being compressed.
Look what happens when I put a glass in a jar of water. What are you observing? (Water does not pour into the glass). Now I will carefully tilt the glass. What happened? (Water poured into the glass). The air came out of the glass and water filled the glass. We conclude: air takes up space.
Take a straw and place it in a glass of water. Let's blow into it quietly. What are you observing? (Bubbles are coming), yes this proves that you are exhaling air.
Place your hand on your chest and inhale. What's happening? (The chest rose.) What happens to the lungs at this time? (They fill with air). And when you exhale, what happens to the chest? (She lowers herself). What happens to our lungs? (Air comes out of them.)
We conclude: when you inhale, the lungs expand, filling with air, and when you exhale, they contract. Can we not breathe at all? Without breath there is no life.
Experiment No. 16 “Dry out of water”
Children are asked to turn the glass upside down and slowly lower it into the jar. Draw children's attention to the fact that the glass must be held level. What happens? Does water get into the glass? Why not?
Conclusion: there is air in the glass, it does not let water in.
Children are asked to lower the glass into the jar of water again, but now they are asked to hold the glass not straight, but tilt it slightly. What appears in the water? (air bubbles are visible). Where did they come from? The air leaves the glass and water takes its place.
Conclusion: the air is transparent, invisible.
Experiment No. 17 “How much does air weigh?”
Let's try to weigh the air. Let's take a stick about 60 cm long. Attach a rope to its middle and tie two identical balloons to both ends. Hang the stick by a string in a horizontal position. Invite the children to think about what would happen if you pierced one of the balls with a sharp object. Poke a needle into one of the inflated balloons. Air will come out of the ball, and the end of the stick to which it is attached will rise up. Why? The balloon without air became lighter. What happens when we puncture the second ball? Check it out in practice. Your balance will be restored again. Balloons without air weigh the same as inflated ones.
Experiment No. 16. Air is always in motion
Goal: Prove that air is always in motion.
Equipment:
- Strips of light paper (1.0 x 10.0 cm) in quantities corresponding to the number of children.
- Illustrations: windmill, sailboat, hurricane, etc.
- A hermetically sealed jar of fresh orange or lemon peels (you can use a perfume bottle).
Experience: Carefully take a strip of paper by the edge and blow on it. She leaned away. Why? We exhale air, it moves and moves the paper strip. Let's blow on our hands. You can blow harder or weaker. We feel strong or weak air movement. In nature, such tangible movement of air is called wind. People have learned to use it (show illustrations), but sometimes it is too strong and causes a lot of trouble (show illustrations). But there is not always wind. Sometimes there is no wind. If we feel the movement of air in a room, it is called a draft, and then we know that a window or window is probably open. Now in our group the windows are closed, we don’t feel any air movement. I wonder if there is no wind and no draft, then the air is still? Consider a hermetically sealed jar. It contains orange peels. Let's smell the jar. We don't smell it because the jar is closed and we can't inhale air from it (air doesn't move from a closed space). Will we be able to inhale the smell if the jar is open, but far from us? The teacher takes the jar away from the children (approximately 5 meters) and opens the lid. There is no smell! But after a while everyone smells the oranges. Why? The air from the can moved around the room.
Conclusion: Air is always in motion, even if we don’t feel the wind or draft.
Water and its properties
Experiment No. 18 “Melting Ice” .
Cover the glass with a piece of gauze, securing it with an elastic band around the edges. Place a piece of icicle on the gauze. Place the bowl with ice in a warm place. The icicle decreases, the water in the glass increases. After the icicle has melted completely, emphasize that the water was in a solid state, but has turned into liquid.
Experiment No. 19 “Evaporation of water” .
Let's put some water in a plate, measure its level on the wall of the plate with a marker and leave it on the windowsill for several days. Looking into the plate every day, we can observe the miraculous disappearance of water. Where does the water go? It turns into water vapor - evaporates.
Experiment No. 20 “Conversion of steam into water” .
Take a thermos with boiling water. Open it so the children can see the steam. But we also need to prove that steam is also water. Place a mirror over the steam. Droplets of water will appear on it, show them to the children.
Experiment No. 21 “Where did the water disappear?”
Purpose: To identify the process of water evaporation, the dependence of the evaporation rate on conditions (open and closed water surface).
Material: Two identical measuring containers.
Children pour an equal amount of water into containers; together with the teacher they make a level mark; one jar is closed tightly with a lid, the other is left open; Both jars are placed on the windowsill.
The evaporation process is observed for a week, making marks on the walls of the containers and recording the results in an observation diary. They discuss whether the amount of water has changed (the water level has become lower than the mark), where the water from the open jar has disappeared (water particles have risen from the surface into the air). When the container is closed, evaporation is weak (water particles cannot evaporate from the closed container).
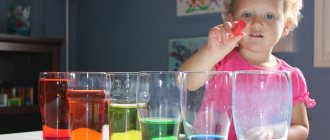
Experiment No. 22 “Different waters”
Educator: Guys, let's take a glass and pour sand into it. What happened? Is it possible to drink this water?
Children: No. She is dirty and unpleasant to look at.
Educator: Yes, indeed, such water is not suitable for drinking. What needs to be done to make it clean?
Children: It needs to be cleaned of dirt.
Educator: You know, this can be done, but only with the help of a filter.
We can make the simplest filter for water purification ourselves using gauze. Watch how I do it (I show how to make a filter, then how to install it in a jar). Now try making a filter yourself.
Independent work of children.
Educator: Everyone did everything right, what a great fellow you are! Let's try how our filters work. We will very carefully, little by little, pour dirty water into a glass with a filter.
Children are working independently.
Educator: Carefully remove the filter and look at the water. What has she become?
Children: The water has become clean.
Educator: Where did the oil go?
Children: All the oil remains on the filter.
Educator: We have learned the easiest way to purify water. But even after filtration, the water cannot be drunk immediately; it must be boiled
Experiment No. 23. The water cycle in nature.
Goal: To tell children about the water cycle in nature. Show the dependence of the state of water on temperature.
Equipment:
- Ice and snow in a small saucepan with a lid.
- Electric stove.
- Refrigerator (in a kindergarten, you can agree with the kitchen or medical office to place a test saucepan in the freezer for a while).
Experiment 1: Let's bring hard ice and snow home from the street and put them in a saucepan. If you leave them in a warm room for a while, they will soon melt and you will get water. What was the snow and ice like? The snow and ice are hard and very cold. What kind of water? It's liquid. Why did solid ice and snow melt and turn into liquid water? Because they got warm in the room.
Conclusion: When heated (increasing temperature), solid snow and ice turn into liquid water.
Experiment 2: Place a saucepan with the resulting water on the electric stove and boil. The water boils, steam rises above it, the water becomes less and less, why? Where does she disappear to? It turns into steam. Steam is the gaseous state of water. What was the water like? Liquid! What did it become? Gaseous! Why? We increased the temperature again and heated the water!
Conclusion: When heated (increasing temperature), liquid water turns into a gaseous state - steam.
Experiment 3: We continue to boil the water, cover the saucepan with a lid, put some ice on top of the lid and after a few seconds we show that the bottom of the lid is covered with drops of water. What was the steam like? Gaseous! What kind of water did you get? Liquid! Why? Hot steam, touching the cold lid, cools and turns back into liquid drops of water.
Conclusion: When cooled (temperature decreases), gaseous steam turns back into liquid water.
Experiment 4: Let's cool our saucepan a little and then put it in the freezer. What will happen to her? She will turn into ice again. What was the water like? Liquid! What did she become after freezing in the refrigerator? Solid! Why? We froze it, that is, we reduced the temperature.
Conclusion: When cooled (temperature decreases), liquid water turns back into solid snow and ice.
General conclusion:
In winter it often snows, it lies everywhere on the street. You can also see ice in winter. What is it: snow and ice? This is frozen water, its solid state. The water froze because it was very cold outside. But then spring comes, the sun warms up, it gets warmer outside, the temperature increases, the ice and snow heat up and begin to melt. When heated (increasing temperature), solid snow and ice turn into liquid water. Puddles appear on the ground and streams flow. The sun is getting hotter and hotter. When heated, liquid water turns into a gaseous state - steam. The puddles dry up, gaseous steam rises higher and higher into the sky. And there, high up, cold clouds greet him. When cooled, the gaseous steam turns back into liquid water. Droplets of water fall to the ground, as if from a cold saucepan lid. What does this mean? It's rain! Rain occurs in spring, summer, and autumn. But it still rains the most in autumn. The rain is pouring on the ground, there are puddles on the ground, a lot of water. It's cold at night and the water freezes. When cooled (temperature decreases), liquid water turns back into solid ice. People say: “It was freezing at night, it was slippery outside . Time passes, and after autumn winter comes again. Why is it snowing now instead of rain? And it turns out that while the water droplets were falling, they managed to freeze and turn into snow. But then spring comes again, the snow and ice melt again, and all the wonderful transformations of water are repeated again. This story repeats itself with solid snow and ice, liquid water and gaseous steam every year. These transformations are called the water cycle in nature.
Magnet
Experiment No. 23 “Attracts - does not attract”
You have objects mixed up on your table, sort the objects in this way: on a black tray, put all the objects that the magnet attracts. Place on a green tray that does not respond to a magnet.
Q: How do we check this?
D: Using a magnet.
Q: To check this, you need to hold a magnet over objects.
-Let's get started! Tell me what you did? And what happened?
D: I passed the magnet over the objects, and all the iron objects were attracted to it. This means that a magnet attracts iron objects.
Q: What objects did the magnet not attract?
D: The magnet did not attract: a plastic button, a piece of fabric, paper, a wooden pencil, an eraser.
Experiment No. 24 “Does a magnet act through other materials?”
Game "Fishing"
-Will magnetic forces pass through water? We'll check this now. We will catch fish without a fishing rod, only with the help of our magnet. Pass the magnet over the water. Get started.
Children hold a magnet over the water; iron fish located at the bottom are attracted to the magnet.
-Tell me what you did and what happened.
-I held a magnet over a glass of water, and the fish lying in the water was attracted and magnetized.
Conclusion: Magnetic forces pass through water.
Experience game “Butterfly flies”
- Guys, what do you think, can a paper butterfly fly?
-I will put a butterfly on a sheet of cardboard and a magnet under the cardboard. I will move the butterfly along the drawn paths. Proceed with the experiment.
- Tell me what you did and what you received.
-The butterfly is flying.
-And why?
-The butterfly also has a magnet at the bottom. A magnet attracts a magnet.
-What moves the butterfly? (magnetic force).
-That's right, magnetic forces have their magical effect.
-What can we conclude?
-Magnetic force passes through the cardboard.
-Magnets can act through paper, so they are used, for example, to attach notes to the metal door of a refrigerator.
-What conclusion can be drawn? What materials and substances does magnetic force pass through?
Conclusion: Magnetic force passes through cardboard.
-That's right, magnetic force passes through different materials and substances.
Experience game No. 25 “Without getting your hands wet”
Does a magnet work through other materials?
-And now we’re going to the wizards’ laboratory.
-Listen to the next task. How to remove a paperclip from a glass of water without getting your hands wet?
-The children are trying. (I show you how to do this).
- We need to take a magnet. And then you need to move the magnet along the outer wall of the glass.
- Tell me what you did and what you received. (The paper clip follows the upward movement of the magnet.)
-What moved the paper clip? (Magnetic force)
-What conclusion can be drawn: do magnetic forces pass through glass?
Conclusion: Magnetic forces pass through glass
| Next > |
Card file of experiences and experiments in kindergarten, junior group
Children in the younger group perceive experimental activities best in a playful way. It is during this period that the ability to explore new objects is laid. Kids quickly get involved in the game and with great pleasure build with sand, watch the formation of frost and the immersion of objects in water. Thus, the child learns the properties of materials and works on fine motor skills. Experimentation is carried out to solve a specific situation. The teacher sets a problem and, together with the children, tries to solve it in a playful way. At the end of the study, the guys must draw a certain conclusion. For example, is it possible to lick an icicle, eat snow, make a pie out of sand, etc. Experimentation is carried out in a special corner or while walking on the street.
An approximate catalog of experimental topics designed for the younger group:
- Natural materials – 8 lessons;
- Water – 6 lessons;
- Air – 4 lessons;
- Sand – 4 lessons;
- Paper – 4 lessons;
- Fabric – 3 lessons.
Important! Experimentation at a younger age should not last more than 15 minutes.
Card index of experiments in the senior group according to the Federal State Educational Standard
Educational standards provide for the comprehensive development of the child’s personality. Experimentation in the older group is aimed at stimulating independent exploration of actions, phenomena and objects. To facilitate research work, special diagrams and models with a detailed algorithm of actions are placed in the experimental corner. Educational books, atlases and various collections from natural materials can serve as a supplement.
An approximate card index of experimental topics, designed for the older group:
- Space – 5 lessons;
- Water – 4 lessons;
- Air – 6 lessons;
- Sand – 5 lessons;
- Plants and animals – 13 lessons;
- Temperature - 5 classes;
- Magnetism – 3 lessons.
Experiments and experiments preparatory group
It is advisable to carry out experimental activities at home with parents. By experimenting, little inventors learn the most complex laws of nature and grow into creative individuals.
Card index of experiments in the preparatory group
Experimentation at this age becomes more complex and improved. Carrying out independent experimental work, children look for the optimal way to carry it out. In addition to the environment, the children explore human activity, the topic of physical experiments expands, and work begins in the kitchen. An approximate card index of experimental topics, designed for the older group:
- Space – 4 lessons;
- Ecology – 8 lessons;
- Air – 3 lessons;
- Person – 5 lessons;
- Temperature - 5 classes;
- Physical experiments - 5 lessons;
- Experiments in the kitchen – 3 lessons.
During experimentation, children can keep personal notebooks where they record the results of their experiments. In her work, the teacher uses cue cards and pictures with fairy-tale characters.