Every day the autumn season is getting closer. She paints the trees in bright colors and dresses them in golden costumes, pours rain on everyone and blows them with wind. Every month nature sheds its clothes and prepares for a long winter sleep. All these stories undoubtedly inspire all the artists who pick up their brushes, trying to convey the full range of emotions of this season.
So for an hour we will turn into painters and plunge into the world of artistic art. This article will tell you how to draw autumn easily and beautifully for kindergarten and school, both with a pencil and paints, you will no longer have any questions about how to help your child with his homework.
You can also make all kinds of pumpkin crafts for kindergarten or elementary school.
Easy and simple autumn drawings for kindergarten
Many parents wonder how to help their child depict the seasons. They start looking for examples and ideas on the Internet. And we have collected everything you need in a convenient format especially for you! Step-by-step photos with detailed instructions for drawing on the theme of autumn will orient you and your child with food.
Before starting work, clean the work area and lay out the necessary materials, teach your little one to hold the tool in his hands and make even strokes. After such a brief excursion, begin to transfer the lesson step by step onto your canvas. A little patience and perseverance and you will get a real masterpiece!
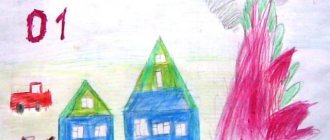
Step-by-step instructions for drawing autumn for a child:
- We outline an even square, and on top of it we mark an isosceles triangle in the right area. We continue it to the left, forming a roof.
- We lower the vertical edge, outlining the cube. On one wall we draw a rectangular door with a handle, and on the other plane a window.
- We use an arcuate line to show the hill on which the building stands. In both parts of the canvas we express trees, with branches spread out in different directions. Keep in mind that the closer to the ground, the thicker the plant trunk becomes.
- We fill the roof of the house with scarlet color without going overboard. We paint the foundation of the house and the neighboring tree with a yellow tint, outlining the rounded shape of the crown.
- Color the opposite tree and clearing with bright orange chalk. With a few chaotic strokes we will show the falling leaves. We will decorate the door in the same color scheme.
- We focus on the red foliage that develops in the wind. Cover the path with small multi-colored specks in the appropriate palette.
- Let us write a characteristic phenomenon for this time of year: bird migration. Our smaller brothers fly away to warmer climes in a whole wedge, which is what we will depict in the corner of the composition. We sketch the birds themselves in the form of black checkmarks.
This illustration is extremely simple and quick, we drew it in literally 10 minutes. The mischievous, active fidget will definitely not get tired of creativity and will even want more!
You can also draw cute autumn mushrooms with pencils.
Drawing with pencils for children from 3 years old
The next work will be no worse than the previous one, but we will do it with the help of colored pencils. A set in a box will definitely be found in every home or in the nearest stationery store. They are easy to use and are recommended for inexperienced toddlers to start their creative activities with. Let's depict a stunning autumn forest on canvas.
Be sure to take your child to this park; he will probably be happy to swim in the fallen leaves. In the meantime, let’s take a walk in his painted version, believe me, it’s even better, because we’ll make it!
We draw an autumn forest in stages:
- A wave extending beyond the boundaries of the canvas denotes mounds. We duplicate it a little lower, expressing the foreground.
- We place three triangular trunks at the same distance. Try to express them as similar to each other as possible.
- We put caps of crowns on the elements, somewhat reminiscent of fluffy clouds.
- We shade the characters from left to right in orange, red, yellow tones. Let the fidget do this completely independently.
- We fill the first wave with a reddish pigment, and decorate the part in the foreground with a bright yellow pencil.
- Fill the trunks with brown and shade the background with blue pigment. We make quick diagonal movements, bypassing the drawn composition.
- Using a contrasting color scheme, we highlight the foliage with dots and the blades of grass with stripes. Let's mark a couple of black birds in the corner with ticks.
The autumn landscape is ready, it is perfect for a competition or a thematic exhibition. And what’s more, it will take away all the awards and sympathy from the audience.
Another lesson on how to simply draw an autumn tree:
Examples of drawings on the theme of autumn for a child to draw for school
All manuals recommend that young artists sketch pictures at first. This will allow you to sharpen your hand and develop a creative eye. By repeating an endless number of works, you will soon be able to create them yourself! Your hands will create magic and your brain will generate great ideas. In the following selection you will find options for children's images using different techniques. Go for it!
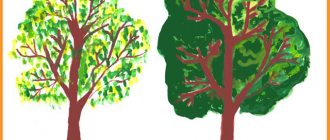
- Three autumn trees against the background of a river: a colorful version of the picture
- A lonely tree on a yellow background is suitable even for the smallest children:
- Trees in yellow and red on a green hill:
- Cute hedgehog with apples: drawing for kindergarten
- Bench in the autumn park:
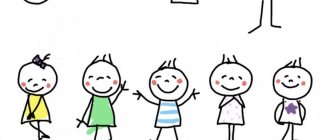
- Another idea for a drawing on the theme of autumn for the junior or middle group of a kindergarten: this option can be depicted by simply dipping your fingers in different colors, the children will simply be delighted!
- Girl in the autumn forest
- Forest mushrooms:
- Autumn road:
- An interesting idea for drawing a sparrow in yellow tones:
You can also draw a bullfinch; older children will definitely love this idea.
- Squirrel on a stump:
Autumn can also be painted with acrylic, here is a video master class on this topic:
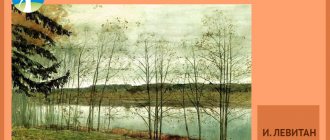
How to draw a picture on the theme “Golden Autumn” with a pencil
During the autumn period, we are amazed and notice the transformation of trees. They, covered with gold, smoothly sway back and forth, and small leaves fall from them, spinning in a dance. A light blow of wind completely changes the course of events and bends fragile blades of grass and plants under it.
From such impressions, your soul becomes light and good, peace covers your head. Have you already presented such a story? Then we suggest transferring your feelings to the canvas and throwing out all your imagination and feelings. Our step-by-step master class on drawing a golden, magical autumn will help and guide your talent in the right direction!
Let's start the creative process:
- We draw a sloping horizon line. We build a log cabin on its top. To show the logs, draw two columns of circles. Then we outline the cats with shutters and mark the rows of pieces of wood along the entire perimeter, connecting the elements.
- We outline the pointed roof with a window and also detail it with logs. Next, draw a diagonal axis and draw a striped tile.
- We finish drawing the left side of the house, and next to it we draw a tree with a voluminous crown. In the left area we will work on the fence for this purpose we make checkered strokes.
- From the building there is a winding path that leads directly to a large tree in the foreground. Its crown is slightly tilted to the left, from the breeze, and young grass grows at the foot.
- We sketch the background with mountains and plowed fields with haystacks. We outline rows of bushes and cumulus clouds in the sky with flying cranes.
- We will paint all the greenery using an interesting technique. We only partially fill the elements with each color, and then change the color. So we will have a variety of transitions and gradients, don’t be afraid to experiment!
- We decorate the house in brownish tones. And the spacious meadows still remain green, as September has just come into its own. We decorate the field with haystacks in a red tone, because wheat grows on it. We paint the skies in a blue palette.
The painting is ready, it’s perfect for homework, so feel free to take it to class. You are guaranteed to get an A!
Idea #8
A very unusual picture can be made using foil. Place the dried leaf (or several) on a sheet of cardboard, veins up. Cover it with thin foil and carefully, so as not to tear it, smooth it with your fingers so that the design appears. Cover the foil with dark paint (you can use gouache, acrylic, tempera, ink) and let it dry well. Rub the painting very gently with a stiff dishwashing sponge. The protruding veins of the leaf will shine, and dark paint will remain in the recesses. Now you can frame your work!
Autumn pictures for school with paints: a step-by-step master class on painting with gouache
If you successfully completed the previous illustration, then working with paints will definitely not scare you. This material is thicker and more saturated, allowing you to achieve bright and natural transitions. You don't need a large package of gouache, because we only use autumn colors.
Brew some warm tea, turn on some nice music and create masterpieces with us on the theme of the golden season. Your efforts will be rewarded at school according to your merits; you will definitely be one hundred percent prepared for the fine arts lesson!
Now we will figure out how to paint an autumn tree branch step by step:
- Fill the entire canvas with bright yellow pigment. We put an orange tone on the brush and outline a circle in the center, making strokes in a rounded shape.
- We fill all the edges and corners with a scarlet palette, slowly mixing it into the already drawn tints. We leave the most intense accent in the middle, so we get a huge sun.
- We draw a bending branch; it should not be a completely straight segment. It has thin knots and uneven branches. This is the natural beauty of nature!
- Using single strokes of orange and scarlet gouache, we mark the remaining leaves on the branches.
- We mark each element with black spots, make sure that they are slightly blurred. So, we will highlight the depth and volume of individual zones.
- We also work on the sky and clouds from above in the same range. We make soft dipping movements to get similar colorful clouds.
The canvas simply screams and bursts with color, it looks extremely impressive and will amaze all spectators and observers on the spot!
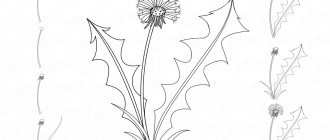
Autumn leaves: drawing for children of grades 1-3 with paints
Let's sketch the main attribute and association with October, September and November - autumn leaves! They smoothly fall and swirl in the air, the children collect bouquets from them and make herbariums for lessons on the world around them. We will depict them on canvas easily and simply, in just a few minutes.
Call your fidget, put on an apron and get creative, our step-by-step master class will help you in this difficult task!
You'll need it today:
- Gouache
- Thick paper
- Background brush, synthetic No. 1 and No. 2, bristles No. 8
Step-by-step instructions for painting autumn leaves with paints:
- We cover the spot in the background with a yellow tone, and also draw out the lower horizontal surface. This will be the water in which the branches are reflected. Add a few cross-shaped ocher strokes.
- We collect red material and shade the area on the right side. We decorate the left corner of the canvas with green color, and also draw it to the opposite edge.
- Using a thin brush we draw a brown twig and the outline of the leaf and its veins. We shade the left area from the edge with red-burgundy, the center should be lighter.
- We schematically express the remaining silhouettes of the leaves using dirty shades. We form several layers, a whole armful of plants.
- We add a few Dark Green spots to add depth to the illustration, and also work on the highlights with white on the water and other elements.
A painting can perfectly decorate the interior of your apartment, just hang it on the wall and it will create a cozy, warm autumn mood for you.
Examples of leaf drawings for sketching and inspiration
The following selection is perfect for those who have run out of thoughts, ideas and imagination on the theme of autumn. It is not necessary to repeat the pictures from the photo exactly; perhaps they will push you to realize your plans. Choose the image you like, there are also step-by-step diagrams among them.
- Maple leaf in bright colors
- Sketch of a pink leaf in a notebook: a simple idea for sketching for beginners
- Another idea for drawing a maple leaf step by step
- Step-by-step instructions for drawing an autumn leaf:
- Black and white leaves flying in the wind: a drawing for the little ones
- An armful of autumn leaves in hand
- Fallen leaf in a puddle
- Beautiful, bright yellow maple leaves in a vase
- Bouquet of colorful autumn leaves
- 6 types of autumn leaves of different colors and shapes
- Birch leaf with a simple pencil: an idea for advanced
- Oak leaf: a simple drawing idea for a child
- Another maple leaf drawing idea
For you, we have also selected a selection of video lessons on drawing autumn leaves. I'm sure you'll find something to your liking:
Watercolor option:
Another bright idea for painting with paints:
Idea No. 9
Those who love textures will surely enjoy filling different silhouettes with patterns. Draw or trace an autumn leaf according to the template, divide it into small planes, like a stained glass window. Have your child fill in each piece with a different pattern. You can do this with a gel pen or felt-tip pens.
How to draw an autumn landscape step by step: an easy but beautiful gouache drawing
Making the next wonderful picture will be very easy. You don’t necessarily have to have a diploma from a higher art school or attend specialized courses.
The language of our lesson is simple and will be understandable to everyone. He will describe to you all the nuances of working with materials, setting light and shade, and processing volume and perspective.
Don’t be intimidated by complex phrases, but rather get down to business quickly:
- The sketch is done with an HB pencil, it should be a light sketch, do not press too hard on the tool. Draw a horizontal line just below the center, which divides the sheet into two parts. Next, we outline the mass of trees in the distance. Then we sketch a meadow with birch trees and note the clouds in the sky.
- If your gouache has dried out, fill the bottles with water and place them in this position overnight.
The next day, drain the liquid and you will be left with fresh, wet material at the bottom. We paint the sky with a pale blue tint, with abrupt strokes, as well as its reflection in the river. The further from the center the darker the tone becomes, add blue paint to the mixture.
- We write out the long shot, the lighting will be on the left side. First, we cover the silhouettes with yellowish pigments, then we work on the halftones with a red palette. Water, like a mirror, reflects everything, so we depict a vertical smeared reflection on it.
- We outline cumulus clouds in empty spaces with whitewash, and decorate them with a pinkish-lilac color. So, we will clearly show the shadow and volume. Now we move to the foreground, make the first layer of yellow crown, mixing in a little light green.
- We use a greenish tone to express the nearby lawn and several accents on the forest background. For additional texture, add dark contrasting shadows in some places. To do this, mix ocher with blue paint and mix the desired range.
- Use whitewash and a thin brush to highlight the ripples on the river. We paint strokes of different lengths in chaotic places. We draw the ornament on the birch trunks in black. Using a purple tint we go over the background, showing the shadow.
- We place accent spots in the crowns and in the reflection on the water surface. Draw blades of grass on the field. Finally, we release a flock of migratory birds in the corner of the image.
We leave our autograph at the bottom of the masterpiece so that everyone understands who worked hard and created an incredible landscape.
Idea No. 3
Paint is applied to the sheet from the vein side. Then the sheet is applied to the paper and an imprint is made. The effect will be different depending on what paint you use.
You can come up with many compositional solutions: the imprint of a large leaf can become the crown of a tree if you complete the trunk; A few prints are already a whole forest!
Prints made with white paint on a colored background look impressive. You can combine several techniques and complete the images with pencils or felt-tip pens.