Gifts of autumn. Decorative still life in gouache. Step by step drawing for children
Gifts of autumn. Decorative still life in gouache. Master class with step-by-step photos.
Gifts of autumn.
Decorative still life in gouache. Master class on drawing. Author: Dyakova Olga Sergeevna teacher of the Fine Arts class MBOUDO "DSHI" Okhansk Description: this master class will be useful for Fine Arts teachers, teachers of additional education of artistic and aesthetic orientation, students starting from the 2nd grade will successfully cope with this work. Finally, the long-awaited autumn came to us, dressed the trees in bright “outfits” and pleased us with the generous gifts of nature. And I wanted to preserve a piece of this bright holiday. I present to your attention the master class “Gifts of Autumn”. Step-by-step drawing will help you avoid the most common mistakes and give you confidence in your own abilities. The work is performed without preliminary drawing. Purpose: use in drawing classes, interior decoration or as a gift. Goal: completing a decorative still life - “Gifts of Autumn”. Objectives: to improve the ability to work with gouache, to promote the development of creative abilities, to develop a sense of composition, the ability to analyze the shape of depicted objects, to deepen the sense of perception of color and color harmony, to cultivate interest in the objective world and painting, to develop accuracy in work Materials: gouache Whatman paper, A-3 format, nylon brushes numbered 2, 3, 5.
Execution sequence:
Place the sheet of paper horizontally. Let's start making the background. We fill the background with color in large rings - starting with the lightest one, gradually increasing the radius and darkening the color: yellow-green, light green, emerald green colors sequentially.
We blur the boundaries between the “rings”, achieving a smooth transition from color to color.
The next stage of our work is completing the basket. We draw the silhouette of the basket in ocher color (sand-yellow+brown).
Next, we draw light and shadow on the basket, the shadow is done in brown, the light in orange.
We slightly blur the shadow and light on the basket along the inner contour, softening their boundaries, achieving a smooth transition from color to color.
We begin to draw the weaving on the basket using dark brown color.
Using vertical strokes we divide the rows of weaving into “bricks”, in a checkerboard pattern.
On each “brick” we draw shadows with light strokes.
We draw light on the “bricks”, on the upper rows we draw the light in white, on the lower rows in yellow.
Using ocher color we paint the edge of the basket.
Using slanted brown strokes, we divide the edge of the basket into rods, forming a shadow.
Using small white strokes we draw light on the opposite side of the edge of the basket, simultaneously clarifying the shape of the edge of the basket.
Using a thin brush and brown color, draw the outlines of the mushrooms (if it is difficult to draw directly with a brush, you can draw the mushrooms with a pencil).
Next, draw the “chanterelle” outline.
Fill the caps and stems of the mushrooms with color.
We outline the shadows on the legs and caps of the mushrooms.
Using light white strokes, paint light on the legs and caps of the mushrooms.
We draw the plates on the legs of the “chanterelles” and the spots on the legs of the mushrooms.
We draw falling shadows from objects on the plane of the table - with an emerald color, slightly blurring them along the contour, softening the boundaries of the shadows.
Using a thin brush with brown color, draw the branches and brushes of the rowan tree.
Using red and crimson colors we draw rowan berries.
We use rowan leaves with bright, saturated colors.
Use brown to draw veins and shadows on the leaves, as well as shadows on the rowan berries.
Using light white strokes we outline the light on the leaves and berries.
We draw the handles of the basket with ocher color.
Using slanted brown strokes, we divide the handle of the basket into rods, forming a shadow.
Our work is complete. Wishing you a bright autumn mood and creative success!
We recommend watching:
Drawing on the theme Autumn for kindergarten Monotopia in elementary school on the theme: Autumn Clay panel on the theme: Gifts of Autumn. Master class with step-by-step photos. Drawing with heated wax crayons on the theme: Autumn
Similar articles:
Drawing lesson for primary schoolchildren on the theme Autumn
Drawing lesson for schoolchildren on the topic “Autumn”
Crafts made from natural materials for kindergarten. DIY basket “Gifts of Autumn”. Master class with step-by-step photos
Examples in painting
Josef Lauer captured this season with a slight touch of romanticism in his painting “Peaches, Plums, Grapes, Melons and Autumn Flowers.” This autumn still life has retained all the warm tones that are characteristic of the golden age, which is why it is considered one of the standards of autumn painting.
But Henri Fantin-Latour managed to depict autumn in an unconventional way in his painting “Flowers, Fruits and Pumpkins.” The canvas is painted in red, rich colors, as if passed through a gradient. The style is something between romanticism, realism and primitivism. The painting is rightfully considered a masterpiece of painting.
Using modern technology, you can also make a unique autumn still life. A photo of objects that captures every shade, every shadow and reflection is a work of art of the new century. Such paintings are more than realistic, but still depend on the mood of the master who made them.
Still life 2. Bouquet in a vase using prints of autumn leaves
The adult turns to the children: “Now let’s imagine with you. Do you think it is possible to draw a bouquet of collected leaves in a vase in another way? How many of you have already guessed how this can be done?
And you can do it like this:
Step 1.
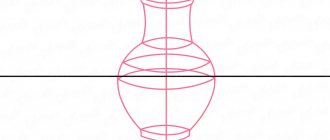
Trace the vase according to the template and color it, as in the first version of the bouquet.
Step 2.
Similar to the first option, try to create a composition of leaves in a vase (I do not repeat this point, because it is described in the first version of the still life with autumn leaves).
Step 3.
Then, apply an even layer of paint “from the wrong side” to the selected sheet over its entire surface with a brush. This is necessary so that the veins are clearly printed. Try to use little water, otherwise the paint will simply smear and the print will be unclear. You can apply paint in one color or in several autumn colors, focusing on natural colors. It is advisable to carry out this work on a separate sheet of paper or plastic napkin.
Step 4.
With the painted side, place the leaf on the landscape sheet above the glued vase and press it tightly to the paper, trying not to move it out of place, otherwise the print will be fuzzy and smeared.
Step 5.
Take the leaf by the stem and carefully remove it from the surface of the paper sheet.
Step 6.
Take the next leaf, paint it a different color and print it in another place in the composition, but so that the cuttings of the leaves are directed into the vase.
The remaining prints should be made in accordance with the intended composition.
The leaf can be coated not with one color, but with different ones, then the print will turn out to be two-color or multi-color.
You can reuse an already painted piece of paper by applying a different color of paint to it, then when mixing different paints you can get an unusual shade.
In this way, leaf prints of different shapes and different colors can be applied over the painted vase to achieve the desired result.
Examples of children's work:
Creative task:
- Think about what else can be depicted with leaf prints?
- Try painting trees with leaf prints.
- Make an ornamental composition from leaf prints in a circle or square.
Different pictures of autumn
It is worth noting that autumn as art has come a long way from antiquity to the 21st century, and over the centuries people have depicted everything that surrounded them, including paintings of autumn. They became most plausible in the 19th century, when the trends that followed them also became relevant. Among the masterpieces of that time, A. Gerasimov’s painting “Gifts of Autumn” deserves attention. The name of the canvas speaks for itself - it represents the golden age in all its glory.

