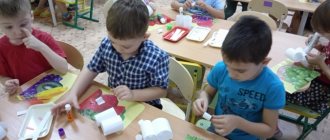
Most children aged 5–6 years are quite capable of independently reading the diagram of an origami craft, and then folding the desired model according to it. This is a great way to prepare for school while developing creativity, logic and discipline. Of course, the schemes should be simple and understandable, with a minimum number of steps. There is no need to immediately set super-tasks for the child, which, instead of development and a positive mood, will only bring worries and loss of faith in one’s abilities.
First steps
In the middle of the last century, the famous origamist Akira Yoshizawa developed a universal system of signs that described the process of folding paper figures. Today this unique “alphabet” is used all over the world. Conventional signs indicate precisely and without words what needs to be done to achieve a result.
First, children need to be introduced to the most important symbols that are found on almost any diagram.
These are different types of folds:
And options for working with the workpiece:
It’s good if the acquaintance takes place in a playful way, so little origamists will remember it better.
Basic forms
Folding any, even the most complex paper figurine, begins with simple steps that are performed in a certain sequence. This is how a basic shape is formed - the master then builds on it, adding folds, bending or turning to get a specific model.
The entire diversity of the world of Japanese papermaking is based on this system. Experienced craftsmen use 11 basic forms; for children aged 5–6 years old, for origami crafts it will be enough to know the following elements:
- "triangle";
- "book";
- “cabinet” or “doors”;
- "kite";
- "Crap";
- "water bomb"
The video tutorial will tell you how each of the basic forms is made:
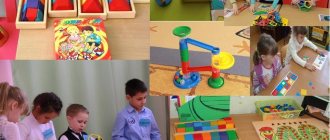
Skills and techniques
Children who can fold basic shapes and recognize them in diagrams are ready to dive into the endless sea of origami ideas. The next stage of their training will be to develop the skills of carefully handling paper so that the figures look aesthetically pleasing and do not “creep”. What should you pay attention to first?
- The fold lines, if they then do not open again, should be smoothed well with a finger, a ruler or the tips of scissors. Then the figure will not lose its shape.
- Bend the model clearly in the directions indicated in the diagram, maintaining symmetry around the central axis.
- When folded, opposite corners and sides are completely aligned with each other.
- The so-called “pockets” - the opening internal parts of the workpiece - must be handled carefully so as not to tear.
The patience, attentiveness, dexterity, and caution developed in the process of practicing these techniques will be very useful in the process of schooling, which is just around the corner. The more independence children show when making figurines, the more useful skills they will gain.
Senior group. Senior preschool age. Children 5-6 years old
Master class on origami “Fawn” for children from 5 years old
The master class will be interesting and useful for children from 5 years old, teachers, and parents. Purpose: for a game, for decorating a postcard or a themed corner. Materials: Two squares, one 2 cm larger than the other. Work progress We begin to fold the head. We take a smaller square and put it...
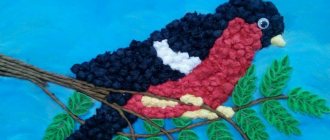
Master class on making an applique with children of the senior group using the origami technique “Wintering Birds”
The flocks of birds have flown away, The forest is covered in snowdrifts to the branches. That's when we waited for Our northern guests. The winter forest does not sleep, but slumbers, All wrapped in silver. Without leaving this land, many birds remained here. Winter is a difficult time for birds. By caring for them, children learn to be kind,...
Origami paper dove
Fold the square sheet diagonally and turn the corners at the base of the triangle upward. You will get a rhombus, which needs to mark the middle and side verticals, as in the diagram. Hide the side corners of the diamond inside, fold the piece in half and turn it over.
On both sides, lift up the future wings of the dove and give them shape. Bend your torso into a trapezoid so that the tail goes down and spread your wings. All that remains is to bend the head-beak on the neck, and the messenger of peace is ready!
Photo: melkie.net
10 best plans for making a paper airplane
Origami paper bunny
Fold a square piece of paper in half and mark the middle of the triangle. Bend its base back a little, and then fold the triangle ears up. Tuck and hide the top and bottom corners of the square to form a muzzle and color it.
Photo: infourok.ru
Photo: mastersamodelok.ru
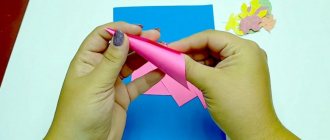
Origami flower
Fold a square piece of paper in half horizontally and tuck in the top corners to form an isosceles triangle. Bend the corners of the base of the top layer up, slightly at an angle to the middle, and do the same on the other side - you will get a square. Bend its side corners to the middle from all sides, straighten it and slightly inflate the figure. Form the petals and straighten the bud by hand on all sides.
To make a flower stem, take a green square, mark a diagonal and bend the side corners to it. Repeat the action for the bottom part, and then again to get a thin rhombus, as in the diagram. Fold the lower elongated part up - this will be the stem of the flower, and bend the wide part and fold it into a leaf.
Photo: savimina.ru
Photo: aprilis.ru
Origami paper frog
Mark the diagonals, central vertical and horizontal lines of a square sheet of paper. Fold it in half and bend the corners inward, as in the diagram, to form an isosceles triangle. Fold the corners of the top layer towards the middle, fold it back halfway and turn the figure over.
Fold the triangle into a rhombus, bend its side corners to the middle, and then straighten the top one into another triangle. Fold the lower part (legs) up and down like an accordion, as in the diagram, turn the toad over and watch how it jumps if you press with your finger.
Photo: bestdiy.ru
Photo: hobobo.ru
Paper fox
Mark the diagonals of the square and fold it in half into a triangle. Fold the corners of the base up to create a small layered diamond again. On one side, bend the corner and turn it around so as to form a muzzle with ears. Now you just need to draw a nose with eyes and bend the tail so that the fox can stand.
Photo: zen.yandex.ru
Photo: vzryvmozga.ru
Origami swan
Take a square white sheet, mark one diagonal and bend the upper and lower corners to it. Fold the ends of the corners in the opposite direction, fold the piece in half and place it on the table like an open book. From a long, elongated corner, form the neck and head of a swan. Make a beak by bending the tip of the head back and forth, and then draw the swan's eyes.
Photo: yboard.ru
Origami whale
Take a gray or blue square, mark a diagonal and bend the lower fragment towards it. Turn the workpiece over and bend the upper and lower (already folded) parts towards the middle. Fold another small corner at the top to form the back, flip the piece over again and make a whale's tail.
Photo: infourok.ru
Photo: zuzino.mos.ru
How to make origami flowers from paper: 8 best patterns
Origami mouse
Mark the diagonal of the square sheet and bend the upper and lower corners towards it, and then bend them back and forth to the middle again. Straighten the diamond as shown in the diagram and turn its corner down. Turn the corner of the main diamond in the opposite direction, and then fold the edges again.
Turn the figure over and straighten the protruding triangles into the mouse's ears. Bend the long triangle twice into a mouse tail and tuck it so that the figurine can be placed on the table. All that remains is to finish drawing the face with eyes and nose.
Photo: pinterest.de
How to make a paper crane: 8 simple ideas
Paper cracker
A paper cracker is folded from a rectangular sheet - you can even use a double notebook. Fold all four corners towards the middle and fold the piece in half into a trapezoid. Fold the corners of the trapezoid down and fold it in half again to create a three-dimensional triangle. You need to take it by the sharp end and shake it sharply so that all the air comes out of the figure with a characteristic pop.
Photo: novamett.ru
Photo: tytmaster.ru