Theme of the week: “Pisces”
Lesson 19. Fish
(Clay modeling)
Program content. Teach children to sculpt oval-shaped objects, pinch parts and decorate the product using a pointed stick. Develop attention. Strengthen the ability to distinguish colors.
Demonstration material. Aquarium with fish.
Handout. A landscape sheet on which multi-colored fish are drawn, swimming to the right - to the seaweed and to the left - to the shell; clay, match, backing board and cardboard stand.
Progress of the lesson
Show your children (if possible) a real aquarium with fish.
Place in front of each child a landscape sheet on which multi-colored fish are drawn, swimming to the right - to the seaweed and to the left - to the shell, and ask: “What color fish are swimming to the seaweed? And what kind of fish swim to the shell?”
Invite the children to sculpt a fish from clay.
First, they must roll a ball out of plasticine, bring it to an egg shape, rolling the ball harder on one side, and flatten it a little between their palms. Then pinch one edge with two fingers - this will be the tail. You can pinch one long fin on the back. After this, children draw eyes, mouth, and fish scales on clay using a match.
Praise the guys for the work done, ask: “What can your fish do!” (Swim, dive, eat food, hide...)
Topic of the week: “My Home”
Lesson 22. House for a bunny and a rooster
(Modeling from plasticine)
Program content. Strengthen children's ability to bring a product to the desired image using plasticine. Learn to retell fairy tales based on illustrations.
Demonstration material. Heroes of the fairy tale “Hare Hut” (hare, fox, bull, dog, bear and rooster), two toy houses.
Handout. A small jar of Rastishka cottage cheese, plasticine, a green cardboard stand, a lining board.
Progress of the lesson
Read the Russian folk tale “The Hare’s Hut” to the children in advance.
At the beginning of the lesson, remember this fairy tale based on the illustrations or dramatize it for the children using toys.
Draw the children's attention to the fact that at the end of the fairy tale, the bunny and the rooster decided to live together. Invite them to make a new house for the heroes of the fairy tale - big and strong.
Place a jar of cottage cheese turned upside down in front of each child.
Children must fashion a door and windows from plasticine and attach them to a jar. Then roll it into a ball, flatten it and attach it like a roof at the top. You can make a pipe on the roof from a column rolled up from plasticine. The house needs to be secured with plasticine on a cardboard stand.
Invite the children to show the resulting houses to the bunny and the rooster. On behalf of the heroes of the fairy tale, thank the children.
Theme of the week: “Defender of the Fatherland Day”
Lesson 23. Cannon
(Clay crafting)
Program content. Continue teaching children to sculpt objects consisting of three parts. Enrich your speech vocabulary.
Demonstration material. Subject pictures: cannon, pistol, shotgun, sword.
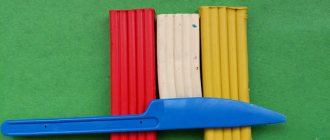
Handout. Clay, cardboard stand, board lining.
Progress of the lesson
Tell the children about the defenders of the Fatherland - strong and brave people who protect the Motherland and its people from enemies; that the defenders have weapons. Show the children pictures of a cannon, pistol, shotgun, sword; name them. Tell us how the warriors used these weapons.
Invite the children to make a cannon out of clay.
First they must roll a cylinder (trunk) and two balls (wheels). The balls need to be slightly flattened and attached in the middle on the sides of the cylinder. Then mold a few more balls from clay and place them next to the cannon - these are the cannonballs.
Topic of the week: “Parts of the body and face”
Lesson 20. Grandmother and grandfather
(Applying plasticine to the surface)
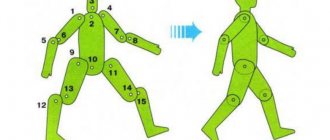
Program content. Continue teaching children how to apply plasticine to a given surface; bring the product to the desired image using threads and plasticine. Strengthen children's knowledge about parts of the face and body.
Demonstration material. Books with Russian folk tales, in which the grandfather and grandmother participate.
Handout. An oval cut out of cardboard; plasticine in white, black, red colors; white and gray threads (2–3 cm long for grandfather and 5–6 cm long for grandmother), lining board.
Progress of the lesson
Tell the children that in many Russian folk tales there is a grandmother and grandfather. Remember the fairy tales with their participation (“Hen Ryaba”, “Turnip”, “Kolobok”, “Masha and the Bear”, etc.).
Place in front of each child an oval cut out of cardboard, white and gray threads (2–3 cm long for grandfather and 5–6 cm long for grandmother). First, children must apply white plasticine to the entire surface of the oval. Then make eyes, nose and mouth out of plasticine. The grandmother needs to attach long threads in the form of hair, and the grandfather needs short threads in the form of hair and a beard. On top, the grandmother’s hair can be secured with a “handkerchief” molded from plasticine, and the grandfather’s hair can be secured with a hat.
At the end of the lesson, praise the guys for a job well done: “Well done! That’s how cute the grandfather and grandmother turned out!”
Theme of the week: “Transport”
Lesson 24. Machine
(Modeling from plasticine)
Program content. Continue teaching children to sculpt objects consisting of several parts from plasticine. Develop speech and thinking.
Demonstration material. Toys or object pictures depicting transport and other objects (toys, vegetables, clothes, food, etc.).
Handout. Plasticine, cardboard stand, board lining.
Progress of the lesson
Show children toys or object pictures depicting vehicles and other objects.
Play the game “Third Odd”: ask them to find an extra object and explain why it is extra. For example: ship, tram, jacket. (The jacket is superfluous, since it is worn, it is clothing, and a ship and a tram transport people - this is transport.) Cucumber, plane, car. (An extra cucumber is a vegetable, and a plane and a car are transport.)
Invite the children to make a small car.
First, they must roll up a ball, roll it between their palms into an oval shape. From plasticine of a different color, they need to roll four small balls - these will be wheels - and attach them to the bottom.
Then you need to make another small ball and place it on top of the car - this is the driver.
Each child places the finished car on a cardboard stand.
