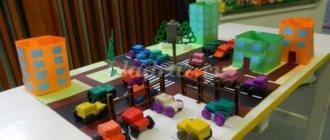
You can make various crafts from plasticine
You can make different figures from plasticine - a giraffe, a turtle, a butterfly and many others. Some children just need to be given a task, they will sculpt using their imagination. Other kids need instructions on how to make a craft step by step.
Turtle step by step
Turtle - this craft is easy and quick to make. To work you will need green, brown, white and black plasticine. Stages of making a turtle:
- Roll several circles of different sizes - 6 green (head, 4 paws, tail), 2 brown, 2 small white and 2 black (even smaller).
- Make a shell and circles for it from brown plasticine.
- From green material you need to fashion 4 legs and a small tail. Attach them to the shell.
- Next, you should sculpt a head from the largest green ball-blank and also attach it to the figurine. On the muzzle, make indentations for the eyes, and also draw a mouth and nose. All that remains is to attach the eyes, made of white and black plasticine.
Giraffe
Making a giraffe for a child is not so easy. But if you follow the instructions, it is quite possible to do this. First you need to decide on the colors. For this craft you need yellow, orange, brown and black plasticine. Stages:
- The animal's body is yellow, so this color is needed most of all. Legs, torso, neck and head are sculpted from yellow material. The animal’s neck is long, so in order to hold it, it can be placed on a wooden skewer.
- Afterwards they make the head, tail and ears. All parts are connected to each other.
- Next, horns and spots are made from orange material and attached to the body. The final stage is attaching the eyes - black and white circles.
Ladybug
Ladybug is one of the lightest, but at the same time brightest plasticine crafts. To make it you need plasticine in 3 colors - red, black and white. The work consists of several stages:
- The base of the figure is the red body. We roll a large red ball, as well as several black ones - a larger one for the head, a smaller one for the legs (6 pieces).
- Next, spots should be applied to the body and eyes should be made.
- We attach the eyes to the top of the head. We attach the legs to the body. The craft is ready.
Butterfly
A butterfly is a very bright and graceful insect. Girls especially enjoy making such beauty. Making it with your own hands is not difficult. For this:
- From a dark-colored material, 3 parts should be sculpted - a head, a body and a tail. You need to make notches on the tail.
- Eyes and curved antennae should be attached to the head.
- You need to make wings from bright material (blue, red, pink) - 2 large and 2 small. Next, you should also go over them with a knife to get beautiful stripes.
- Attach the wings to the body. Then apply circles, stripes or other shapes on them to make the wings colorful.
See also:
DIY corrugated paper tulips with candies - step-by-step instructions