Space idea made of paper and cardboard for April 12
From components such as paper and cardboard, it is easiest to do work for kindergarten and school. Because they are always present in any home. And also scissors and glue. If all this is available, then I propose to build such a composition from a flying spaceship, the sun and Saturn on a black background.
To work you need:
- Cardboard with a black background about 30*25 cm;
- Toilet paper roll;
- Colored paper;
- Gold and silver foil;
- Semolina;
- Scissors;
- PVA glue;
- Pencil.
Manufacturing:
1. Cut the sleeve in half. At one end we cut off the edges to create the nose of the rocket.
2. From blue paper, cut out three blue cones, which we bend in the middle. These will be our rocket engines. We glue them to the uncut (back) part of the sleeve.
3. Glue the rocket onto a black background.
4. Cut out two petals from red and gold paper. This will be fire coming out from behind the ship.
5. Glue the flame and the cut out window.
6.Draw the sun on gold foil, and Saturn with a ring on silver foil. Cut out and glue both shapes onto black cardboard.
7. Apply glue to the background and sprinkle semolina on top. This is our milky way. Beautiful craft is ready!
Did you like the collage? If you have schoolchildren, you can make a flying luminous object below.
Step-by-step 3D postcard in the form of a rocket
If you have never created three-dimensional postcards, here is a step-by-step method for you. Again, everything is as simple as two and two. Templates can be found at the end of my post.
We need:
- A blank sheet of paper A4;
- The pencil is simple;
- Scissors;
- Colored paper;
- Glue;
- Gouache paints.
Manufacturing:
1. Fold the A4 sheet in half. On the fold we draw half a rocket.
2. Part of the rocket in the photo below is marked with a dotted line. This means that we will not cut here. And we will cut out all the straight lines using scissors.
3. We try to do everything as carefully as possible.
4. We turn our spaceship inside. It will fold inward and the entire card will fold outward.
5. Draw the details of the ship: nozzles, porthole, nose and flame below.
6. Paint the background black with gouache. And the rocket itself in suitable colors.
Here you can get creative and make an astronaut’s face in the porthole window.
7. Draw beautiful flames.
8. Cut out different planets from colored paper. We glue them all over the background. You can also make stars from foil.
Voila! Our cool three-dimensional card is ready. We give it away for its intended purpose.
Simple crafts for kids in kindergarten on Cosmonautics Day
I suggest making a rocket with the kids from a sleeve (you can even use toilet paper) and colored paper. It turns out such a long and stable little thing that can be placed on a blue background and next to an astronaut figurine.
Add some foil and you'll have a more realistic spacecraft.
Let's make a starship out of paper. You can do this simply according to the diagram below.
And here is the finished version. Color it as you wish.
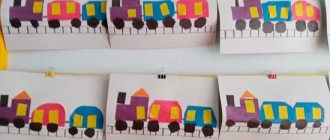
Or we’ll make an unidentified flying machine out of thick paper. You can make several of these things and put them again on the blue sky.
Look how colorful and at the same time original UFOs we produce.
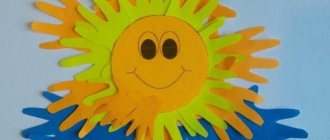
Let's use the baby's favorite toy - plasticine. It is pliable, soft and adheres well to almost any surface.
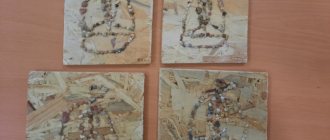
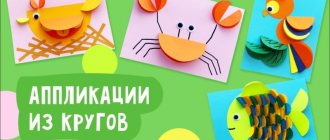
Here are some applications you can make with it in disposable plates.
Saucers - open space
Oh, and we parted ways! Let's sculpt a cute alien. It will look good next to a paper flying saucer.
Funny alien
Don't feel like folding paper? So let's blind her too, because there is a lot of plasticine!
When working with plasticine, the first thing you need to do is explain to children that this is an inedible material and should not be put into their mouth.
Alien and flying saucer made of plasticine
How to make crafts from disks on a space theme?
CDs are already being thrown into the trash, but in vain. After all, this waste material is very suitable for souvenirs for Cosmonautics Day. Its shiny and round flat surface is very suitable for the production of unidentified flying objects.
Here is a second grader's masterpiece. She used the disk under a flying saucer with a very cute alien.
And this is the alien himself with antennas made of springs and foil.
Interplanetary taxi from the children from the preparatory group in kindergarten.
The cutest plate made of rhinestones and fluffy antennae.
ABOUT! And here is a whole group of funny humanoids with their own transport.)
And one more idea on how to use CDs.
Shine
The glitter will fit very harmoniously into the star theme and add brightness to the craft. They can be used to outline the finished application, highlight some elements of the rocket, or make a beautiful inscription “Happy Cosmonautics Day!”
You can use either ready-made glitter gel from the creativity kit or dry small glitter. In order for the latter to stick well, they will have to be applied using colorless nail polish: first apply a layer of varnish to a small area, and then sprinkle glitter on it, and shake off the excess.
Making original works for a school competition
Let's be inspired by the ideas of the kids who won space-themed craft competitions. They all tried, working out every detail in their masterpieces.
Any available materials were used in the work. These are twine, foam balls as planets, glass pebbles, felt and much more.
International station
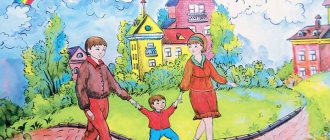
Composition of planet Earth, a rocket and two astronauts in outer space.
Russian cosmonauts
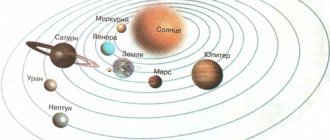
Solar System with satellite and planets.
And here is a magnificent model made from plastic bottles.
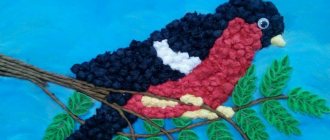
We use felt for voluminous applique.
Intergalactic travelers.
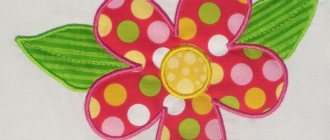
Beautiful applique made from napkin balls.
To make it, you need to roll out many, many balls from colored paper napkins. But the work seems to be worth it!
The squirrel and the salt dough arrow are waving their paws at you).
A little imagination on the theme of the galaxy, starships and UFOs - and a wonderful work is ready for the competition!
Starry sky
The starry sky in the background is the main general feature of space-themed applications. You can make such a background very simply, using a sheet of black cardboard, white paint and a brush. A sheet of black cardboard will be used as a backing. You will need to put stars on it.
A brush to make a lot of small stars will not help us. The paint should be applied in splashes. The necessary fine sprays can be easily done using a small brush with hard bristles; a toothbrush works well for this purpose.
The brush needs to be generously smeared in white paint and rubbed over its bristles with your finger so that splashes are made. To begin with, it is better to practice splashing on rough paper to avoid misunderstandings and unnecessary blots. If everything works out, then you can apply paint to the black cardboard backing.
The starry sky for the application for Cosmonautics Day is ready!