Purpose: To introduce children to the history of various types of dishes. Summarize children's knowledge about the purpose of various types of dishes, materials and methods of their production. Develop cognitive abilities, memory, thinking, imagination, speech. Foster a respectful attitude towards the work of adults.
Progress of the lesson:
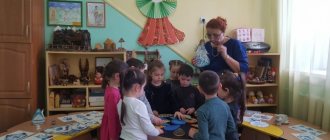
— Guys, let's remember the fascinating and instructive fairy tale by K.I. Chukovsky "Fedorino's grief". What happened to the heroine of this fairy tale? That's right, all the dishes ran away from her. Do you remember why this happened? Grandmother Fedora did not take care of her dishes, did not wash them, did not clean them, did not store them in proper order. Do you think the dishes deserve to be treated with respect? (Children's answers.) When do you think the first dishes appeared? That's right, a very long time ago. At first, ancient people did without utensils. Vegetables and fruits were eaten raw, and meat was fried over a fire and eaten with hands. But very soon they realized that this was not very convenient. Why do you think? (Food from the fire is very hot, and you need to eat everything at once, because there was nowhere to put the leftovers of the cooked food.) But different types of dishes have their own history. And before we get acquainted with the origin of some types of dishes, let's find out which items belong to the dishes. So, we already know that dishes are items for preparing, eating and storing food. There are also decorative dishes that are designed to decorate the interior. (vases, plates, dishes, etc.)
Name the items that are used for preparing food and drinks. (Pots, frying pans, baking dishes, teapots, coffee makers, dumpling makers, steamers, etc.) What kind of food is used when eating? (Plates, bowls, dishes, salad bowls.) What do we use for drinking and drinks? (Cups, mugs, glasses, shot glasses, goblets, shot glasses, wine glasses, decanters, jugs, bottles, thermoses.) What type of container is used for storing food (cheesecake pans, butter dishes, bread bins, etc.) What is considered cutlery? (Spoons, forks, knives, etc.)
There are also auxiliary serving items, who knows what belongs to them? (Trays, saucers, candy bowls, vases, etc.)
That's how many different dishes there are in the house. And all of it can be made from various materials. Which ones? (Made of wood, clay, glass, metals, plastics, paper, stone.) What kind of dishes do you think appeared first? The history of tableware goes back centuries, its rich pedigree is surrounded by all sorts of legends and myths, as well as entertaining historical descriptions. It is believed that the first dishes appeared about seven thousand years ago. It was sculpted from simple clay and by hand. Over time, people realized that not just any clay will do.
for making durable cookware. Then other substances began to be added to it. This is how ceramics appeared. As for glass, it was used back in Ancient Egypt. However, glass production reached its true flourishing in a later period. We cannot ignore China, where a porcelain recipe was invented and kept secret for a long time. Wooden utensils have a long history. Pots and bowls are the first utensils in Ancient Rus'. They were made from wood, and later from metal. For a long time, the pot reigned in the kitchen - the direct predecessor of the modern saucepan. The sizes of the pots were very different. The pots also differed in their external decoration. More elegant were those in which food was served on the table. It is interesting that the higher the level of pottery skill became in cities and villages, the less attention was paid to the external decoration of pots. However, despite its versatility, the pot had difficulty satisfying numerous culinary needs. Then all kinds of pots, baking trays and frying pans came to his aid. You have learned a lot about dishes, there is still a lot to learn, so I suggest you relax a little and play.
Fizminutka
The basket stood on the shelf, idle. (Sit down, round your arms - depict a basket.)
She was probably bored all summer. (Head tilts, left and right.)
Autumn has arrived and the leaves have turned yellow. (Stand up and imitate tree branches.)
The time has come to reap the harvest. (Stretch and pretend to pick fruit from the trees.)
The basket is satisfied. (Round your arms in front of you, nod your head.)
she was surprised, (Spread hands.),
That there are so many fruits in the garden! (Rise up on your toes, shake your arms in a big circle.) Cutlery also has an interesting story. For example, an ordinary table knife. Our distant ancestors did not distinguish between combat, hunting, utility or table knives. Each one carried his own knife in his belt and used it for different purposes. Special table knives came into use only in the 16th century, but they also had a sharp, dagger-like head. They say that the ends of knives should be rounded so that they would not be used during dinner quarrels, as if Napoleon ordered. The tablespoon also has quite a respectable age. Spoons, like knives, were often carried with them in special cases, or simply in a belt or boot top. The fork is the youngest of the cutlery. Even at the royal table in the 17th century, only a knife and a spoon were used. The first forks had two prongs and were only owned by very wealthy people. People began to use a fork only in the 19th century.
(Next, you can tell the children about the history of the various dishes described in the manual.)
• Count which dishes are the most, tea or dining.
• Tell what each item is made of and how it is used.
• Come up with a story that uses as many names of different utensils as possible.
Answers to card quiz questions
1. What kind of utensils are used to store food? (Jars, cheese bowls, butter dishes, bread bins, barrels, tubs, etc.)
2. Name the items that are used for preparing food and drinks.
(Pots, frying pans, baking dishes, teapots, coffee makers, dumpling makers, steamers, etc.)
3. What utensils are used when eating?
(Small plates, deep plates, bowls, round, oval dishes, herring bowls, vases for broth, soup, compote, gravy bowls, salad bowls, menazhniki (for garnish), sprat bowls, etc.)
4. What do we use for drinking and placing drinks?
(Cups, mugs, glasses, shot glasses, goblets, shot glasses, wine glasses, decanters, jugs, bottles, thermoses.)
5. What is considered cutlery? (Spoons, forks, knives, etc.)
6. What are the names of the utensils for spices? (Salt shakers, mustard shakers, pepper shakers, vinegar shakers.)
7. Name examples of decorative tableware. (vases, plates, trays, etc.)
8. What materials are dishes made from?
(Made of wood, clay, glass, metals, plastics, paper, stone.)
9. In what materials can food be cooked hot? (In dishes made of metals, clay and heat-resistant glass.)
10. What shape can plates be? (Round, oval, square, triangular.)
11. Name tea and coffee utensils.
(Tea cups with saucers, coffee cups, mugs, glasses, bowls, teapots, coffee pots, butter dishes, soup bowls, crackers, vases for jam, saucers for jam.)
12. Name Russian folk crafts that make dishes.
(Gzhel, Khokhloma, Zhostovo, Gorodets, Mezen painting, Ural-Siberian painting.)
KNOWLEDGE OF THE AROUND WORLD “Dishes”
Tasks. Continue to introduce children to the names of dishes, the materials from which they are made (clay, glass, wood, metal, plastic, paper). Learn to correlate the shape of an object and its purpose. Introduce different types of teapots and samovars.
Preliminary work. A few days before the lesson, the teacher sculpts two cups from clay, which must have time to dry.
Materials, tools, equipment. Illustrations depicting different dishes (deep and shallow plate, large and small, cup, saucer, bowl, dish, glass, teapot, sugar bowl, etc.). Clay prepared for modeling, two cups molded from clay by the teacher in advance, water should be poured into one cup the day before. A factory-made clay cup or plate covered with glaze. Dishes made from different materials include clay, glass, wood, metal, plastic and paper plates. Illustrations depicting samovars, a real samovar.
Contents of educational activities. The teacher displays one illustration of different dishes and asks the children what they are and what the name of this or that item is. Asks children questions like: “What is a bowl, a deep plate for? Can I eat shallow bowl soup? What do we eat with a spoon? What do they eat from a saucer? Then he asks how all these objects can be called in one word.
He remembers with the children how they made toy dishes from plasticine, who made what and how they played with it. He says that real dishes are often sculpted, just like toy ones. But real dishes - cups, plates, saucers, teapots - are made not from plasticine, but from clay. Shows children how to make dishes, gradually giving the desired shape to one lump of clay. In front of the children, the teacher sculpts an object from clay, asks what it looks like, transforms it so that it looks like a dish - saucer - small plate - deep - bowl - glass - cup - spoon - fork - knife. Showing the transformations of clay, the teacher emphasizes that the shape of an object depends on what it is used for. Through his actions, the teacher emphasizes that the magical transformation of simple clay into wonderful, exquisite pieces of tableware is a matter of skill and technique.
The teacher shows the children a clay cup that was made a few days before the lesson and had time to dry. He offers to touch it and tell how it feels to the touch. Shows another
401
the cup into which water was poured the day before, examines together with the children what happened to the clay (it became soaked, became soft), what the water in this cup became (dirty, cloudy). Explains to the children that in order for clay dishes to be used, they must be fired in a special, very hot oven. Only then will it dry so that it will no longer get wet. Shows the children a cup or plate partially covered with glaze and asks them to compare which surface is smooth and which is slightly rough. Explains that pottery is usually coated with a glaze that is waterproof.
The teacher tells the children that clay can be white, yellow, red, gray, black. When fired, the clay changes color. Dishes made from white clay are called porcelain. Porcelain dishes can be so thin that a cup will weigh lighter than a sheet of paper.
The teacher asks the children what else, besides clay, can be used to make dishes. Exhibits utensils made from different materials (wood, glass, metal, plastic, paper), together with the children examines and names what they are made of. Invites children to name the dishes that can break (clay, glass) and those that cannot (wood, metal, plastic, paper). Draws attention to which dishes require more time and skill to make, why and how people decorate the dishes.
He says that it turns out that dishes can not only be molded from clay or carved from wood, but also sewn from leather or birch bark, hollowed out from a bottle gourd or coconut. You can also weave dishes. Indians in America know how to weave cups, plates and pots for cooking food that do not let water through at all. But pots, cups and plates are not enough - you need to make not only what to cook in and what to eat from, but also what to eat different foods with. Of course, you can take food with your hands, but you won’t be able to eat soup like that, and there will be a lot of difficulties with other dishes too. That's why the spoon appeared, and for a very long time people only used a spoon and a knife. The fork was invented much later and for a very long time it was treated as something very strange. The teacher invites the children to listen to a comic poem about where the big spoon and small fork came from. Reads Tim Sobakin’s poem “On the Benefits of Oatmeal”:
-Where did the spoon come from?
— She came from a teaspoon that ate oatmeal and grew
in a big spoon!
-Where did the fork come from?
—And the fork came from huge forks that didn’t like oatmeal
and turned
into a small fork1.
The teacher shows the children an illustration of a samovar and asks them if they know what it is. He takes out the samovar and compares the illustrations with a real samovar. He says that the samovar can be heated with pine cones or heated with electricity. He asks the children why the samovar is called that.
The teacher shows different types of samovars (in the pictures). He asks how water is heated now, what types of kettles the children know. He reports that water for tea used to be heated in a samovar, describes the ritual of tea drinking, and offers to drink tea from a samovar.
Follow-up work. The teacher organizes didactic games: shows different sets of dishes, asks to match a cup to a saucer, a spoon to a fork, etc. based on the similarity of patterns, color, size, material.
Our friends are poets. Part 2. - St. Petersburg: Agency for Educational Cooperation, 2006. P.64
402
403
MOLDING “Tea set for toys”
Tasks. Teach children to sculpt dishes in a constructive way. Arouse interest in teamwork to create a tea set for toys. Learn to agree on the size of crafts and the nature of the design (for example, sticking, scratching, prints). Develop fine motor skills and eye. Synchronize the movements of both hands. Develop collaboration and co-creation skills.
Preliminary work. Examining items from a doll tea set.
Materials, tools, equipment. Clay or plasticine (teacher's choice), stacks, caps of felt-tip pens or fountain pens, oilcloths, paper and cloth napkins. The teacher has a rotating disk and blanks for demonstrating modeling methods.
Contents of educational activities. The teacher reads the poem “Tea Party” by V. Shipunova to the children:
Like our Dunya's cups and saucers. Like our Lyusenka, the little ones ask for tea. - You are welcome - Come and visit. Come for cookies, tea and jam. This is simply delicious - Cake for the dolls on their birthday! 1
The teacher clarifies the children's ideas about what items are included in the tea set: a teapot, a sugar bowl, 6-12 tea pairs (each consisting of a cup and a saucer), as well as additional items - a creamer or milk jug, a candy bowl, a rusk bowl, vases and sockets for jam. It reminds you that all the items in the service are decorated the same way - polka dots, flowers, checkered patterns or some other way.
The teacher suggests making beautiful tea sets for dolls from clay or plasticine. Distributes children into 2-4 groups to make 2-4 sets for 6-12 people (each group will sculpt items for one set). He explains that each child makes a tea pair - that is, a cup and saucer. At the same time, the children of each
From unpublished.
groups agree among themselves what color the dishes will be and how they will be decorated (polka dots, straight or wavy stripes, flowers, etc.).
Then the teacher shows and explains to the children the technique of sculpting tea utensils.
Saucer.
Roll out the ball, flatten it into a flat cake (disk) and slightly bend the edges, smooth out the middle and level the sides - the saucer is ready.
Cup.
We create a cylindrical shape in which we make a depression with the index finger or some auxiliary object (stack, ice cream stick, pencil). We enlarge the resulting shape - we expand and stretch it with our fingers, turning the product in a circle or rotating it on a rotary disk. We try to make sure that the walls of the cup are the same in thickness. Smooth the walls and level the edge by running your finger in a circle several times. We make the handle from a separately molded cylinder or from half a disk. Attach the handle and lubricate it. The finished cup needs to be decorated as agreed among each other in the group (after all, all the items in the service are decorated the same way). The decoration can be a separate image or an ornament running in a strip around the circumference of the cup. This pattern is called ribbon. It can be located on a flat plane (towel, ribbon) or on a closed surface (vase, cup, flowerpot, etc.). Using a stack, we outline the diagram or the main points of the ornament and begin to sculpt.
The teacher shows the children some techniques for decorating tea cups:
- “polka dot” - rolls out small balls, flattens and evenly distributes over the entire surface of the cup;
- “with a stripe” - rolls out a long flagellum and lays it along the rim - straight or in a wave;
- “in a flower” - attaches 2-4 flattened balls to the cup - the centers of flowers and, using a felt-tip pen or pen, puts imprints around them - petals.
Complicating the task.
The teacher can complicate and diversify the content of the work: in each group, select 2-3 children with well-developed artistic abilities and sculpt with them more complex pieces of service - teapots, cream jugs (milk jugs), candy dishes, vases for jam, sugar bowls. Or offer to create these objects to those children who quickly made a tea pair.
Kettle.
We divide the clay (plasticine) into 2-3 parts and create the initial shape: a large ball, a “carrot” (cone) or a roller (cylinder). We make a deepening and begin to increase evenly
404
405
form, forming a hollow vessel, i.e. with a hole inside. At the same time, we try to maintain the given shape and stretch the walls evenly. From separate pieces of clay we sculpt a handle, a lid that fits the hole, and a stand in the form of a low cone, disk or 2-3 legs. We decorate the teapot so that the cups and teapot make up a set.
Follow-up work. Completing the design of tea sets for games. Role-playing tea party game. Making napkins for table setting. Didactic games with tea sets for comparison, pairing, classification, seriation.
MATHEMATICAL REPRESENTATIONS Lesson No. 12
Tasks. Teach children to determine equality and inequality of two quantitative groups; distinguish between flat figures (circle, square) and volumetric bodies (ball, cube), find their similarities and differences. Practice counting to five, distinguish between the process and the result of counting, coordinate the numeral with the noun in gender, number and case.
Materials, tools, equipment. Demonstration material:
square, circle, square, cube.
Handout:
square, circle, square, cube for each child.
Contents of educational activities. The teacher organizes the game “Counting”
(“More? Less? How many of us?”). To do this, she unites children into small subgroups, calling them by
406
names. Invites six children to stand at one wall of the room, and seven at the other. (The difference in the number of children in the two subgroups should be 1 person.) The rest of the children are observers, they stand at the board or in the middle of the room. The teacher explains to them that they will carefully observe the actions of the summoned children and determine whether they are completing the tasks correctly. Next, the teacher turns to the called children and invites them to come up with a common name for their subgroup. Since children, in all likelihood, do not yet know how to negotiate, the teacher offers several names to choose from, involving observers in the choice: “Do you want to be “dragonflies” or “dolphins”? She asks the child observers: “Which name is most suitable for this subgroup?” After determining the names of the groups, the teacher invites the children to portray “dragonflies” and “dolphins”, showing approximate movements:
—Dragonflies fly, flap their wings, and land on flowers. And dolphins swim, dive, emerge from the water, and “talk” to each other.
Children, following the teacher, reproduce the movements. At the teacher’s signal (for example, she claps her hands three times), the children begin to move in the given images. At the signal “Stop!” the children freeze. The teacher turns to the observers: “What do you think: who is bigger - dolphins or dragonflies? Who is less? Or maybe there are equal numbers of them? Observers express their assumptions.
— How can you find out exactly who has more or is there an equal number of all? The teacher gets the children to decide to place dragonflies and
dolphins in pairs. Comments: “Hold hands so that each pair has one dolphin and one dragonfly.” The children do it. “Observers” determine who is more and who is less. It turns out that there are fewer dragonflies, because one dolphin was left without a mate.
- How can we make sure that there are equal numbers of both? The dolphin moves aside, the “observers” confirm that now it is equal.
The teacher asks the dolphin to return to his place and asks everyone:
- What else can be done to make it equal?
If the children do not answer immediately, the teacher asks one of them to be a dragonfly. The volunteered child pairs up with the dolphin.
- And now who is more, who is less, or everyone equally? Since companies have 6 and 7 people, and children have learned to count
to five, the teacher does not offer to recalculate, limiting himself to determining quantitative relationships.
The game is repeated, players change places. Now the groups will have 4 and 5 people. Their names are retained. This time, after the children get into pairs, the teacher asks to count the “dolphins” and “dragonflies”. Children count and determine: str-
407
goats - 4, dolphins - 5; five more, four less, means more dolphins. Later, as the game progresses, the children establish: four and four - equally; five and five - equally, dragonflies and dolphins - equally.
Repeating the game “Counting” in subsequent lessons, the teacher randomly changes the number of children in groups, their names, and images of animals. Otherwise, the content of the game is completely repeated.
Next, a comparison of a circle and a ball, a square and a cube is organized. On the tables in front of each child there is a ball and a circle, a cube and a square. The teacher asks the children to pick up the square and feel it. Then take the cube and feel it. The teacher holds a cube and a square in front of the children at the same time and asks, pointing to the square: “What is this? What is the name of?" Pointing to the cube, he also asks the children to name it. Children name and show such figures in their own home. The teacher asks them:
— Are a square and a cube similar?
- How are they similar? (Both squares and cubes have corners.)
- Why are squares and cubes different?
Children's answers may include the following: the square is thin, thin, and the cube is thick. The teacher picks up these judgments and uses them to characterize a flat figure and a three-dimensional body.
The teacher asks you to touch each corner of the cube and count them. Children perform, but after counting to 5 and not knowing the names of the numbers further, they can say: “a lot,” “more than five,” or “we don’t know how many.” In any case, the teacher encourages their statements. If someone names the number 8, the teacher confirms the correctness of the answer. Then she asks:
- How are a square and a cube similar? (Corners.)
The teacher asks the children, touching each corner of the square, to count them out loud.
Just as with a cube and a square, the teacher discusses with the children the similarities and differences between a ball and a circle.
APPLICATION “Napkins for toy dishes”
Tasks. Continue to introduce children to folk arts and crafts (weaving, embroidery). Explain the dependence of decor on the shape and purpose of the product. Learn to decorate the edge of a napkin (“shore”), create a pattern from ready-made elements on a circle (napkin) using an algorithm. Develop a sense of composition (build a pattern by alternating elements and placing them on
408
the same distance) and color (select the color of the background and pattern elements).
Preliminary work. Acquaintance with products of folk arts and crafts created for the interior (weaving, embroidery). Looking at patterns on different napkins. Didactic game for selecting color dyads (harmonious pairs).
Materials, tools, equipment. Decorative napkins for examining patterns, paper circles of different colors and ready-made elements cut out by the teacher from colored paper (for example: flowers and leaves, berries and leaves, flowers and buds, circles and triangles) - at least 8-12 for each child. Flannelgraph or composition options to show and explain options for placing elements.
Contents of educational activities. The teacher shows the children first an ordinary napkin without decoration, and then a beautiful napkin with a woven or embroidered design. Invites you to examine, compare and admire. He asks which napkin do you like best and why? Summarizes the answers to clarify children’s ideas about decor: “We all prefer a napkin with a pattern, because it is elegant, beautiful, unusual, when you look at it, you want to smile, and even a treat served on such a napkin seems more delicious.” Then he asks the children why such elegant napkins are needed, and clarifies that such beautiful things are needed for both benefit and beauty. So, they cover the table with napkins to place dishes on them - cups, a teapot, vases with flowers. On weekdays they often use ordinary things, and on holidays they use more beautiful and elegant ones.
Then the teacher invites the children to make beautiful and elegant napkins for dolls themselves. Reminds me that they have already made dishes for tea drinking: cups, saucers, a sugar bowl, a teapot, a milk jug, a candy dish. But the toys will soon have a holiday, so it would be nice to prepare beautiful napkins for them to serve on the holiday table.
Then the teacher explains the task: you need to take round “napkins” (cut by the teacher from colored and white paper) and decorate them with patterns. Each child chooses the color of the napkin according to their wishes. And also, at his own request, he selects elements for the pattern, cut out by the teacher in advance: flowers and leaves, butterflies and beetles, berries and leaves, circles and triangles, etc.
Shows a napkin and asks how it can be decorated. Listens to the children's answers and asks them to think about how the napkin will be used and what they will put on it. Children guess that the cups will be placed in the center of the napkin, the middle will not be visible,
409
therefore, it does not need to be decorated. Demonstrates how the napkin will be used (places the cup on the napkin), and with an outlining gesture shows that only the edge (shore) of the napkin will be visible. Repeatedly asks which part of the napkin is best to decorate so that the pattern is visible to the guests during tea drinking. Asks the children to draw a gesture around the edge (shore) of the circle.
On a flannelgraph or compositional diagram, the teacher explains how a pattern is built on a circle: the elements are placed first at the top, bottom, right, left, and then in the spaces between them. Children repeat the algorithm (top, bottom, right, left). The elements can be the same (all flowers, all circles, all leaves) or alternate: leaf-berry, leaf-berry or flower-berry, flower-berry).
Children choose the color of the circle and a set of ready-made elements as they wish. The teacher asks to attach the elements of the pattern to the background to check whether the colors combine beautifully. If necessary, children choose a different background color or a different coloring of the pattern elements.
Note.
The teacher can simplify the way of completing the task by offering the children paper circles, not colored, but white, as a background.
Children lay out the elements on the background according to the diagram (top-bottom, right, left), examine them, show them to the teacher and then carefully glue them. Once the compositional base has been created, they complement the pattern as desired, filling the gaps with identical or alternating elements in color or shape. The teacher can invite children to check the pattern by placing a cup or saucer on a napkin.
| 410 |
At the end of the lesson, the teacher invites the children to admire each other’s “napkins” and display cups and saucers made from plasticine on them in the “Tea set for games” lesson.
Follow-up work. The teacher invites the children to set the table in the dollhouse for a festive tea party.