Preview:
Abstract of GCD on plasticineography for the senior group "Rocket"
Goal: to interest children in drawing a rocket for Cosmonautics Day. Develop artistic and creative abilities, a sense of composition. Strengthen skills in working with plasticine Encourage children to supplement their work with stars, planets, comets, etc. of their choice. Encourage children to show individuality.
Preliminary work: Conversation about Cosmonautics Day, about the first person to fly into space, test pilot Yu. Gagarin.
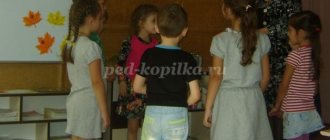
The teacher encourages the children to remember what holiday is coming soon. Then he demonstrates the presentation “The First Flight of Man into Space,” accompanied by the story: “For a long time, people have dreamed of overcoming gravity and going into outer space to visit other planets or even, perhaps, fly to the stars. And one fine spring day, April 12, 1961, the first step was taken towards realizing the long-standing dream of all mankind. On this day, the first flight of a spacecraft with a person on board took place. Our compatriot, Yuri Alekseevich Gagarin, became the first cosmonaut. And now the date April 12 is celebrated in our country as the holiday “Cosmonautics Day. The launch of a multi-stage space rocket took place at the Baikonur cosmodrome on April 12, 1961 at 9 hours 6 minutes. From that day on, the development of astronautics went quickly. Then the first woman, Valentina Tereshkova, flew into space. Already in 1965, cosmonaut Alexei Leonov made the first exit from a spacecraft into outer space. In 1968, the first manned flight to the Moon took place. American astronauts on the Apollo 8 spacecraft reached the Moon.
Many countries have space programs in our time, but our compatriot, Yuri Alekseevich Gagarin, will remain the first cosmonaut in the history of the Earth for all centuries. And as recognition of this historical fact, with
In 2011, April 12 is also celebrated throughout the world as the “International Day of Human Space Flight.”
The teacher suggests drawing a rocket using the plasticineography technique. He looks at the image of a rocket with the children and determines which parts to paint over with which plasticine. Encourages the expression of independence when finishing the work (comets, stars, planets, rocket flames, etc.). Children start drawing. The teacher ensures accuracy when smearing the plasticine, encouraging children to use the stack, aligning the edges of the parts.
At the end of the lesson, the children look at all the pictures and talk about their own: where it flies, what else has been completed.
Methods of drawing with plasticine and necessary materials
The plasticine for work needs to be selected soft and pliable enough so that it is easy for the child to change its shape, for example, wax. Any other safe modeling mass will do. There doesn't have to be a lot of colors - the important thing is that they are bright and mix well. It is advisable to have white and black in the palette so that the baby understands the principle of changing color saturation.
To get started, you will also need the following materials and tools:
- board for rolling out plasticine;
- stencils, templates or ready-made drawings on cardboard, plastic, glass;
- stacks, toothpicks, rolling pins, molds, stamps;
- decorations - beads, cereals, painted pasta, small buttons, rhinestones, sequins, shells;
- a syringe for squeezing out sausages (useful for advanced plasticine artists to create large-scale paintings);
- wide tape for gluing the surface of the drawing on cardboard before applying plasticine, to make it more convenient to correct flaws;
- baby hand wipes.
It is very convenient to use disposable plastic plates as a base. The plasticine adheres well to them, and at the same time the drawing is easy to adjust. The round shape looks neat, the work takes on a finished look.
The complexity of the technique used should increase in stages depending on the age and abilities of the child:
- For novice artists, a suitable option is to smear the sculpting mixture with your fingers within the designated contour.
- Children over 5 years old who can roll small balls or sausages from plasticine will be able to make three-dimensional drawings.
Planar modeling for the little ones
It is best to start getting acquainted with the basics of plasticineography by drawing with strokes. Invite your child to randomly smear several small multi-colored pieces of well-mashed plasticine on a dense surface (cardboard or plastic board). After this, you can begin to “color” simple drawings of large geometric shapes - the sun, a tree, a flower, animal figures. Typically, children use the index finger of their dominant hand to work, but it is useful to use the other hand, the thumbs. Such exercises develop synchronization of the work of both hemispheres of the brain.
When the child has mastered the smearing technique well, offer to apply 2-3 layers of plasticine of any color to the work surface, and then move it with pressure with your fingers or a stick. Depending on the pressure applied, different shades will begin to appear on the palette - the effect will amaze the baby’s imagination.
Mosaic made of plasticine balls
This technique is available to children in the middle or even junior group of kindergarten. As soon as the baby has learned to roll small balls of plasticine, you can invite him to fill the finished outline with multi-colored lumps, lightly pressing them onto the base. Such activities perfectly develop fine motor skills and imagination. Using this technique, you can depict anything, and any errors can be easily corrected by simply moving the ball to another place.
This property can be used. Try making a plasticine cartoon with your child based on a simple picture, moving the lumps so that it “moves.” Even a camera on a mobile phone is suitable for filming, and the baby will be delighted!
Plasticine sausages and spirals
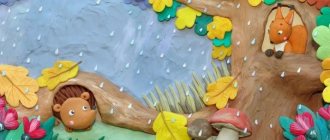
In the older group, children can already make simple compositions from plasticine rolled into a thin sausage. Here they will need even more accuracy and patience - these are the qualities that work in this technique develops. By combining stripes of different shades, children can depict space with stars and comets, and by placing a layer of plasticine snow on the green branches of fir trees - real winter. This technique successfully produces autumn trees, the underwater world, and landscapes. The complexity of the work can be increased by placing objects on top of each other, giving the picture depth.
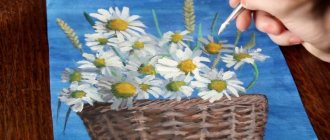
Plasticine flagella, curled into spirals, look like flowers. From such blanks you can assemble a whole bouquet, or you can make a curly birch tree or a fluffy cat. The palette of designs will become richer, and the works themselves will become more beautiful, if you roll up plasticine of similar shades without mixing them to a uniform color. To get an elegant candy, you need to carefully twist two thin flagella (preferably made with a syringe) of bright colors together, then roll the resulting strip into a flat spiral or cut into short sticks with a hook at the end.
Place 1-2 blue, green and pink stripes among the strips of white plasticine, then apply picturesque zigzags across them with a spatula stack. The colors will mix slightly and you will get the northern lights.
Drawing with scratches and dents
Even a 3-year-old child can scratch patterns on a surface covered with plasticine using a stack or any other suitable stick. The result will be a kind of grattography. Older children use similar tools to detail the drawing, giving it additional volume and realism. Small scratches will help to depict fluffy spruce branches or a luxurious fox tail; a sharp stick is convenient for drawing scales on multi-colored fish.
Kids can squeeze out ready-made figures on smeared plasticine using special molds. Older preschoolers are interested in creating ornaments using the same technique. In this case, solid silhouettes are replaced with small curly stamps, which can be decorative buttons or interestingly shaped pasta. A tool with a tip in the form of a hemisphere will help you make indentations for the eyes of animals or fairy-tale characters: with such a device, the quality of the picture will immediately improve.
Buy your child a set of various stacks. A large selection of tips - sharp, flat, round, jagged - will spur the imagination of the young artist and inspire him to search for new images.
Plasticineography is an excellent option for conducting creative activities with both children and school-aged children. Using this technique, children get original cards for mom on March 8 or dad for February 23, New Year's and competition crafts. There are a lot of different techniques and tricks in the execution of plasticine paintings, it all depends on the imagination and experience of the young artist.
Plasticineography, plasticine - Work on plasticineography with children 4–5 years old “Bullfinch on a branch”
Publication “Work on plasticineography with children 4–5 years old “Bullfinch on...”
"CREATIVITY OF CHILDREN 4-5 YEARS OLD BY MEANS OF PLASTILINOGRAPHY." Drawing with plasticine (plasticineography) is one of the most rarely used types of visual activities in practice, since it is not mandatory in the preschool education program. Plasticineography…
Summary of a lesson on sculpting “Golden Fish” using the plasticine technique in the senior group Goal: to develop the ability to perform modeling using the platinography method. Objectives: 1. Develop fine motor skills. 2. Continue to teach children non-traditional techniques for working with lastilin. 3. Reinforce previously learned modeling techniques: flattening, pinching off a whole piece of plasticine. 4….
Modeling using the plasticine technique “Herringbone” with children 5 years old
Goal: to continue to strengthen children’s ability to work in the plasticineography technique, to combine drawing needles using stacks. Winter has come and children are looking forward to the fabulous, cheerful New Year holiday. What would a New Year's holiday be without a beautiful Christmas tree? The guys are happy...
Abstract of GCD on plasticineography on the topic “Balloon” (senior group)
Goal: to develop the ability to perform modeling using the platinography method, to supplement the work with non-traditional means (lids. Objectives: To improve skills in working with plasticine To develop the ability to supplement one’s work with the proposed material (lids) to cultivate interest in the work...