Inexpensive toys and exercise equipment for sensory development of the younger group
Children in the younger group learn primary colors, identify the simplest shapes of objects and train their hearing system, expanding their experience in terms of sensations. Didactic fun should not be complex and time-consuming, and the attributes and simulators need to be bright and interesting, but simple:
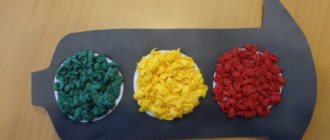
- Fun with buttons, beads, beans. Don't have a habit of hoarding buttons? You will have to buy approximately 10 pieces of different sizes of primary colors. We play with loose buttons in this way: we move them from box to box, lay out a path, a flower, other shapes, while learning colors and distinguishing between the concepts of “one - many”.
The simplest sensory mat: just sew buttons onto thick fabric. Children love to sort through these circles.
We make a simulator based on the sensory mat: we make some parts with loops and put them on the buttons on the mat. Or we go further: we create a fabric panel depicting trees, for example. There are buttons on the trees, and our fruits are sewn separately with a loop. So we hang the fruits on the trees.
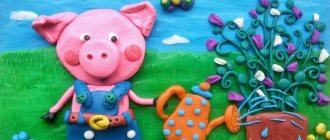
Just a charming idea for sensory development: we make a pig out of a plastic bottle, covering it with fabric or decorating it. We put “food” into the mouth-neck - buttons, beads, beans, peas, etc.
- Sensory bags: we sew small bags and sew different materials into them - cereals of different sizes, legumes, rustling fabrics. To develop the sense of smell, we fill the bags with herbs, coffee, etc. At the same time, several exhibits need to be made with the same filling so that the child can find them and distinguish them from others.
- Didactic cubes: children of this age can stack them one on top of the other in 2-3-4 formations, so the design on the cubes should form a single pattern so that the child uses thinking. Or, to teach color, make blocks of primary colors and offer different ways to play. Cubes made from different materials are good: knitted from threads, sewn from fabric, made from smooth and textured cardboard.
- Trainers - laces, fasteners, latches, snakes, clothespins, etc. How to make them can be found on the Internet.
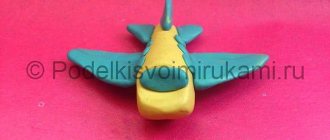
- Maracas - we make them from plastic bottles and fill them with bulk materials - we develop our hearing.
Didactic manual “Knitted sensory games”
Veronica Kovalevskaya
Didactic manual “Knitted sensory games”
Handicraft is my hobby. I really love to create and create handmade items. I widely apply my passion in my professional activities.
Today I would like to present to your attention knitted sensory games . To work, you will need woolen yarn of bright colors, knitting needles and a hook, filler, accessories, and free time, which, unfortunately, is often not enough to implement all the ideas.
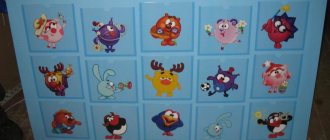
We have a clearing for mushrooms. The butterflies are dressed with flowers that match the color.
We are setting up the production of toys for the middle group
In the middle group we continue to develop sensitivity, we begin to teach counting, a wider range of colors, sounds, and different geometric shapes. You can read more about this in the manual “Sensory development of children 4-5 years old. Color. Form. Size. Didactic games and exercises for organizing joint activities of the teacher and children of middle preschool age: 16 didactic cards.”
We can do a lot with our own hands for this age:
- For counting games, it is appropriate to use clothespins. Glue a circle of paper with a number (from 1-9) onto a clothespin. Next, we prepare different types of didactic material: it is more convenient to use circles with a radius division into sectors, in which different objects are drawn, numbering from 1 to 9. You can do this in the form of a roulette, when a certain sector falls out randomly.
We counted the number of items in the sector, found a clothespin with the corresponding number and attached it to the sector.
- Caps from plastic bottles can be used with great success: if you pre-drill or pierce a hole in the center with a hot knitting needle, you will get a construction set. By stringing the caps onto string in a certain way, you can create not only beads, but also figures.
If you work hard, you will get a simulator for developing fingers: take a box, make holes in the lid the size of the neck of the cut bottles. We insert the blank into the holes on the back of the lid and close the box lid. The child will practice his fingers by screwing and unscrewing the caps. You can complicate the task by coming up with something based on color, counting, etc.
The lids can also be used as lotto chips, checkers, or filled with homemade maracas, or whatever.
- Touch board: we nail buttons with plastic heads onto a wooden board. Using rubber bands, we create different patterns, attaching them to buttons.
- A plastic sink grate makes a good frame for weaving ribbons: it is divided into square cells, making it convenient to do simple weaving.
- Just for this age, it’s time to make a simulator for tying shoelaces: we cut out something like a shoe from thick cardboard or plywood and make a hole for lacing.
Sensory education in children 2-3 years old
In order to purposefully influence the sensory skills of preschoolers, it is necessary to know the main stages of sensory development, be able to diagnose its level and correlate it with age-related characteristics. Among them are the following:
- Getting to know an object through perception through the senses. The child puts it into his mouth, tastes it, feels it, smells it, evaluates its shape and size.
- Formation of skills to correlate the spatial arrangement of objects, connect objects and their parts. The child evaluates the sizes of objects and their relationships. To do this, you need to teach children to put one object into another (games with a pyramid work well), string beads on a cord, and push small objects into various holes. The child becomes familiar with composite objects, with the concept of the whole and parts. Games with large puzzles, cut-out pictures, and construction sets of 2-4 elements will help him with this. At the first stage, the child is able to assemble a matryoshka doll from 2 elements.
- Mastering ways to practically distinguish the properties of objects. A preschooler learns to compare two similar objects through practical actions: putting one on top of the other, the relationship between shape and color. At the second stage, the child is able to assemble a matryoshka doll from 3 elements.
- Formation of manipulative actions with an object based on repeated repetition. After practical manipulations with an object, the child is able to visually correlate the size and shape of objects using only mental operations. He can group objects according to one characteristic, select 3 objects according to a given pattern, and is able to sort objects from smallest to largest. At this stage, the preschooler assembles a five-seater nesting doll.
- Complicating the conditions for performing actions that require correlation according to one of the characteristics. The child groups objects according to several characteristics, is able to correlate 6 or more colors with each other, and visually selects a pair of objects according to given characteristics.
- Using learned actions in solving practical and cognitive problems. The child is able to reproduce acquired knowledge and skills, differentiate the properties of objects, and apply subject standards in solving assigned problems. At this stage, a 3-year-old child can correctly assemble a pyramid of 8 rings in descending order of their size.
Sensory education is a targeted didactic impact on the sensory systems of preschool children, which becomes more complex with each new stage of sensory development. Creating conditions for the comprehensive development of the senses is the task of parents and teachers of preschool educational and developmental institutions.
How to cope with the development of sensitivity in 5-6 year old children?
The older group requires more complex sensory activities, but the attributes can still be made independently. By the way, I advise you to read: “Sensory development of children 5-6 years old. Color. Form. Size. Didactic games and exercises for organizing joint activities between the teacher and older children: 24 didactic cards.”
And for classes with children with vision problems, I recommend this manual: “Sensory development of preschoolers with visual impairments in special and inclusive education. Thematic individual lessons and games.”
So, let’s make the attributes for classes:
- Massage track - in principle, this thing is suitable for any age without restrictions. The work is long, but simple: we sew something like pillows connected to each other into a track. We sew different fillings into each pillow, like the sensory bags that I described above. It is very useful to lie down, crawl, and walk along such a path.
- It's time to do the math: take a photo frame, attach strings in any available way, and string the same bottle caps, beads, and curtain rings onto them. You can adapt a compact clothes dryer for abacus using abacus clothespins.
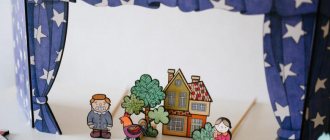
- I really liked the idea of a sensory labyrinth, it would look great in a kindergarten sensory room (if you have one). The point is this: take frames that can stand stably, about 5-6 of them, and attach various obstacles for movement to the top crossbar of each: balloons with sand, strips of rubber, fabrics, Christmas tree “rain”...
Like in a car wash. By the way, you can sign so that the child searches and climbs through the frames one by one: water, cleaning, drying, etc. This is a great active sensory play!
- To study numeracy and literacy, you can use an old computer keyboard. Cover unnecessary distracting buttons with pieces of paper. See how quickly our computer kids learn letters and numbers.
- Touch boards: cut a board out of plywood or cardboard and glue plain felt on top. We prepare various figures, numbers, letters, houses, trees, cars, and glue Velcro onto the back side. Children create pictures, solve math problems, etc. right on the board.
Preparatory group and sensory fun
Children of this age are actively preparing for school; accordingly, we focus on literacy and numeracy, but do not forget about comprehensive ontogenesis (development) through play. By the way, I can recommend the excellent manual “Game training using sensory modules. Senior and preparatory groups": a non-standard approach is used here to implement educational tasks on sensory development.
To understand what toys to make for the sensory senses of children of this age, you need to understand these tasks, and they are: continue to enrich the experience of children, expanding the boundaries of auditory, visual, and tactile perception. Introduce a wide range of colors, sounds, smells, textures. Firmly consolidate knowledge about sensory standards.
As for do-it-yourself sensory toys, at 6-7 years old it is quite possible to continue using the above-mentioned toys, but set more complex tasks for them.
By the way, bottle caps can be used as a massage pool: we fill the box with the caps, making sure that they lie with the flat part up, and let the child stomp in place, massaging the feet.
In general, sensory boxes can be made in an economical way, like with lids, and in a “rich” way: we fill the container with selected pebbles or glass balls for floristry, and we get a whole dry pool. Or we mix different cereals: rice, millet, balls for sprinkling confectionery and we get an excellent relaxation simulator.
I also really liked the idea of a glass easel: it’s something like a frame with glass on stable legs. You can draw on glass on both sides and wash off the drawings.
There are different types of winder toys, they are a toy on a string, and the thread is tied to a stick or pencil; you need to wind the thread around the stick, bringing the toy, a mouse, for example, closer to you. In this kind of fun, two participants can compete in speed. It's very easy to make them, I think you can guess how.
To develop visual memory, everything is generally simple: cut out pictures from magazines or draw them, show them to the child, hide them, and he remembers what was depicted. Or also for developing the perception of syllables - it costs nothing to write the syllables on cards and let the children make up words or select pictures depicting objects for a given syllable.
Why you need to develop fine motor skills
Many people know about the need to develop children's fine motor skills from an early age. However, not everyone understands why this is needed and what such activities are.
Fine motor skills are the ability to perform precise movements with the hands and fingers. It is coordinated by the work of the nervous, muscular, skeletal and visual systems. Its development begins in the first months of a child’s life with looking at his own fingers and hands. Then the baby gradually learns to master them by picking up toys. Motor skills have a positive effect on manual dexterity, the formation of a student’s future handwriting, and reaction speed.
It has been established that the level of development of a child’s speech directly depends on the degree of formation of finger movements. In the human brain, the centers responsible for speech and motor skills are located nearby. Thus, when one area is stimulated, the other is also activated.
Sensory fun for all ages
There are also such fun things for the preparatory period - speech serpentine, which you can also do yourself. We draw a serpentine road on paper, and removable elements such as cards and pictures are attached along the sides of each turn. The child must, following the serpentine, name syllables, letters, and images. You can move in any way you like: paving the way with buttons, pebbles, walking with your fingers, moving a car.
Also, “for a snack,” I suggest making this didactic sensory fun from matchboxes: on top of the box we paste an image of an animal, a bird that makes recognizable sounds: meow, woof, moo, coo-ka-re-ku, co-co-co, coo -ku, etc. On the inside of the box at the bottom, we write these sounds in readable letters. The child must choose the right sound for the picture. If you can’t read yet, read it yourself, and the child picks it up by ear.
I think you have enough ideas for implementation today. If you have any additions, please share them, as well as links to my articles. In addition, I invite new subscribers to our company.
Sincerely, Tatyana Sukhikh! Till tomorrow!